PTU tutorial using Coronach by Karra's Kreative Korner!
You can purchase the kit HERE!
**This tutorial was written by me and any resemblance is purely coincidental. It is written for those with a working knowledge of Photoshop.**
Supplies
Font
Mask
Scrap Kit
Tube
*You must obtain a license to use this tube.*
Elements
apple
balcony
bats
blood
butterfly
candles
cloud
dead grass
ground
hat
lantern
leaves1
leaves2
leaves3
mask1
moon
mushrooms
plant1
pumpkin
rock
skull
spider
tree
violin
Papers
16
Let's start!
Open a new canvas, size 650x650.
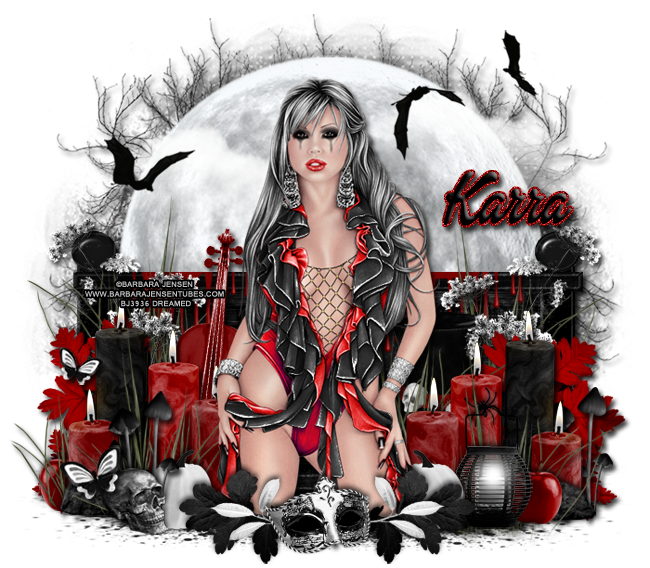
Place the tube on the canvas. Resize and add a drop shadow.
Place the balcony behind the tube. Resize and add a drop shadow.
On top of the balcony, place the blood. Resize so you see most of the drips and it stays in the middle.
Move the moon behind the balcony and make it rather large. Add a drop shadow.
Behind the moon, place the tree. Resize and add a drop shadow.
Use a couple more copies of the tree to make a background for the moon.
On top of the moon on the right, place a cloud, flip horizontally, and resize.
Duplicate the cloud and flip horizontally. Move it to the left side of the tube.
On top of the clouds and moon, place the bats. Resize and add a drop shadow. Only show two on the right side of the tube.
Add another copy of the bats and only have one on the left side of the tube. Resize and add a drop shadow.
Under the tube and balcony, place a copy of the ground on the right and flip horizontally. Resize a little and make sure it doesn't hang off the canvas.
Duplicate the ground, flip horizontally, and move to the left of the first copy of the ground. Again, make sure nothing hangs off the canvas.
To the right of the tube and in front of the balcony, place the candles. Resize and add a drop shadow.
Duplicate the candles and place them on the left.
In front of the candles on the right, place the dead grass. Resize and add a drop shadow.
Duplicate the grass and place it in front of the candles on the left too.
Place the lantern in front of the grass and candles on the right side. Resize and add a drop shadow.
Behind the lantern on the right, place an apple. Resize and add a drop shadow.
Between the apple and candles, place the rock. Resize and add a drop shadow.
Behind the candles on the right, place the mushrooms. Resize and add a drop shadow.
To the left of the lantern, place the pumpkin. Resize and add a drop shadow.
On top of one of the candles, place the spider. Resize and add a drop shadow.
Place leaves2 behind the candles. Resize and add a drop shadow.
Make it rather small and erase any parts that hang out.
Duplicate it and flip horizontally then move behind the candles on the left side.
Take the leaves2 and place a larger copy behind the candles. Resize and add a drop shadow.
Duplicate the leaves2 and flip horizontally. Move behind the candles on the left side.
Behind the leaves2, place plant1. Resize and add a drop shadow.
Duplicate the plant1 and place it behind the leaves2 on the left side. Flip it horizontally.
Between the plant and candles, place the hat and flip horizontally. Resize and add a drop shadow.
On the left side of the tube, place the skull in front of the candles and grass. Resize and add a drop shadow.
Between the grass and skull, place a copy of the mushrooms. Resize and add a drop shadow.
Place the rock behind and to the left of the skull. Resize and add a drop shadow.
On top of the rock and skull, place the butterfly. Resize and add a drop shadow.
To the right and behind the tube, place the pumpkin and flip horizontally. Resize and add a drop shadow.
On top of the leaves2 on the left, place another copy of the butterfly. Resize and add a drop shadow.
Behind the tube and candles, place the violin. Resize and add a drop shadow.
On top of the balcony, place another copy of the dead grass on the left. Resize and add a drop shadow.
Duplicate the grass and place it on the right side too.
In front of the tube's legs, place leaves one on the right leg. Resize and add a drop shadow.
Duplicate leaves 1 and flip horizontally. Move it over the left leg.
Erase parts of the both leaves layers that lay over the tube's clothing, but leave the legs covered.
On top of leaves1 on the right, place leaves3. Make it lay the same way as the black leaves. Resize and add a drop shadow.
Duplicate leaves3 and place it over the left side.
In the middles of the black and silver leaves, place mask1. Resize and add a drop shadow.
Add a layer behind the mask and fill it with black. Erase the layer so it only shows behind the mask.


Place the tube on the canvas. Resize and add a drop shadow.
Place the balcony behind the tube. Resize and add a drop shadow.
On top of the balcony, place the blood. Resize so you see most of the drips and it stays in the middle.
Move the moon behind the balcony and make it rather large. Add a drop shadow.
Behind the moon, place the tree. Resize and add a drop shadow.
Use a couple more copies of the tree to make a background for the moon.
On top of the moon on the right, place a cloud, flip horizontally, and resize.
Duplicate the cloud and flip horizontally. Move it to the left side of the tube.
On top of the clouds and moon, place the bats. Resize and add a drop shadow. Only show two on the right side of the tube.
Add another copy of the bats and only have one on the left side of the tube. Resize and add a drop shadow.
Under the tube and balcony, place a copy of the ground on the right and flip horizontally. Resize a little and make sure it doesn't hang off the canvas.
Duplicate the ground, flip horizontally, and move to the left of the first copy of the ground. Again, make sure nothing hangs off the canvas.
To the right of the tube and in front of the balcony, place the candles. Resize and add a drop shadow.
Duplicate the candles and place them on the left.
In front of the candles on the right, place the dead grass. Resize and add a drop shadow.
Duplicate the grass and place it in front of the candles on the left too.
Place the lantern in front of the grass and candles on the right side. Resize and add a drop shadow.
Behind the lantern on the right, place an apple. Resize and add a drop shadow.
Between the apple and candles, place the rock. Resize and add a drop shadow.
Behind the candles on the right, place the mushrooms. Resize and add a drop shadow.
To the left of the lantern, place the pumpkin. Resize and add a drop shadow.
On top of one of the candles, place the spider. Resize and add a drop shadow.
Place leaves2 behind the candles. Resize and add a drop shadow.
Make it rather small and erase any parts that hang out.
Duplicate it and flip horizontally then move behind the candles on the left side.
Take the leaves2 and place a larger copy behind the candles. Resize and add a drop shadow.
Duplicate the leaves2 and flip horizontally. Move behind the candles on the left side.
Behind the leaves2, place plant1. Resize and add a drop shadow.
Duplicate the plant1 and place it behind the leaves2 on the left side. Flip it horizontally.
Between the plant and candles, place the hat and flip horizontally. Resize and add a drop shadow.
On the left side of the tube, place the skull in front of the candles and grass. Resize and add a drop shadow.
Between the grass and skull, place a copy of the mushrooms. Resize and add a drop shadow.
Place the rock behind and to the left of the skull. Resize and add a drop shadow.
On top of the rock and skull, place the butterfly. Resize and add a drop shadow.
To the right and behind the tube, place the pumpkin and flip horizontally. Resize and add a drop shadow.
On top of the leaves2 on the left, place another copy of the butterfly. Resize and add a drop shadow.
Behind the tube and candles, place the violin. Resize and add a drop shadow.
On top of the balcony, place another copy of the dead grass on the left. Resize and add a drop shadow.
Duplicate the grass and place it on the right side too.
In front of the tube's legs, place leaves one on the right leg. Resize and add a drop shadow.
Duplicate leaves 1 and flip horizontally. Move it over the left leg.
Erase parts of the both leaves layers that lay over the tube's clothing, but leave the legs covered.
On top of leaves1 on the right, place leaves3. Make it lay the same way as the black leaves. Resize and add a drop shadow.
Duplicate leaves3 and place it over the left side.
In the middles of the black and silver leaves, place mask1. Resize and add a drop shadow.
Add a layer behind the mask and fill it with black. Erase the layer so it only shows behind the mask.
Name
Main color is black.
Select the pixels of the name and expand by 2.
Add a layer below the name and fill with #9e0000.
Add a drop shadow and noise to the red layer.
Mask
Open a new canvas, size 600x600.
Open paper 16 and resize to 600x600. Place on top of the canvas.
Open the mask and move on top of the paper.
Remove the white background and place the mask behind the tag.
Make it evenly stretched on all sides.
Add your tagger mark and copyright information.
Crop off any extra canvas.
Save as a .psd & .png.
Here are free snags!

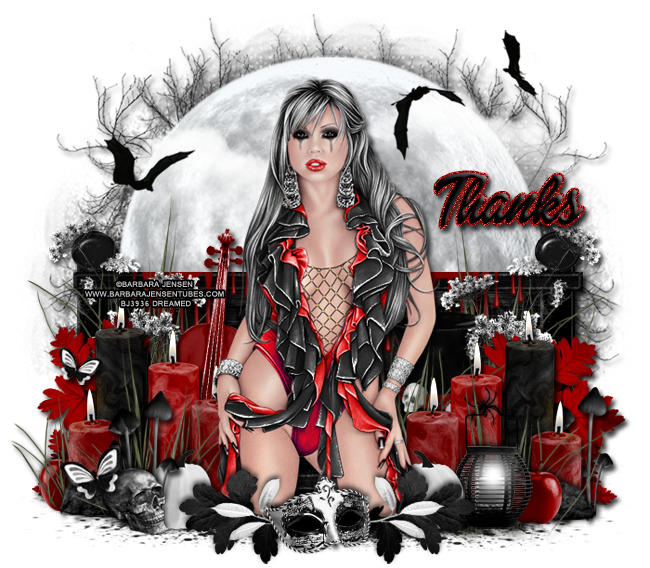
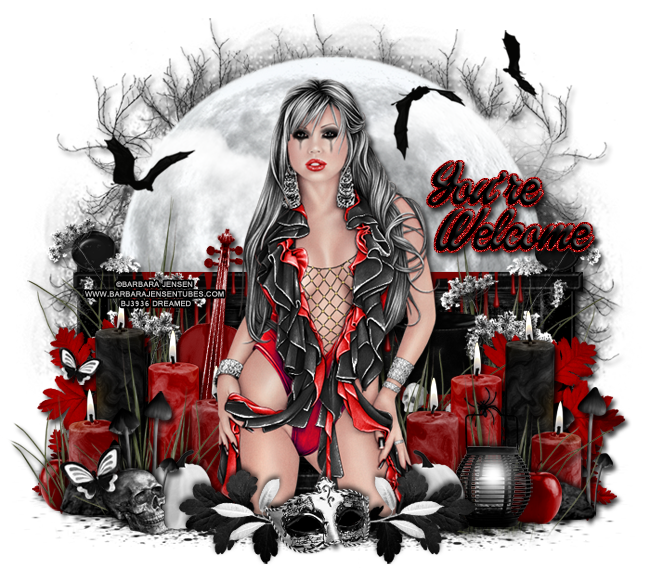
Thank you for coming by!