Showing posts with label Scrap Candy. Show all posts

Sunday, August 11, 2013

CT Tags using a collab inspired by 2013 I Love Nerds!

Rissa's Designs and Kizzed by Kelz created a collab to match the beautiful, yet nerdy tube 2013 I Love Nerds by Ismael Rac :)

The first tag was made using Rissa's Designs kit:
This tag was made using Kizzed by Kelz's kit:
You can purchase the collab from the Scrap Candy store!

Here are free snags for you!


Thank you for coming by!

Sunday, August 4, 2013

PTU Tutorial - Harlot

PTU tutorial using Harlot by Gemini Creationz!
You can purchase the kit HERE!
**This tutorial was written by me and any resemblance is purely coincidental. It is written for those with a working knowledge of Photoshop.**

Supplies
Font

Mask

Scrap Kit
Harlot by Gemini Creationz

Template

Tube
*You must obtain a license to use this tube.*

Elements
4
5
10
14
26
34
48
49
50
52
57
58

Papers
3
6

Let's start!
Open a new canvas, size 650x650.
Open the template and remove the word art, ornaments, Rectangle 3, and pixel words. 
It's not time for Christmas, yet :)

Ok, move p6 on Rectangle 1 and create a clipping mask. Add a drop shadow to Rectangle 1 back.
For the the rest of the layers, I made a gradient paper. The two colors are #7a5287 & #4a5489 and the angle is 56.
Move the new gradient paper over Rectangle 3 red. Using to copies of the paper will be necessary. Don't worry about a visible seam. Have the purple show on the left and blue on the right. Create a clipping mask for both.
On top of the paper on Rectangle 3 red, place e4 and create a clipping mask. Resize a little.
Add a drop shadow to the back of Rectangle 3.
Take another copy of the gradient paper and move it over Circle 1 and create a clipping mask. Do the same for the other circle.
Add a drop shadow to the back of the circles.
Add p3 to Rectangle 2 and create a clipping mask.
Add a drop shadow to the Rectangle 2 back.

Take e14 and place it on top of the black paper on Rectangle 2. Move around so you just have the short ends showing.
Let's place the tube. Move her on top of the black Rectangle 2, but behind the Rectangle 3 backing. Resize and add a drop shadow.
Now take the tube close up and move it over Circle 1 and create a clipping mask. Flip the tube horizontally. Repeat this step for Circle 2, but flip the tube the opposite way. Change both tubes to luminosity.

Take e5 and place it behind the Circle 1 backing. Resize a little. Move it so just the black lace is showing. Duplicate and cover the other half of the circle. Add a drop shadow to both layers.
Copy the same steps for Circle 2.

Move e10 behind the circles. Resize and add a drop shadow.
Behind Rectangle 2 and on top of the circles, place e5. Resize and add a drop shadow.
On the right side behind the circle, place e58. Resize and add a drop shadow. Rotate it a little to the right.

Place e26 behind Rectangle 3 red on the left. Hide half of it behind it. Resize and add a drop shadow.
Behind the flower, place e34 and rotate to the left a little. Resize and add a drop shadow.
On top of the flower, but behind the rectangle place e48. Resize and add a drop shadow.
On top of the rectangle and flower, place e49. Resize and add a drop shadow.

Duplicate the flower and move it to the opposite end. 
Place e50 on top of the flower and rectangle. Resize and add a drop shadow.
On top of the bottle, place e52. Flip horizontally. Resize and add a drop shadow.

 Name
Main color is black.
Add a stroke, size 3, #c52e56.
Add a drop shadow.
For the bevel: Change style to Stroke Emboss
Change Shadow to white.

Mask
Open a new canvas, size 600x600.
Move the gradient paper on to the blank canvas. 
Open the mask and move on top of the paper.
Remove the white background and place the mask behind the tag. Make it evenly stretched on all sides.

Add your tagger mark and copyright information.
Crop off any extra canvas.
Save as a .psd & .png.
We're done :)

Here are free Harlot snags for you!

Thank you for coming by!

Friday, July 19, 2013

FTU Tutorial with Tomboy Princess!

FTU tutorial using Tomboy Princess by Irish Princess Designs!
Visit Scrap Candy to find out where to download it :)
*Irish Princess Designs is the featured designer at Scrap Candy for the month of July so check out her kits while they are 50% off!*

**This tutorial was written by me and any resemblance is purely coincidental. It is written for those with a working knowledge of Photoshop.**

Supplies

Font

Mask

Scrap Kit
Tomboy Princess
by Irish Princess Designs
You can download it at Scrap Candy!

Template
Sassy, Classy, Smart Assy template 

Tube
*You must obtain a license to use this tube.*

Elements
Bottle
Drink
GlitterTrail
Helmet
Jersey
Ribbon
Rose
Sparkles
Swirls
Tiara
WordArt

Papers
1
2
3
4
6
9

Let's begin!

Open a new canvas, size 650x650.
Link the template together, leaving out the word art, and move on to the canvas. Resize so there's plenty of white space around the template.

On layer 11, select the pixels of the big circle and fill with #a00836.
On layer 13, the frame of the big circle, add noise at 12%. Add a drop shadow.

Drop the opacity of layer 12 down to 55%.

Move the close up of the tube over the large circle and create a clipping mask.
Change it to luminosity and opacity to 90%.

Take the full size tube and move her in front of the template. Resize and add a drop shadow. Enhance her brightness a little.

Move Paper2 over layer 1 and create a clipping mask. Resize the paper a little and add a drop shadow to layer 1.
Duplicate the paper and move it over layer 2 and create a clipping mask. Add a drop shadow to layer 2.

Place Paper6 over layer 3 and create a clipping mask. Resize the paper and move it around until you see the design on the paper.
Duplicate the paper and move it over layer 4. Move the paper around so you see different parts of the design. Add a drop shadow to both layers 3 & 4.

For the Dotted layers 1 - 4, change the color overlay to #f5b5c5.

Move Paper3 over layer 5 and create a clipping mask. Resize a little then add a drop shadow to layer 5.
Duplicate the paper and move it over layer 6 and create a clipping mask. Add a drop shadow to layer 6.

With layers 7 & 8, move paper 1 over each layer and create a clipping mask. Add a drop shadow to both layers.

Behind the large circle and frame, place the GlitterTrail on top of layers 7 & 8. Move one copy to the left of the circle and then duplicate it and move it to the other side. 

Move Paper4 over layer 9 and create a clipping mask. Add a drop shadow to the layer.
Duplicate the paper and move it over layer 10 and create a clipping mask. Add a drop shadow to the layer.

Now place the Sparkles around the large circle. I took about four copies of the Sparkles and moved each one around the template. Flip each layer in different ways to get different coverage. Erase any parts that hang off the template too much.

Behind the Sparkles, place the Swirls. Rotate so the bottom of the Swirls is hiding behind the WordArt and the top curves along the circles in the top right. Add a drop shadow.

Place the WordArt in front of the tube. Add a drop shadow and a bevel. Change the Gloss-Contour to Cone-Inverted and the shadow to white.
Take another copy of the GlitterTrail and place it over the word 'Tomboy'. Create a clipping mask and erase any parts that hang over to 'Princess'. You only want the glitter trail in 'Tomboy'.

Behind the full size tube, place the Ribbon. Resize & add a drop shadow.

Directly behind the word art, place the Helmet on the right side of it. Resize & add a drop shadow.
Behind the Helmet, move the Jersey. Resize & add a drop shadow.

On top of the Helmet, place the Tiara. Resize & add a drop shadow. Erase parts so it looks like it is resting on the Helmet.

On the left side of the tube and word art, place the Bottle. Resize & add a drop shadow.
In front of the bottle, place the Drink. Resize & add a drop shadow.

Move the Rose behind the word art on the left end. Erase the petals below the rose. Resize & add a drop shadow.
Duplicate the rose and flip horizontally. Move to the other end of the word art. 

Name
Font is Carlotta.
Main color is white.
Add a stroke, size 2, in color #de507c.
Add a drop shadow.
Mask
Open a new canvas, size 600x600.
Open Paper9 and resize to 600x600. Place on top of the canvas.
Open WSL_Mask84 and move on top of the paper.
Remove the white background and place the mask behind the tag. Make it evenly stretched on all sides.

Add your tagger mark and copyright information.
Crop off any extra canvas.
Save as a .psd & .png.


Thank you for coming by!

Saturday, July 13, 2013

CT Tags with Night At The Club & Free Snags!

I have two tags made with Night At The Club by Rissa's Designs!
You can purchase it at Scrap Candy :)


And here are free snags for you! 

Thanks for coming by!

Thursday, June 27, 2013

PTU Tutorial Gothic Beauty

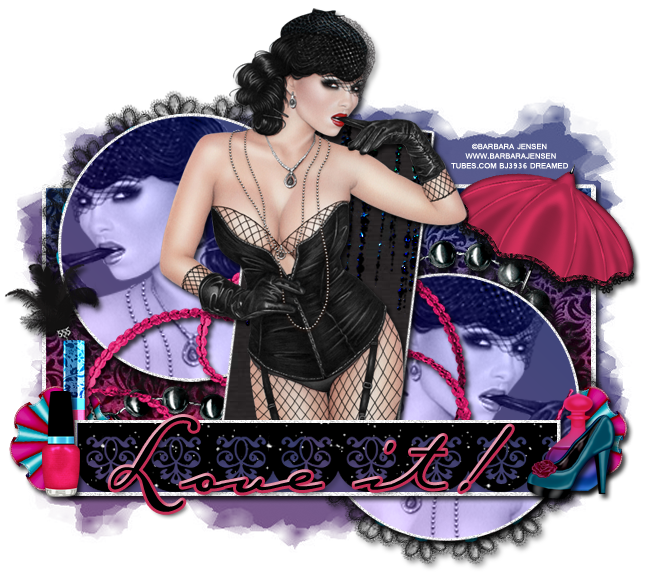
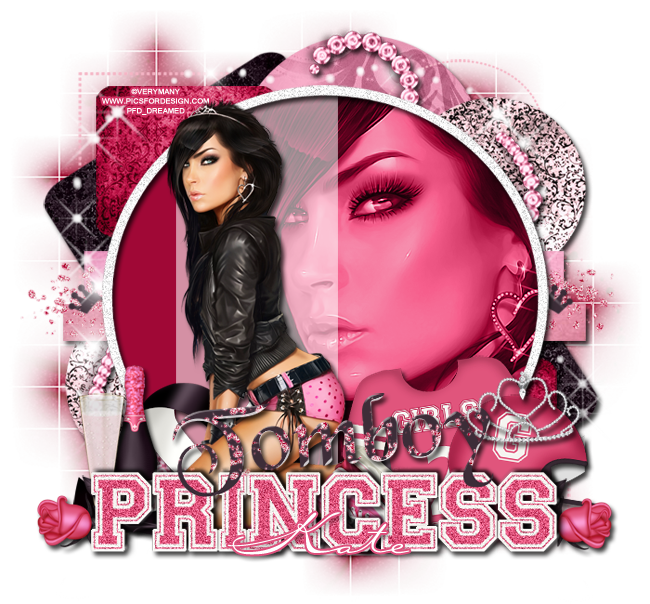
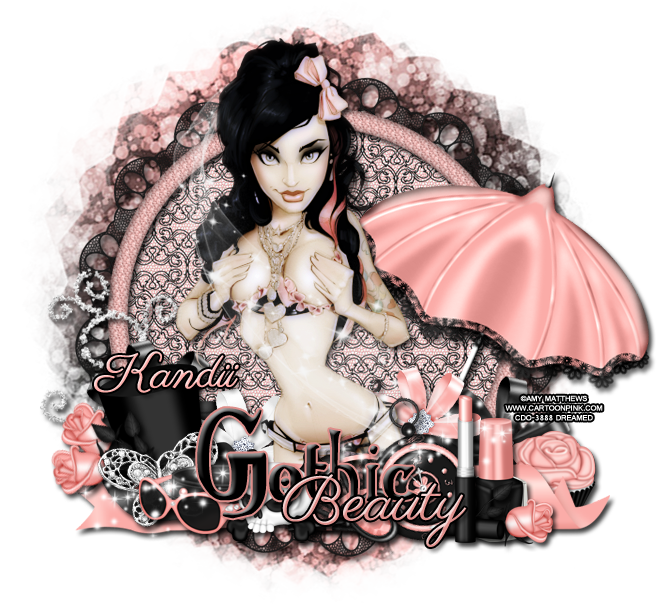
I have a new PTU Tutorial with the gorgeous kit by Kandii Popz called Gothic Beauty. It matched perfectly with a tube by Amy Matthews. 


**This tutorial was written by me and any resemblance is purely coincidental. It is written for those with a working knowledge of Photoshop.**

What you will need:

Fonts

Mask
I used a circle mask. You can find a similar one here.

Scrap Kit
Gothic Beauty by Kandii Popz.
You can purchase it here!

Tube
17-1 by Amy Matthews
You can purchase it here.
*You must obtain a license to use this tube.*

Elements
Charm
Choker
Cuppy
Fan
Frame1
GlitterDoodle
Key
Lipstick
NailPolish
Parasol
PocketWatch
Ribbon1
RibbonFlower1
RibbonFlower2
RibbonFlower3
Rose
Skull2
Sparkles2
StreakofLight
Sunnies
TopHat

Papers
P1
P9

Have everything ready? Let's go!

Open a new canvas, size 650x650.

Move Frame1 on to the canvas and resize. Rotate if you like and add a drop shadow.
Place P1 behind the frame, resize, and erase extras.

Move the full sized tube in front of the frame. Resize so the hair sticks over the top of the frame a little and the bottom of her meets in the middle of the bottom of the frame. Add a drop shadow.

Place the Parasol on the right side of the tube and behind her. Resize and rotate it toward the right a little. Make sure nothing hangs off the edge of the canvas. Add a drop shadow.

Move the Tophat to the left of the tube. Resize and add a drop shadow.

Take Ribbon1 and place it in front of the tube on the bottom. Place it behind the top hat and in front of the parasol. Resize and add a drop shadow.

Move Ribbonflower1 behind the tophat. Resize and add a drop shadow.
Move Ribbonflower3 behind the tube and the tophat. Move it slightly lower than the black flower. Resize and add a drop shadow.
On the right side of the tube, move Ribbonflower2  behind the tube. Resize and add a drop shadow.
Duplicate the layer of Ribbonflower1 and move it behind the pink flower and in front of the parasol. Resize and add a drop shadow.

In front of the black flower on the right side and behind the pink ribbon, place the Cuppy. Resize and add a drop shadow.

Place the choker in front of the tophat. Resize and add a drop shadow.
In front of the tophat and choker, place the sunglasses. Resize and add a drop shadow. Erase parts of the sunglasses that appear over the choker on the left so it appears the sunglasses are in front and behind the choker.

Directly to the right of the tube place the pocket watch above everything. Resize and add a drop shadow.
Move the nail polish right next to the pocketwatch. Resize and add a drop shadow.
Place the lipstick in front of the pocketwatch and nail polish. Resize and add a drop shadow.

Now lay the key in front of the pocketwatch. Resize and rotate so the teeth of the key are laying flat pointing up. Add a drop shadow.

Behind the pocketwatch, place the fan. Resize and add a drop shadow. Have some of the fan hidden behind the pocketwatch.

Move Skull2 in front of the fan and the choker/sunglasses. Resize and add a drop shadow.

Between the tophat and the choker/sunglasses, place the Charm. Resize and add a drop shadow.

Between the lipstick and the nail polish, take a rose and rotate it so it lays horizontally facing away from the tube. Resize and add a drop shadow.
Duplicate the rose layer and add two pointing away from the tube on the left side behind the top hat.

Move Sparkles2 on to the elements in the front. You can move it around until it's covering what you want. Resize and erase any extras hanging off the elements.

Move Streakoflight on to the tube. Rotate so it goes along the height of the tube. Resize and erase any parts hanging off the tube and outside the tag.

Behind the tophat, move the Glitterdoodle. Resize and rotate so it's going along the curve of the frame toward the top. Add a drop shadow.
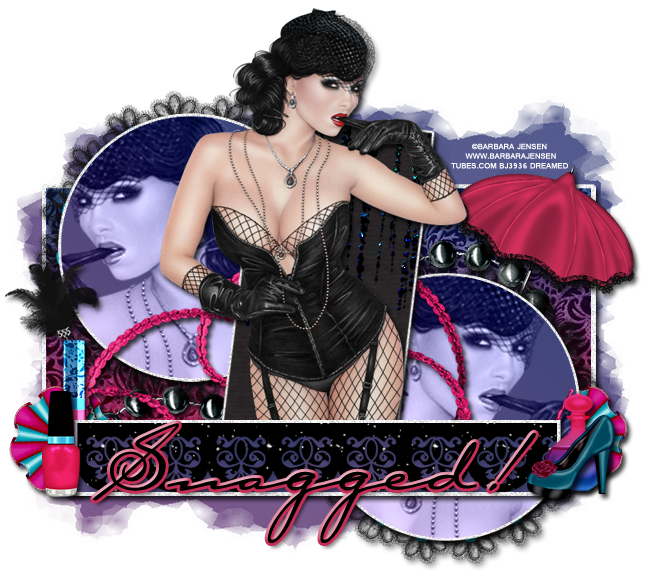
For the word art:
"Gothic Beauty"
Gothic is in the font Gothic Birthday.
Main color is black.
Stroke is size, 2, in color #dd8e8a.
Bevel is the default.

Beauty is in the font Parisienne.
Main color is #e0918d.
Stroke is size2, black.
Bevel is in Gaussian with a white shadow.

Add a drop shadow to both. Place Gothic on top of the elements and a little higher than the sunglasses.
Move Beauty on top of Gothic and a little toward the right. Have the B meet the "o" in gothic. Make sure the sizes are somewhat equal. 

For the name:
Use the same font as Beauty in the word art.
Copy the main color and the layer styles from Beauty too.

Let's make the mask:
Open a blank canvas, size 600x600.
Open P9 and resize to 600x600.
Open your choice of mask and make sure the size is 600x600.
Move the paper on to the blank canvas and then the mask on top.
Remove the white background and place behind the tag.
Resize so it is visible around the frame. Make sure no parts of the mask hang off the canvas.

Now add your copyright information and tagger mark.
Crop off any extras.
Save as .psd & .png.

We're done! Isn't it beautiful?
Thanks for stopping by:)

Sunday, January 13, 2013

Anti-Valentine's Day Snags!

Valentine's Day is a month away and I know it's not everyone's favorite day of the year so here's an anti-Valentine's day tag & free snags!

I used Heart Collector by Irish Princess Designs.
You can purchase the kit at Scrap Candy!

Here are a few snags for you! 
Thanks for coming by!

New Name, New Blog!

Hello friends! I have decided to change my designer name to reflect that I make kits more than I do CT work. I made a new blog so the old links for this blog will remain active for future visits. Please visit me at Drea's Designs ! I'll see you there!
Related Posts Plugin for WordPress, Blogger...