Wednesday, February 27, 2013

PTU Goddess2 Tutorial

PTU Tutorial with Goddess2 from Scrappin Krazy Designs.


You can find this beautiful kit here!

*This tutorial was written for those with a working knowledge of Photoshop*

Tools
Font used:
Sail
Grab it here.

Mask used:
Mask 20 from Moonbeams and Spiderwebs.
Grab it here.

Tube used:
Anita by Alex Prihodko from PicsforDesign
Grab it here.
*You must purchase this tube and obtain a license from PicsforDesign to use it.*

Elements used:
Bow1
Frame2
Glitter2
Heartstring
Ribbon1
Sparkle2
Sparkle3
Scrunchedribbon
Spiralgem
String2
Twistedclip
Wire1

Papers used:
P11
P15

Filters used:
Xero Porcelain
Xero Radiance

Ready? Let's Go!
Open a new canvas size 650x650

Move frame2 over to the canvas

Resize the frame & add a drop shadow

Move Paper15 behind the frame

Resize and erase any extras sticking outside of the frame

Move Sparkle3 between the frame and paper15

I duplicated Sparkle3 a few times and rotated the new ones to fill in the background behind the tube

Merge the Sparkle3 layers and erase any extras that stick outside the frame (Adding a 50% gray layer will make the extra Sparkle3 show up so it can easily be erased)

Drag tube between the frame and the Sparkle3 layers

Add a drop shadow and erase any parts of the tube that stick outside the frame

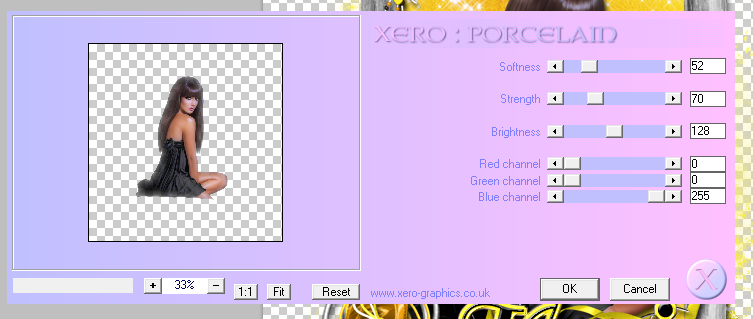
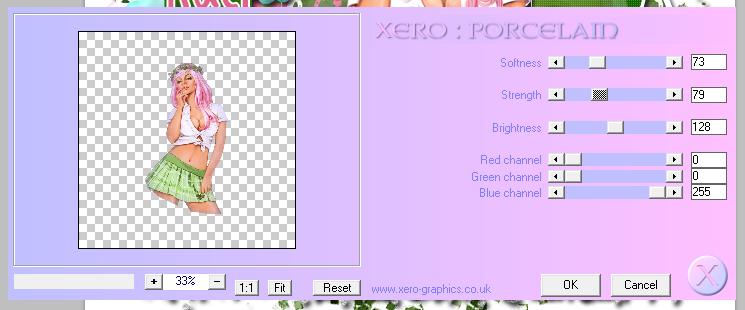
Here are the numbers I used for the filters

Porcelain


Radiance


Move Spiralgem to the bottom right hand corner of the frame

Rotate and add a drop shadow

Move Ribbon1 and place it along the bottom of the frame

Resize and add a drop shadow

Move Wire1 and place it behind the Spiralgem and Ribbon1

Resize and add a drop shadow

Move Twistedclip and put it over the bottom left hand corner of the frame

Move it below Wire1, resize, and add a drop shadow

Move String2 and place it on top of the Twistedclip

Resize and add a drop shadow

Move Scrunchedribbon and place it on top of String2

Resize and add a drop shadow

Move Bow1 and place it on top of Scrunchedribbon

Resize and add a drop shadow

Open Heartstring and place it in the top left hand corner of the frame

Resize and add a drop shadow

Move Sparkle2 over Spiralgem

Resize it so it gives that certain gem sparkle

Move Glitter2 and place it below the frame on both bottom corners and resize

Open a new canvas, size 600x600

Open Mask 20 and resize to 600x600, if necessary

Open Paper11 and resize to 600x600

Move Paper11 onto new canvas and then move Mask 20 on top of Paper11 on the new canvas

Remove the background so you are just left with the mask

*If you do not know how to remove the background then please check out this easy to follow video here*

Now move the mask behind paper15 and resize to fit

Make sure no parts of the mask hang off the canvas

For the font:
I used Sail in a black style with a gold outline, expanded to size 4

Add a drop shadow to the gold layer

Add your copyright information and tagger mark

Crop to remove any extra canvas and save your template as .psd and your new tag in .png

I hope you enjoyed my Goddess2 PTU Tutorial!


Thursday, February 21, 2013

2nd PTU Tutorial - Glitter!

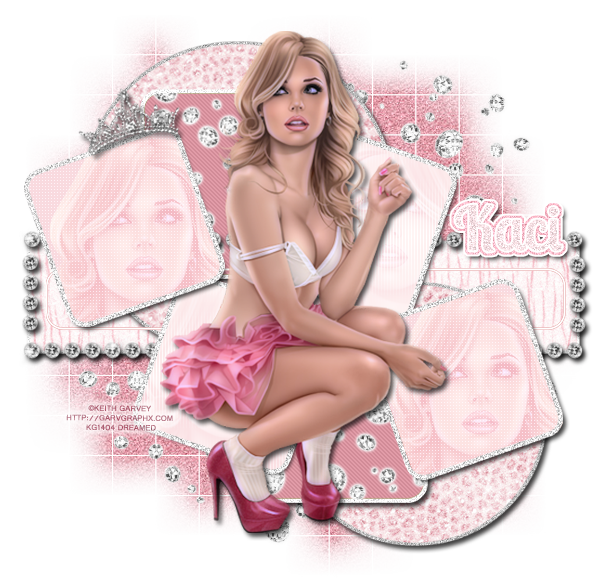
Tutorial using Scrappin Krazy Designs Kit Glitter! Glitter is a gorgeous kit and I had fun with it :)

You can find it here:

Tutorial using Scrappin Krazy Designs PTU Kit Glitter!


Tools

Template used:

I used template #141 from Millie’s PSP Madness.

You can download here:


Tube used:

I used one of my favorite tubes from Keith Garvey.

*You must purchase the tube to obtain a license number*

You can find her here:


(I just noticed I used both Christmas template & tube, lol!)

Mask used:
WSL_Mask84 from Weescotslass Creations

You can download here:


Elements used:
Blingstrail
Diamonds
Tiara

Papers used:
P04
P05
P15

Filters used:
Xero: Porcelain
Xero: Soft Vignette
Penta: Jeans
Penta: Color Dot


Now that we are all set up, let’s get started!

Open a new canvas. I used 650x650.

Open up the template and delete the layers you do not want. (I removed 6, 15, 16, 17, and Raster)

Link together the layers you kept and move them to the new canvas.

Open up papers 04 and 05.

Move paper04 to layers 2 and 3, the black circles.

I added glitter borders to both black circles.

Select layer 1, the green rectangle.

Move paper05 and resize to fit. I shrunk the paper down to get more of the pattern so duplicate the paper after you get it the size you want.

Again, I added a glitter border to this layer.

For layer 7 you can select pixels and fill with white.

Next, we move to the two vertical boxes, they are layer 4 and 5.

Select the pixels of layer 4 and fill with color. 

I used color #d18b97. Repeat this step for layer 5.

I used filter Penta: Jeans on layers 4 and 5.

Amount – 17
Border Width – 4

Add the diamonds element and put it in both layers 4 and 5. Size the diamonds as you wish and then create clipping mask for both boxes.

I added a light glow to the diamonds. Just change the glow to white and change the spread to zero and size to 3.

Now we will work with layers 8 – 15. The even numbers are the box and the odd numbers are the borders. We will only work with the even numbers.

Select each box on layers 8, 10, 12, and 14 and fill in with #f9dadf.

Now add the close up of the tube and move it into the box. With the tube layer selected on boxes 8 and 10 make it Screen. Boxes 12 and 14 will be Overlay.

I used Penta: Color Dot in white and Xero: Soft Vignette.

Follow this for Soft Vignette in boxes 8 and 10:

Gradient Shape: Vertical

Effect type: Background Colour

Pattern type: Vertical Lines

Repeats: 10

Width: 0

Height: 0

Strength: 255

Open the tiara element and resize it smaller and put it over the top of the box on layer 12.

Add a drop shadow.

Open the blingstrail element resize it to make a box around layer 1. 

Add a drop shadow.

Open the mask, WSL_Mask84.

Open P15 and resize to 600x600

Open a new canvas size 600x600

Move the paper onto the canvas and then move the mask on top of the paper.

Remove the background of the mask.

Move the mask behind the template and resize to fit.

Add noise to the mask. I used 8.

Make sure that the edges are not cut off.

Now take the diamonds element and put it above the mask layer.

Move and resize so that you can see the diamonds behind the template.

I moved the diamonds around and then duplicated it and flipped it for the opposite size.

Open your tube of choice.

Move it on top of the template and all elements.

Resize to fit and add a drop shadow.

Now we add the filter, Xero: Porcelain. This can go for all the tube layers.

Softness: 50

Strength: 128

Brightness: 128

Red Channel: 0

Green Channel: 0

Blue Channel: 255
  
For the name, I used Lobster Two font.

Make the name a light pink color and add noise.

Add a white stroke, size 2.

Select the pixels of the name and expand by 3 or 4, whichever you like better.

Add a darker pink color and add noise again.

Add a white stroke, size 2 and add a drop shadow to the darker pink layer.

Add copyright information and tagger mark.

We’re done! Now you can unclick the white background and save as a .psd and .png.


Thanks for taking a look; I hope you enjoyed it as much as I did!


Wednesday, February 20, 2013

PTU Tutorial - Glitter!

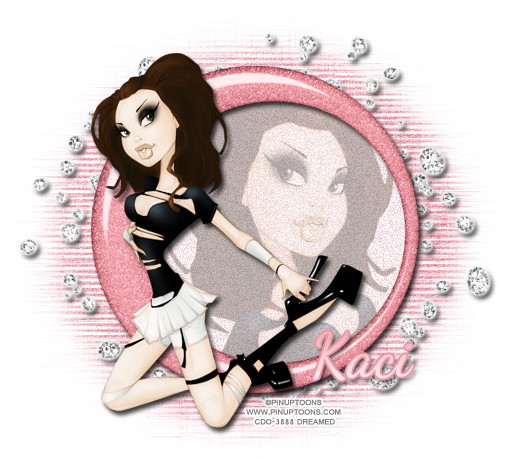
Simple Tut Using Scrappin Krazy Designs' awesome kit Glitter!


You can find the kit here:

http://scrappinkrazydesigns.blogspot.com/2012/01/new-ptu-kit-glitter.html


*This tutorial was written for those with a working knowledge of Photoshop*

Elements used:
Diamonds
Frame4

Paper used:
Paper15

Tube used:
Pinup Toon 143-2

*You must purchase this tube and obtain a license from www.cdoestore.com to use this tube*

Mask used:
WSL_Mask216

*You can download it here http://weescotslasscreations.blogspot.com/.

Here we go! :)

Open your blank canvas. I used 550x550 for this one. You can make it bigger if you like.

Drag Frame4 over to the blank canvas and size it.

Add a drop shadow to the frame.

You can now add a paper of choice behind the frame. I picked a color that matched.

Color code for background is #fcebed.

I then added noise to the background. Filter > Noise > Add Noise and put it at 9. You can move the number up and down to suit your needs.

Drag your tube in front of the frame. Place and size it. Add a drop shadow.

Take a close up of the tube and put it behind the frame but in front of the paper or background and then flip it.


I rotated the Pinup Toon up a little and made her a little smaller than the original size of the close up.

I then added the Xero filter Radiance to both layers of the Pinup Toon.

Drag the diamonds element and place it behind the background of the frame (make it the lowest layer above the background).

Add drop shadow. I also added a small outer glow in white.

Now create your mask using WSL_Mask216 and Paper15. I added noise to the filter.

Resize the mask behind the diamond layer (making this the lowest layer above the background).

Add copyright and tagger mark.

For the name I used the font Dancing Script.

Crop out the extra background.

Save the .psd template and then save your.png and your done!

Hope you enjoyed this tut! Thanks for taking a look :)


New Name, New Blog!

Hello friends! I have decided to change my designer name to reflect that I make kits more than I do CT work. I made a new blog so the old links for this blog will remain active for future visits. Please visit me at Drea's Designs ! I'll see you there!
Related Posts Plugin for WordPress, Blogger...