Monday, April 29, 2013

PTU Tutorial "Vintage Romance"

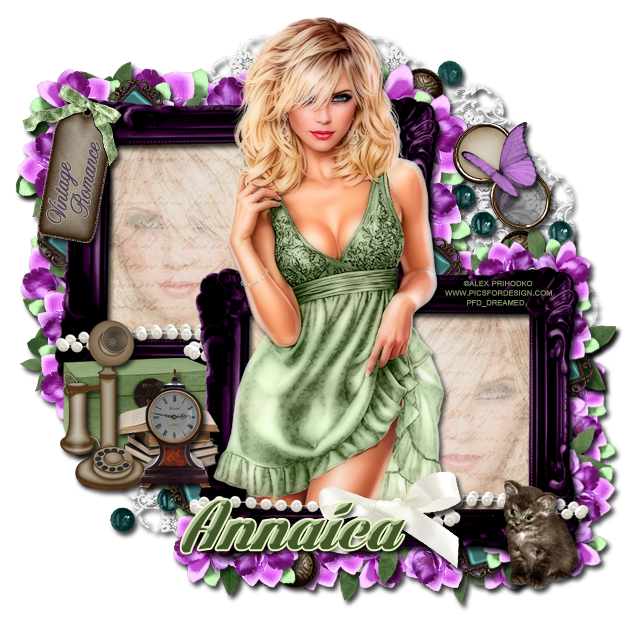
PTU Tutorial using Annaica's Place kit Vintage Romance. (It's gorgeous!) I used the perfect match artwork by Alex Prihodko, which you can find at PicsForDesign.

**This tutorial was written by me and any resemblance is purely coincidental  It is written for those with a working knowledge of Photoshop.**

Tools

Tube
Springtime by Alex Prihodko
You can find it here.
*You must obtain a license to use it.*

Font
Lighthouse
You can find it on dafont.
AltastGreeting
You can find it on Fonts101.

Elements
1
2
5
7
14
15
16
19
20
21
22
24
26
31
32
35
39

Papers
Paper4

Ready? Let's go!

Open a new canvas, size 650x650.
Move element 39, the purple frame on to the canvas. Resize so there is enough room for two frames. Add a drop shadow and duplicate the frame. Move the duplicate on top of the other frame so they overlap. Erase the lower right hand corner of the frame in the back that sticks through the frame in the front.

Move Paper4 behind the first frame. Resize so it only covers the back of one frame. Erase any extras, if there are any. Duplicate Paper4 and move it behind the other frame.

Move Element16 behind the frames. This will work as your mask. Have it fill the empty space in the corners where the frames connect. Add a drop shadow.

Now move Element24 on top of Element16. Resize so a little sticks on the open space to the right and left of the frames where Element 16 sticks out. It's ok to have a little stick outside Element16. Add a drop shadow.

Now the next part you can do it my way or add your own twist. Open Element 26 and resize. I started with the frame in the forefront and rotated the flowers so it fit the corner of the frame. Make sure you move it behind the paper and the frame so it doesn't stick through the front or you can just erase extras as you go. Now repeat this step around both frames. Rotate the flowers are you go so it has a free flow effect. 

After you have outlined the frames with flowers, you can use Element31 to accentuate the flowers. Make the leaves smaller and have some of it stick out and some can be hidden. Add a drop shadow to each layer. You can add as much or as little as you like. 

When you are done with the leaves, open Elements 19 & 32. Make them smaller and then stick them in the flowers randomly. Add a drop shadow to each addition.

Move Element20 to the top left hand corner of the frame in the back. Resize so it only covers half of the frame on the left. You can rotate it to the left a little too. I added "Vintage Romance" in the font, AltastGreeting, to the tag, but you can add what you like. I made the font purple, #5f325f, with a stroke of 1 in green, #9eb28a. No drop shadow.

Move Element22 in front of the frame in the front. Resize so just a little sticks out on both sides. Have the open end on the left hand side. Add a drop shadow. Duplicate,  flip horizontally, and then move to the other frame. 

Now move Element35 on top on Element22 for the frame in the front. Resize so it's not too big and sits in the middle of the frame. Add a drop shadow.

Move Element14 to the bottom right hand corner of the frame in the front. Resize and add a drop shadow.

Open Element 15 & 21. Place Element21 to the top right hand empty spot of the tag. Resize and rotate so the back of the compact faces the top. Place Element15 on top of the compact so it sits in the middle. Add a drop shadow to both.

Now we need Elements 1, 2, 5, 7. These will go on the empty space on the left hand side of the frames.
Move Element7 and resize so it's smaller and doesn't stick outside the tag too much. Add a drop shadow.

Move Element1 in front of the green chest and add a drop shadow.

Move Element2 in front of the green chest but behind the telephone, resize. Add a drop shadow.

Move Element5 in front of the books. Resize and add a drop shadow.

For the name you need to use Lighthouse. 
I used a darker color green for this, #42562a.
Add a stroke, size 2, with a lighter green, #eaf6c6.
You can add a bevel, change the Gloss Contour to Cove - Deep. Leave the shadow mode to white and the highlight mode to green, #c0d2ab.

Place your tube on top of the frame in the front. Have her head stick out above the frame in the back. Make her overlap the left side of the frame in the front just a little. Add a drop shadow.

Now move the tube on top of the paper but behind the frames so it appears to be her reflection. Flip the tube horizontally and move it to the left of her on the frame in the back. Change the fill to 50%. Erase any parts of the tube reflection that sticks outside the frame.

Move the tube again, do not flip horizontally, to the right of the main tube on the frame on the right. Again, change fill to 50%. Erase any extras hanging outside the frame.

Crop off any extras. Do not cut off parts of the tag.

Add your proper copyright information and tagger mark.

Save as .psd and .png.

Thanks for trying out my tutorial. This is a beautiful vintage kit! 

PTU "Toes In The Sand 2" Tutorial

My second PTU Tutorial using Jackie's Jewels Toes In The Sand kit and I used artwork by PinUp Toons, which you can find at CDO.

**This tutorial was written by me and any resemblance is purely coincidental. It is written for those with a working knowledge of Photoshop.**

Tools

Tube
PinUp Toon 69-2 
You can find it here.
*You must obtain a license to use it.*

Mask
WSL_Mask84
You can find it here.

Font
TheNautiGal
You can find it here.

Elements
BeachBag
Chair1
Cocktail2
Dolphin
FlipFlops
FlyingGulls
Frame4
Lantern2
PalmTree1
PalmTree2
Sandpile
Starfish2
Sun
Towel2
Umbrella
WoodElement

Papers
Paper9
Paper14

Ready? Let's get started!

Open a new canvas, 650x650.

Move Frame4 on to the canvas. Resize and add a drop shadow. 

Move Paper9 behind the frame. Resize to the size of the open part of the frame. There should not be any extra paper hanging outside the frame.

Now put the FlyingGulls on top of Paper9. Make the gulls smaller for a sense of depth.
Do the same thing with the Dolphin. You can erase tiny parts of the Dolphin so it looks like it's coming out of the water.

Move the Sun to the upper right hand corner of the frame. Rotate it so the lighter side of the Sun is showing through. Erase extras hanging outside the frame.

Move the WoodElement to the left side of the frame. Resize so it is no taller than the middle of the frame. Add a drop shadow. Duplicate the WoodElement, flip horizontally, and move to the right side of the frame.

Place Towel2 in front of the frame. Resize and add a drop shadow. 

Place Chair1 on top of the towel on the right hand side. The back of the chair can stick outside the back of the towel. 

Place a SandPile behind the chair and in front of the WoodElement. Make it so it just meets the top of the rope on the smaller pole. Add a drop shadow. 

Place the BeachBag behind the chair so it peeks through the arm of the chair. Add a drop shadow.
Move the FlipFlops in fron the BeachBag as well. Add a drop shadow.

Move Starfish2 in front of the lower left hand corner of the frame and WoodElement. Resize and add a drop shadow.

Move Lantern2 to the front left corner of the towel. Add a drop shadow.

Let's place the tube on the towel. If using the same one, move her in front of everything but the chair. Add a drop shadow. 

Place Cocktail2 in front of the tube, resize, and add a drop shadow.

Move the Umbrella behind the chair. Have it stick out over the chair. Add a drop shadow.

Move PalmTree2 behind the frame on the right. I can stick out above the frame. Add a drop shadow.
Move PalmTree1 behind the frame on the left. Make it smaller the than the other one and so it sticks over the WoodElement.

Now take the SandPile again and place it under the towel. It will take a few duplicates of the SandPile to make it sandy under the towel. Add a drop shadow to each pile.

Open the mask, a new canvas 600x600, and Paper14. Move the paper on to the canvas and the mask on top. Remove the white background and place the mask at the lowest layer. I erased parts of the mask that stuck out at the bottom.

Let's do the name now.
The name can be white with a red, #990000, stroke 2.
Now expand the pixels of the name by 4 and make it blue. You can choose the shade of blue that works for you. Add noise to the blue layer and then a drop shadow. Place it over the chair.

Crop off any extras and make sure not to cut off any parts of the tag!

Add your copyright information and tagger mark.
Save as .psd and .png.

I hope you enjoyed this one as well! I love this kit, as you can tell :)

Saturday, April 27, 2013

New Cluster Freebies from A Day At The Beach by AGP!

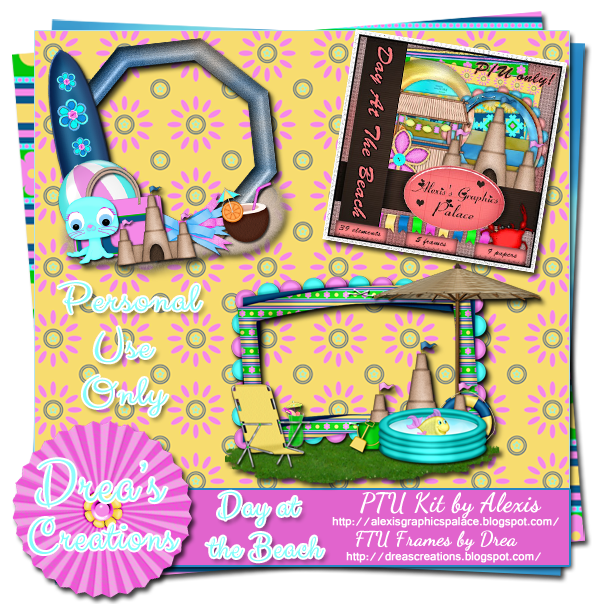
Alexis's Graphics Palace has a cute new kit for sale called A Day At The Beach. I made you two cluster frames that you can download from here

**Please do not share. Link back to my blog for others to download. Thanks!**

You can go to Alexis's blog to find the stores she sells at! Her kits are on sale until April 30th so hurry while it lasts!

Cluster Preview


And here is a tag I made with one of the clusters for Alexis :)


I hope you like them! This kit is super adorable for Summer so check it out soon!

Monday, April 22, 2013

PTU "Toes In The Sand" Tutorial

PTU tutorial using Jackie's Jewels Toes In The Sand kit and I used the cute artwork of Pinup Toons, which you can find at CDO.


**This tutorial was written by me and any resemblance is purely coincidental. It is written for those with a working knowledge of Photoshop.**

Tools

Tube
PinUp Toon 41-3
You can find it here.
*You must obtain a license to use it.*

Mask
K'Lani's Designs Mask, which you can find here.

Font
akaDora 
You can find it on FontSpace.

Elements
AsstShells2
BeachBag
Camera
Cocktail1
Fence
FlipFlops
Flower4
Gull
Lifesaver
Ocean
Palms
PalmTree1
PalmTree2
PaperBoat
Sand
Sandpile
Shell1
Shell2
Shell3
Sign2
Starfish1
Starfish2
Sunglasses2
SunHat
Umbrella

Paper
Paper1

Alright, let's get started!
Open a new canvas, size 650x650.

Move the lifesaver to the blank canvas. Put in the middle. I made it a little smaller than it originally is.
Add a drop shadow.

Move the ocean behind the lifesaver and make the top of the ocean meet the bottom of the open circle. Erase parts of the ocean that stick outside the lifesaver.

Take the sand and move it behind the lifesaver and ocean. Erase any parts of the sand outside the lifesaver.

Move the fence behind the lifesaver so the part that sticks out shows the rope on the left side. Resize it so it the top of the fence meets the middle of the lifesaver. Add a drop shadow and then duplicate the fence. 
Move the fence duplicate to the right side of the lifesaver.

Now move your tube in front of the lifesaver. Have her head/hair just stick above the lifesaver and add a drop shadow.

Move the sand behind the fence and under the tube so she is sitting on it. The bottom of the sand should meet the very bottom of the tube. 

Move the palm behind the fence on the left hand side. Make it smaller and have two copies on each side to cover the back of the fence. Move a third copy on the left side only. Move it in the middle of the two palms and move it down a little to cover the empty space. Add a drop shadow to each palm.

Move PalmTree2 behind the palms on the right side. Have it stick out above the lifesaver just a little. Add a drop shadow. Duplicate the PalmTree and move it to the other side and flip horizontally. Make it shorter than the other group.

Now open PalmTree1. Move it on the right side and in front of PalmTree2. Make it smaller and below the PalmTree2. Add a drop shadow. Duplicate PalmTree1 and move it to the right of the PalmTree2 and behind the lifesaver. 

Now move Sign2 so it sits on the fence to the left of the lifesaver. It should stop at the 'A'. Add a drop shadow. Duplicate the sign and move it to the other side. Now it should show the 'CH'.

Move the Gull and have it sit on top of the sign on the left hand side. The wing tips should meet the palm tree branch. Add a drop shadow.

Move the Umbrella behind the lifesaver. Flip horizontally and add a drop shadow. Erase the pole if it sticks out. 

Now take the sandpile and move it on the left hand side. Move it behind the tube. Have the tip of the sandpile meet the bottom bar of the fence. It can stick outside the fence a little. Add a drop shadow. Duplicate the sandpile, flip horizontally, and move it to the right side of the tube. 
You should have a little space left in the middle so duplicate one of the sandpiles, make it smaller and move it to the middle under the tube. 

Move the BeachBag on top of the sandpile on the right side. The bag should stick out just about the bottom bar of the fence. Add a drop shadow.

Move the flipflops behind the tube and in front of the beachbag. Make it smaller and add a drop shadow.

Move the sandhat in front of the flipflops and beachbag. Add a drops shadow.

Move the sunglasses2 behind the sandhat and in front of the bag. Add a drop shadow.

Move the paperboat in front of the sand bucket (if you used the same tube as me). Add a drop shadow.

Move shell1 to the left side of the boat. Flip vertically and add a drop shadow.
Move shell2 to the right side of the paperboat. Add a drop shadow.

Move the camera to the left hand corner toward the edge. Add a drop shadow.

Move cocktail1 behind the camera and add a drop shadow.

Move starfish1 behind the camera and cocktail. Add a drop shadow. 

Move shell3 behind the camera and the tube. Resize and add a drop shadow.

Move flower4 behind the cocktail. Add a drop shadow.

Move asstshells behind flower4 and the tube. Add a drop shadow.

Move starfish2 in front of the camera and tube. Resize and add a drop shadow.

Save as a .psd if you haven't already.

Let's add the mask.

Open a blank canvas, size 600x600.
Open KLD_Maskvac from K'Lani's Designs.
Open Paper1 and resize to 600x600.
Move the paper on to the blank canvas and then move the mask on top of the paper.
Remove the white background.

Move the mask behind the tag and resize so it shows a little outside the tag. Make sure it doesn't stick outside the canvas.

Crop off any blank space. Don't cut off any parts of the tag!

For the font:
The font is akaDora.
The color is dark blue - #0a2c6e

Add a white stroke, size 4 and add a drop shadow.
Add a white bevel as well.

Add your copyright information and tagger mark.

Save as a .psd and .png.

We're done!

I hope you liked the outcome. I loved working with this kit and it's perfect for your arsenal of summer kits :)

CT Tag Show Off with Rustic Grunge from Rissa's Designs and Freebie Snags!

You can pick up Rustic Grunge from Rissa's Designs! I love the colors of this kit and it's so fun to work with. I know you'll enjoy it too!

First up is an animated banner for Rissa! Freebie snags are below it. Make sure you add the snags to your own Fotki or Photobucket so you can enjoy the animation :)


SNAGS


Next tag is for Rissa with the freebies below it :)


SNAGS


Thanks for stopping by! I hope you like my freebie snags :)

Saturday, April 20, 2013

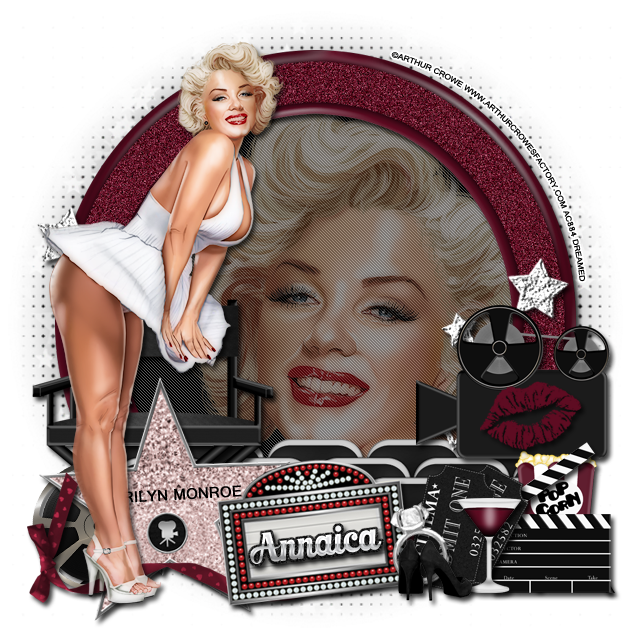
PTU "Classic Beauty" Tutorial

PTU Tutorial with Annaica's Place kit Classic Beauty and the artwork of Arthur Crowe.

**This tutorial was written by me and any resemblance us purely coincidental. It is written for those with a working knowledge of Photoshop.**

Tools

Tube
"The Lady" by Arthur Crowe.
You can purchase the tube here.
*You must obtain a license to use it.*

Mask
My mask: DC_Mask19 you can find here.

Font
Marmellata Jam
You can find it on dafont.

Gautami
You can find it here.

Elements
1
2
3
4
5
6
7
8
9
21
23
26
27
28
39
45

Paper
PAPER5

Alright, let's get started!

Open a new canvas, size 650x650.

Move element 45 onto the canvas. Resize so it's fairly large and add a drop shadow.

Add a new layer and fill black. This will be the background for the frame. Erase any extras outside the frame.

Move the close up of the tube on top of the black layer and flip horizontally. Make it large so it covers almost the entire background. Bring fill 49%.

Move element 21 on the right side of the frame and erase any stars that stick outside the frame or on the face of the tube. Add a drop shadow and duplicate. Then move the copy to the left side of the frame and flip horizontally. Move it up a little higher than the right side.

Move the full tube on top of the frame. Add a drop shadow.

Move element 6 behind the tube. Don't cover her face too much and make sure it doesn't stick outside the frame.

Move element 2 behind the tube. Make the top of the chair stop around her hips. Add a drop shadow.

Move element 8 in front of the chair. Resize so it sticks out to the left of the chair and sits below the bottom of the chair. Add a drop shadow.

Move element 1 in front of element 8 and add a drop shadow. Use the Gautami font to add MARILYN MONROE on the star.

Move element 39 on top of the star with the bow on the outside edge of the roll of film. Add a drop shadow.

Move element 4 to the right side of the frame. Make it about the same height as the chair. Add a drop shadow.

Move element 28 on to the camera, resize so it sits on the camera and add a drop shadow.

Move element 3 in front of and below the camera so the part sticking up just touches the bottom of the camera. Add a drop shadow.

Move element 9 behind the element 3 and in front of the camera. Add a drop shadow.

Move element 7 on the left side of element 3 so it is just below the camera. Add a drop shadow.

Move element 5 in the middle and rotate it just a little. I put it so it covered the right side of the star and met the top of the right point. Add a drop shadow.

Move element 23 above element 5 and rotate a little to the left. Add a drop shadow.

Move element 26 on top of element 23. Make them smaller than the ring and add a drop shadow.

Move element 27 right next to element 26 and add a drop shadow.

Let's do the mask now!

Open a new canvas, 600x600.

Open PAPER 5 and resize to 600x600.

Open DC_Mask 19.

Move the paper onto the canvas and then the mask on top of the paper.
Remove the white background.
Move it behind the frame and the black layer.

For the name:
The font again is Marmellata Jam.
I made it silver. You can use a style if you like.
Then select the pixels of the font and expand by 3 or 4.
Add a layer below the text and fill with black. Add noise to give it a glitter effect and add a drop shadow to the bottom layer.

Crop off any extras, but make sure you don't cut off any part of the tag.

Add your copyright information and tagger mark.

Save as .psd and .png.

There is so much you can do with this kit! You must pick it up today :)

PTU "American Beauty" Tutorial

PTU Tutorial with Scrappin Krazy Designs' kit American Beauty and the artwork of Ismael Rac

**This tutorial was written by me and any resemblance is purely coincidental. It is for those with a working knowledge of Photoshop.**

Tools

Tube
"Venom" by Ismael Rac. 
You can purchase the tube here
*You must obtain a license to use it.*

Mask
by K'Lani Designs, you can find it here.

Font
Native Alien
You can find it on dafont.

Elements
ele01
ele03
ele27
ele31
ele42
ele55
ele56
ele59
ele61
ele71
ele72
ele83
ele88
ele92
ele98
ele99
ele100
ele104

Papers
p07
p13

Have everything set up? Let's get started!

Open a new canvas, size 650x650. You can larger or smaller, if you like.

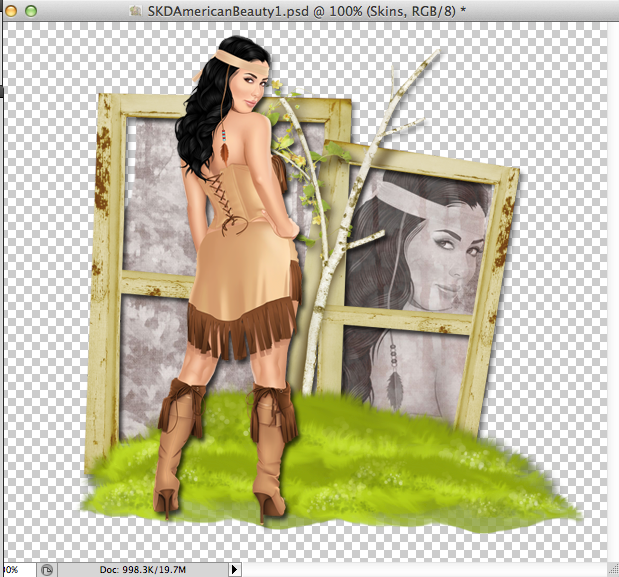
Move ele98 onto the canvas and resize. Add a drop shadow.

Move p13 behind the frame, postion, and erase extras outside the frame.

Move your tube in front of left side of the frame. Resize and add a drop shadow.
Take a duplicate of the tube, make it larger, and move it on top of p13 but behind the frame so it's a "reflection" of the tube in the window. Erase any extras hanging outside the frame. 
On the reflection tube, change it to luminosity and the fill to 60%.

Move ele61 on top of the frame. Resize so it hangs off the frame a little on the right side of the frame and meets the edge of the frame on the left. Add a drop shadow.
Now take ele61 again and make it smaller to give it a hill effect. Have the left end of the hill meet the left side the frame too. Then duplicate the smaller size and move it to the right side so they overlap the in the middle and meet up with the larger grass background. Don't add a drop shadow to the smaller "hills".  Here's a snapshot of how it should look now. 


Move ele55 on top of the grass hills and frame, but behind the tube. Resize it so it sticks out just a tad over the top of the frame. It can stick out on the left side of the frame, but make sure it doesn't stick outside the canvas. Add a drop shadow.

Move ele03 on top of the tree trunk. Resize it so it does not stick outside the tree trunk. No drop shadow necessary.

Move ele99 onto the tree top. I placed it where the tree branch was sticking out. Resize it so it is appropriate to the size of the tree and add a drop shadow. 

Move ele27 on top of the tree at the base of the trunk. Resize it and move it to the middle of the tree trunk. Duplicate ele37 and flip horizontally so they overlap in the middle. Add a drop shadow to both. 
Move ele31 behind both ele27s and have it stick out the top, just under the paw print. 

Move ele83 on top the tree limb in the middle of the frame. Flip it vertically and resize. Have the point at the bottom meet the top of the large hill background. Add a drop shadow.

Move ele88 on to the limb to the left, resize, and add a drop shadow. 

Move ele92 behind the tree and between the large grass hill and the smaller grass hills. Resize so it doesn't stick too much outside the frame and the right side of the grass hills. Add a drop shadow.

Now move ele42 behind ele92 on the right side of the frame. Resize it so it stands as tall as the middle bar of the frame. Add a drop shadow.

Move another copy of ele42 in front of ele92. Make it much smaller than the first one. Add a drop shadow. 

Move ele42 next to the tree on the right side. Move it in front of the large grass hill and behind the small grass hill on the left. It should be behind ele92. Make it smaller than the other one to where it touches the bottom of the tree top. Add a drop shadow. 

Move ele56 on top of the smaller grass hill on the right size. Resize so the closed end of the log meets the middle of the small grass hill. Add a drop shadow. 

Move ele104 on top of the tree log. Flip horizontally so the acorns are on the right side toward the open end of the log. Resize so the ends almost meet up. It can stick outside of the log a little. Add a drop shadow.

Move ele59 so it sits on the log. I moved it so it was sitting on one of the edges. Resize so its size is appropriate to the tree log. Add a drop shadow. 

Move ele100 directly behind the tube just above her shoes. Resize it so it's just in front of her. Add a drop shadow.

Move ele01 in front of the log and ele104. Have the paws meet the end of the right side of the log and the tail end of the wolf overlap the tube's right show. The wolf's head should stick out just above the grass hill in the background. Add a drop shadow.

Move ele71 in front of the wolf. Make it flush with the wolf. Add a drop shadow. 

Move ele72 to the top right hand corner of the frame. Resize it and add a drop shadow.

Now would be a good time to save your work as .psd if you haven't already.

Now it's time for the mask.
Open a new canvas, size 600x600.
Open the mask and make sure it's 600x600 as well.
Open p07 and resize to 600x600.
Move p07 on to the blank canvas and then move the mask on top.
Remove the white background and then move it behind the frame. Make sure it is the very bottom layer. Resize as you like. I had little bits sticking outside the frame except the bottom. 

Let's work on the name now.
Again, the font is Native Alien. 
The color is #8c5431
Add a stroke of 2, color #2d0807
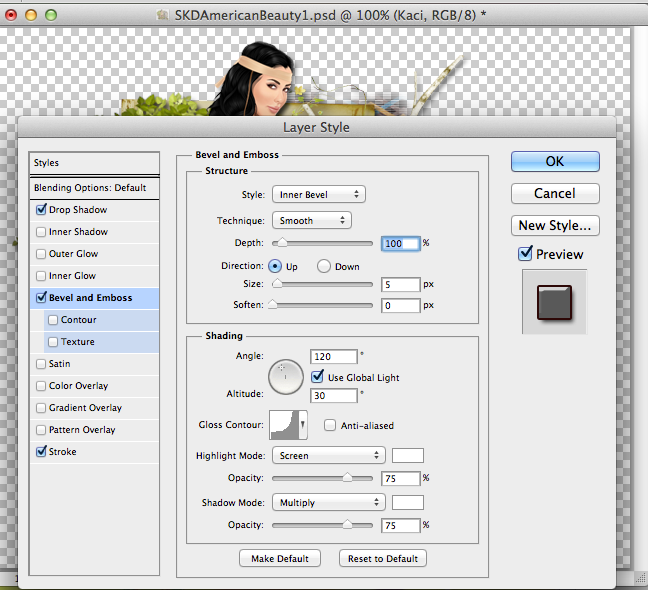
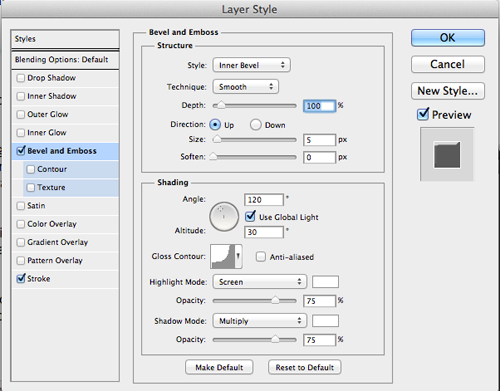
Add a white bevel to it as well, settings are below.


Add your copyright information and tagger mark.
Crop off any extra parts of the canvas. Make sure you do not cut off parts of the tag.
Save as .psd and .png.

Congrats your done! This kit is a must have! There are so many possibilities and it's so beautiful. I know you'll enjoy it as much as I did.

My FB Timeline Set for Boston

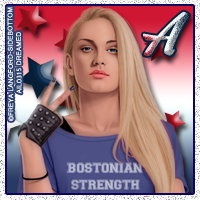
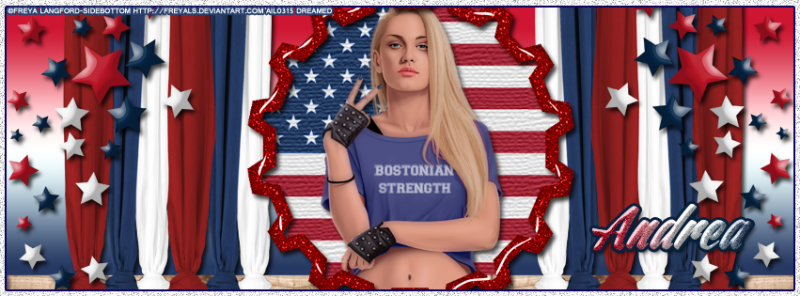
This was one crazy week for the wonderful USA. I had my birthday on the 16th, but I was focused on what was going on in Boston and then Texas. I was glued to police scanners, news websites, and social media trying to keep up with the latest on the man hunt for the Marathon Bombers. Fortunately, it ended earlier this evening and Bostonians can rest peacefully and hopefully continue their lives as they were.

Here is the FB timeline cover I made using a FTU tube by Freya Langford-Sidebottom. You can get this from her Facebook group, Art of Freya.

I used a FTU kit by Tasha's Playground and you can find it on her blog here!


Thank you to Freya and Tasha for the awesome freebies!

Sunday, April 14, 2013

CT Rissa's Designs "Sentimental"

I love this kit! I used the Exclusive kit, Sentimental, by Rissa's Designs made to match the gorgeous tube of the same name by Arthur Crowe. You can find the kit here! You can find the tube here.


Thanks for stopping by! :)

Saturday, April 6, 2013

PTU "Rockabilly" Tutorial

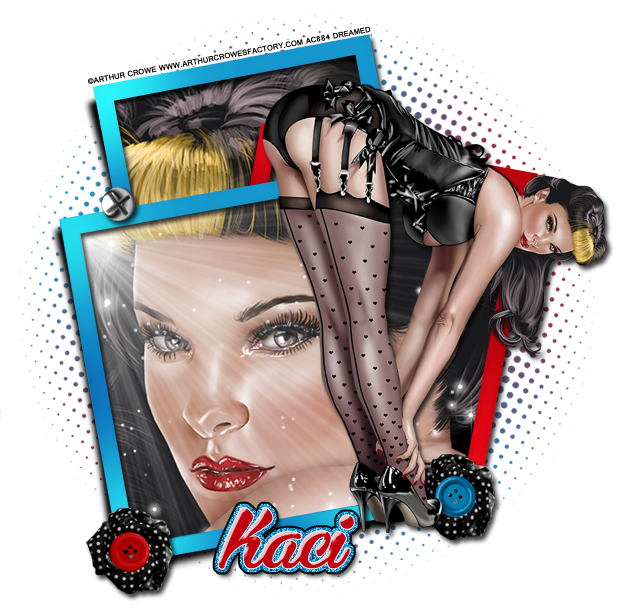
PTU Tutorial with Scrappin Krazy Designs' kit Rockabilly and the artwork of Arthur Crowe.


**This tutorial was written by me and any resemblance is purely coincidental. It is for those with a working knowledge of Photoshop**

Tools

Font
Bira
You can download it from dafont.com

Tube
"Style Life" by Arthur Crowe
You can purchase the tube here.
*You must obtain a license number to use it.*

Elements
ele14
ele19
ele23
ele25
ele26
ele27
ele28
ele36

This is a simple tutorial with a fun Rockabilly kit and a new tube by Arthur Crowe. I hope you have fun with it, I did!

Let's start out by opening a new, blank canvas. Make it 650x650.

Move ele36 onto the canvas. It already has a shadow, but you can add more if you like.

Make a new layer and fill it with black. Move it behind the frame and size so nothing black sticks outside the frame. This will be the background for the frame.

Move ele25 behind the frame background. This will play as your mask. Size to fit and make sure nothing sticks off the edges of the canvas.

Move ele14 to the top left corner of the frame and flip horizontally. Resize and add a drop shadow.

Move ele23 to the bottom left hand corner of the frame. Resize and and add a drop shadow.

Duplicate ele23 and move it to the bottom right hand corner of the frame.

Move ele26 on to the first copy of ele23. Make it smaller so it's the center of the element. I didn't add a drop shadow, but you can if you like.

Move ele27 on to the duplicated ele23. Repeat the process as you did for ele26.

Move the AC tube on to the right side of the frame. Make sure it is the top layer so it is above the flower and button combo.

Resize the tube so her shoes meet the bottom of the frame and her head sticks out just a little over the red frame. Add a drop shadow to the tube.

I didn't use any filters this time to preserve the look of how she was intended. You can add filters if you like.

Move a new copy of the tube behind the frame but on top of the black background.
Flip her horizontally and make it so her face in mainly in the bottom blue frame with a little yellow hair showing. You should see the back of her neck in the red frame.

Move ele28 behind the frame but on top of the tube. Move the corner of the light to the top left hand corner of the frame in the front. Resize it so it looks as if it is coming from the corner of the frame. Erase any of the light that sticks outside the frame. To do this I add a new layer and fill it with 50% gray so I can see it easily.

Move ele19 on top of ele28 and adjust so it gives a little sparkle. Some can carry over to the red frame portion. Again, use the gray layer to erase anything sticking outside the frames.

For the font I used Bira. The name is red, #c0020e, with a stroke size 1 in white. The bevel can be copied from the image below.


Now select the pixels of the name and expand by 4.
Fill it with blue, #1698ce, and Add Noise at around 18%. You can do more or less depending on your taste. Add a drop shadow and a black stroke, size 2.

Add your copyright information and tagger mark.

Crop off any extra parts of the canvas.

Save your .psd and save as .png.

Voila! We're done!

I love, love, love this kit and plan to play with it more so keep an eye out for more tags!

New Name, New Blog!

Hello friends! I have decided to change my designer name to reflect that I make kits more than I do CT work. I made a new blog so the old links for this blog will remain active for future visits. Please visit me at Drea's Designs ! I'll see you there!
Related Posts Plugin for WordPress, Blogger...