
**This tutorial was written by me and any resemblance us purely coincidental. It is written for those with a working knowledge of Photoshop.**
Tools
Tube
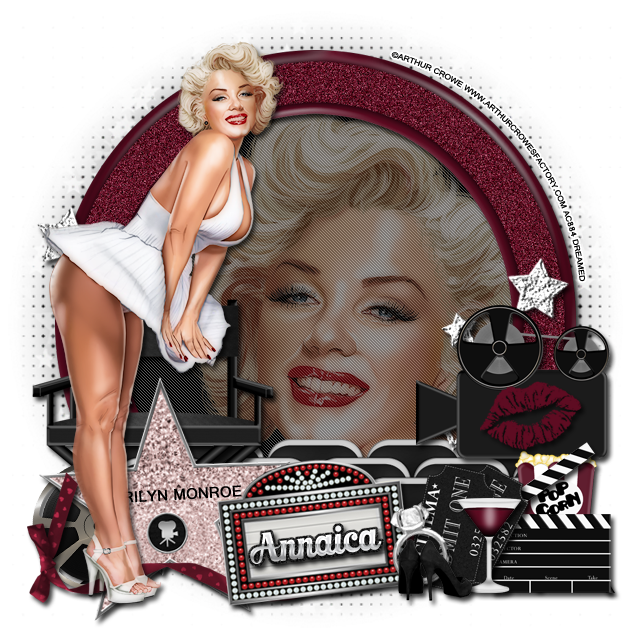
"The Lady" by Arthur Crowe.
You can purchase the tube here.
*You must obtain a license to use it.*
Mask
My mask: DC_Mask19 you can find here.
Font
Marmellata Jam
You can find it on dafont.
Gautami
You can find it here.
Elements
1
2
3
4
5
6
7
8
9
21
23
26
27
28
39
45
Paper
PAPER5
Alright, let's get started!
Open a new canvas, size 650x650.
Move element 45 onto the canvas. Resize so it's fairly large and add a drop shadow.
Add a new layer and fill black. This will be the background for the frame. Erase any extras outside the frame.
Move the close up of the tube on top of the black layer and flip horizontally. Make it large so it covers almost the entire background. Bring fill 49%.
Move element 21 on the right side of the frame and erase any stars that stick outside the frame or on the face of the tube. Add a drop shadow and duplicate. Then move the copy to the left side of the frame and flip horizontally. Move it up a little higher than the right side.
Move the full tube on top of the frame. Add a drop shadow.
Move element 6 behind the tube. Don't cover her face too much and make sure it doesn't stick outside the frame.
Move element 2 behind the tube. Make the top of the chair stop around her hips. Add a drop shadow.
Move element 8 in front of the chair. Resize so it sticks out to the left of the chair and sits below the bottom of the chair. Add a drop shadow.
Move element 1 in front of element 8 and add a drop shadow. Use the Gautami font to add MARILYN MONROE on the star.
Move element 39 on top of the star with the bow on the outside edge of the roll of film. Add a drop shadow.
Move element 4 to the right side of the frame. Make it about the same height as the chair. Add a drop shadow.
Move element 28 on to the camera, resize so it sits on the camera and add a drop shadow.
Move element 3 in front of and below the camera so the part sticking up just touches the bottom of the camera. Add a drop shadow.
Move element 9 behind the element 3 and in front of the camera. Add a drop shadow.
Move element 7 on the left side of element 3 so it is just below the camera. Add a drop shadow.
Move element 5 in the middle and rotate it just a little. I put it so it covered the right side of the star and met the top of the right point. Add a drop shadow.
Move element 23 above element 5 and rotate a little to the left. Add a drop shadow.
Move element 26 on top of element 23. Make them smaller than the ring and add a drop shadow.
Move element 27 right next to element 26 and add a drop shadow.
Let's do the mask now!
Open a new canvas, 600x600.
Open PAPER 5 and resize to 600x600.
Open DC_Mask 19.
Move the paper onto the canvas and then the mask on top of the paper.
Remove the white background.
Move it behind the frame and the black layer.
For the name:
The font again is Marmellata Jam.
I made it silver. You can use a style if you like.
Then select the pixels of the font and expand by 3 or 4.
Add a layer below the text and fill with black. Add noise to give it a glitter effect and add a drop shadow to the bottom layer.
Crop off any extras, but make sure you don't cut off any part of the tag.
Add your copyright information and tagger mark.
Save as .psd and .png.
There is so much you can do with this kit! You must pick it up today :)
