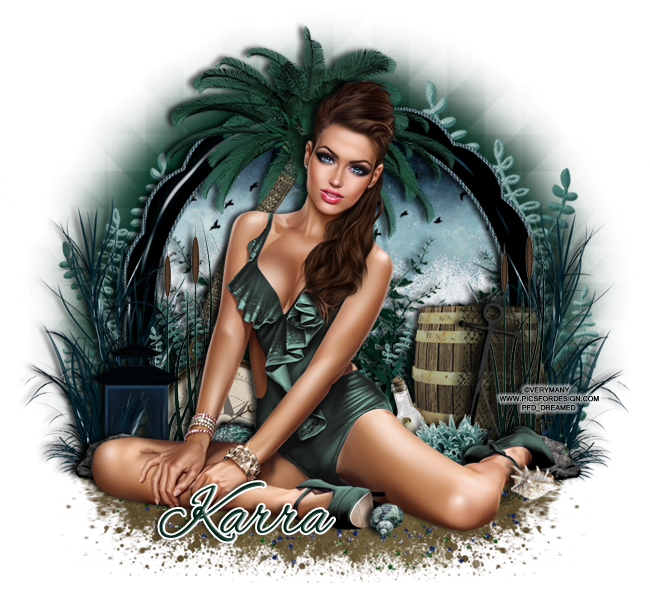
PTU tutorial using Evening's Tide by Karra's Kreative Korner!
**This tutorial was written by me and any resemblance is purely coincidental. It is written for those with a working knowledge of Photoshop.**
Supplies
Font
Mask
Scrap Kit
Evening's Tide by Karra's Kreative Korner
Tube
*You must obtain a license to use this tube.*
Elements
anchor
barrel
birds
bottle
cattails
compass
flower1
frame2
glitter
grass1
grass2
lantern
netting2
palm tree
plant2
plant3
rock1
rock2
sand
seashell
seashell2
splash2
Papers
4
5
Let's start!
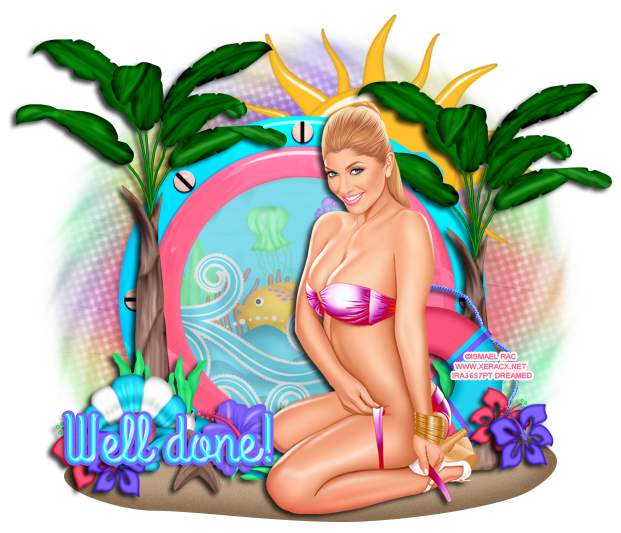
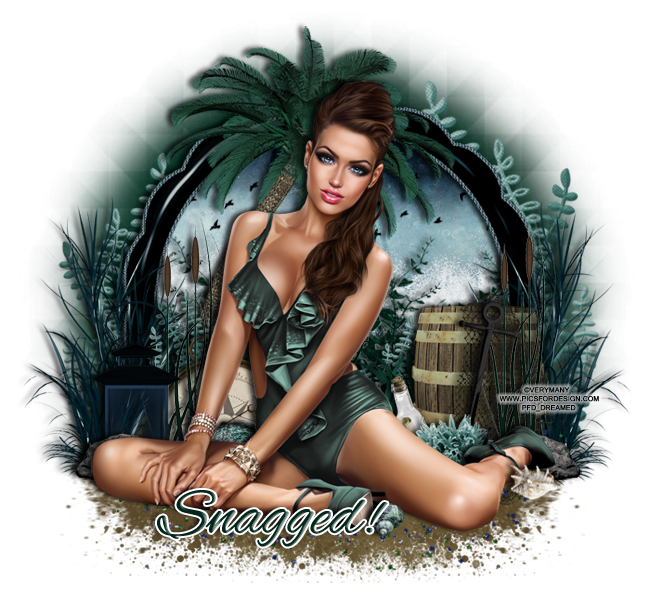
Open a new canvas, size 650x650.
Move Frame2 on to the canvas. Resize and add a drop shadow.
Move paper5 behind the frame. Resize and erase anything outside the frame.
Move the tube in front of the frame. Resize and add a drop shadow.
Behind the frame and below the tube, move the sand and place. Resize it so it's not too big. Duplicate the sand and cover the space beneath the tube.
On the paper, behind the frame, place the birds. Resize and erase anything outside the frame.
Behind the tube on the right, place the barrel.Resize and add a drop shadow.
On top of the barrel, place netting2. Resize and add a drop shadow.
On top of the netting, place the anchor and flip horizontally. Resize and add a drop shadow.
Behind the barrel and to the right, place grass2. Resize and add a drop shadow.
Duplicate grass2 and move it to the left side behind the tube.
In front of the grass on the left, place the lantern. Resize and add a drop shadow.
Behind the tube and lantern, place the compass. Resize and add a drop shadow.
Between the compass and the lantern, place the cattails. Resize and add a drop shadow.
Duplicate the cattails and move them on the other side between the anchor and the netting.
Place the rock on the right side in front of the grass, but behind the tube. Resize and add a drop shadow.
Duplicate the rock and move it in front of the lantern on the left side.
In front of the compass and behind the tube, place rock 1. Rotate horizontally then resize and add a drop shadow.
Behind the tube on the right and in front of the anchor, place flower1. Resize and add a drop shadow.
Behind the flower, place the bottle. Resize and add a drop shadow.
On top of the sand, but under the tube, place the glitter. Erase anything that hangs off the sand too much.
Behind the tube, place splash 2 on the right side. Take another copy of splash2 and move it on the right side. Erase anything of both splashes that hang outside the frame.
Behind the frame, place grass1 on the right side of the tube. Duplicate grass1 and move it on the left side.
Take plant3 and move it behind grass1 on the right side. Duplicate and move it on the left side. Resize and add a drop shadow.
Between the grass and the plants behind the frame, place plant2 on the right. Resize and add a drop shadow. Duplicate the move it on the left side.
Take plant2 and move it behind the frame and paper. Move on copy on the right side. Resize a little and add a drop shadow. Duplicate and move it on the left side.
Place seashell1 on place it next to the tube's foot in the front. Resize and add a drop shadow.
Place seashell2 by her foot in the back. Flip vertically, resize, and add a drop shadow.
Move the palm tree behind the tube and flip horizontally. Resize and add a drop shadow.
Name
Main color is #022619.
Add a stroke, size 2, in white.
Add a drop shadow.
Add a bevel, default, and change the shadow to white.
Mask
Open a new canvas, size 600x600.
Open paper4 and resize to 600x600. and move on top of the canvas.
Open the mask and move on top of the paper.
Remove the white background and place the mask behind the tag. Make it evenly stretched on all sides.
Add your tagger mark and copyright information.
Crop off any extra canvas.
Save as a .psd & .png.
We're done :)
Here are a few Evening's Tide snags for you!
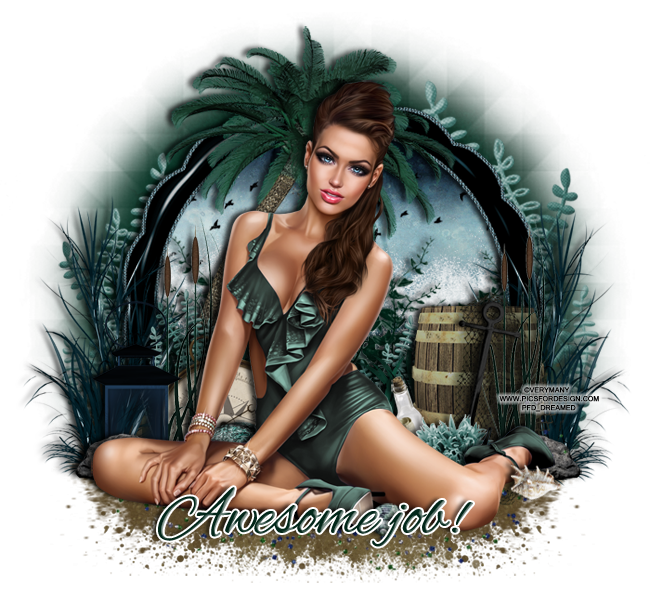

Thank you for coming by!