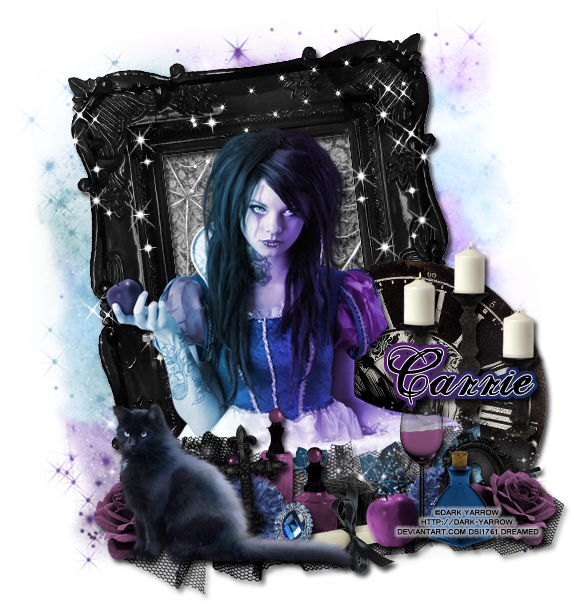
PTU tutorial using Gothic Twilight by PinkParadox Productions!
You can purchase the kit HERE!!
**This tutorial was written by me and any resemblance is purely coincidental. It is written for those with a working knowledge of Photoshop.**
Supplies
Font
Mask
Scrap Kit
Tube
*You must obtain a license to use this tube.*
Elements
7
13
17
24
29
31
37
39
49
60
63
69
79
85
88
108
125
126
Frame9
Papers
7
12
Let's start!
Open a new canvas, size 650x650.
Move Frame 9 on to the canvas and resize. Rotate to the left a little and add a drop shadow.
Move P12 behind the frame and rotate it with the frame. Erase anything outside the frame.
Place the tube in front of the frame and resize her. Add a drop shadow.
On top of the paper and behind the frame, place E79. Put on in the upper left corner. Resize and add a drop shadow. Take another copy and move it on the right side. Resize and add a drop shadow.
Behind the tube, place E7 on the right. Resize and add a drop shadow.
In front of the clock and behind the tube, place E63. Resize and add a drop shadow.
Place E31 in front of the tube. Flip vertically and resize. Add a drop shadow.
On top of E31, place the cat tube. Resize, add a drop shadow, flip horizontally.
Behind the cat and in front of it, place E85. Resize and add a drop shadow.
Behind the cat and to the right of it, place E88. Resize and add a drop shadow.
In front of 88 and behind the cat, place E29. Resize and add a drop shadow.
Place E60 behind the cat, by its tail, and in front of the blue flower. Resize and add a drop shadow.
Move E39 behind the flower and to the right and flip horizontally. Resize and add a drop shadow.
Between E60 & E39 place E49. Resize and add a drop shadow.
On top of E49 and to the right of it, place E17. Resize and add a drop shadow.
Duplicate the layer with E85, the purple flower, and flip horizontally. Move it to the opposite side.
Behind the flower, place E24. Resize, rotate to the left, and add a drop shadow.
In front and to the left of the flower, place E37. Resize and add a drop shadow.
Behind the apple and blue vial, place E13. Resize and add a drop shadow.
Behind E24, place a duplicate of the layer with E88.
Take E108 and move it on top of E31. Lay it horizontally and resize. Add a drop shadow.
On top of the ivy, place the E125. Lay it horizontally as well and resize. Erase anything that hangs off the tag too much.
Now on top of the frame and behind everything, place E126. Resize a little and make sure some are on the frame. Take another copy and move it to the right. Use it cove the right side. Don't clutter it too much. Erase anything that hangs off the sides.
Name
Main color is black.
Add a white stroke, size 1.
Select the pixels and expand by 4.
Fill the the bottom layer with white and then add a gradient overlay with #561e76 & #1a2b64.
Just change the angle of the gradient to -33 and the scale to 105.
Add a drop shadow to the gradient layer.
Mask
Open a new canvas, size 600x600.
Open P7 and resize to 600x600. and move on top of the canvas.
Open the mask and move on top of the paper.
Remove the white background and place the mask behind the tag. Make it evenly stretched on all sides.
Add your tagger mark and copyright information.
Crop off any extra canvas.
Save as a .psd & .png.
We're done :)
Free Snags!
Thanks for coming by!


