
New PTU tutorial with Steampunk Twilight by Pink Paradox Productions.
I used a prepaid tube by Jose Cano.

**This tutorial was written by me and any resemblance is purely coincidental It is written for those with a working knowledge of Photoshop.**
Supplies
Font
Mask
Scrap Kit
Tube
Steampunk by José Cano
*You must obtain a license to use this tube.*
Elements
43
46
48
65
92
93
94
95
99
100
121
126
134
139
142
148
F12
Papers
P7
P11
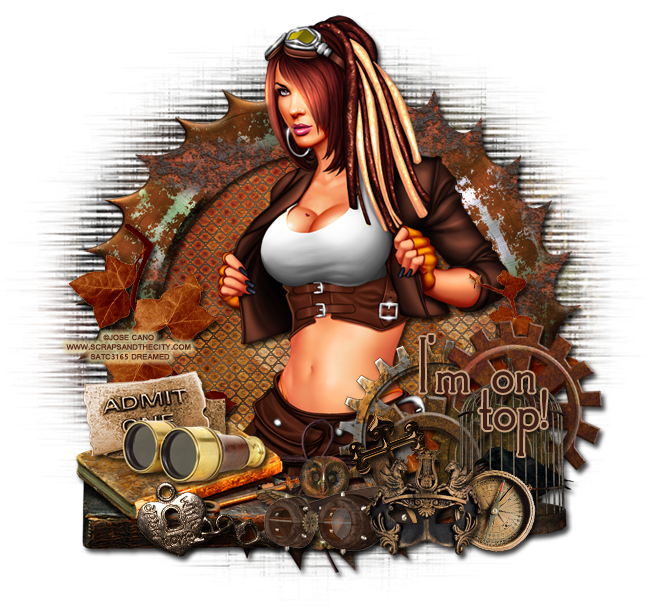
Let's start!
Open a new canvas, size 650x650.
Place F12 on the canvas and resize. Add a drop shadow.
Move P11 behind the frame and resize. Erase extras.
Place E126 on top of the paper and behind the frame. Resize and add a drop shadow in this color #ff6504.
Move the tube in front of the frame and resize her. She can be taller than the frame. Add a drop shadow.
Move E43 on the left side of the frame. Resize and add a drop shadow.
On top of the stack of books, place E46 and flip horizontally. Resize and add a drop shadow.
Behind the binoculars on top of the books, place E99. Resize and add a drop shadow.
Move E95 in front of the stack of books. Resize and add a drop shadow.
Behind the stack of books, place E121. Rotate the leaves so they lay vertically on the frame. Resize and add a drop shadow.
On the right side of the tube, place E150. Place it lower than her arm then resize and add a drop shadow.
On top of E150, move E148 and make it smaller. Place it at the bottom and to the left of the first element. Resize and add a drop shadow.
Move E142 on top of both of those and make it bigger than the second element. Resize and add a drop shadow.
Behind all three gears and in front of the tube, place E139. Have it overlap on the tube and meet the bottom of E142. Resize and add a drop shadow.
In front of the gears on the right place E100. Flip horizontally and resize. Add a drop shadow.
Move E92 in front of E100 and resize. Have it off to the left a little and add a drop shadow.
Behind the mask, place E94 so they stick out the left side of the mask. Resize and add a drop shadow.
On the right side of the mask and behind it, place E48. Resize and add a drop shadow.
Move E93 behind the mask so it sticks out above it. Resize and add a drop shadow.
Place E65 behind the goggles. Resize and add a drop shadow.
Move E134 behind everything but on top of the tube and frame. Have the bow visible in the middle of the frame. Resize and add a drop shadow.
Mask
Open a new canvas, size 600x600.
Open P7 and resize it to 600x600 then move it on the canvas.
Open the mask and place it on top of the paper.
Remove the white background.
Move behind the tag and stretch so it is evenly spread around the frame.
Make sure nothing hangs off the edge of the canvas.
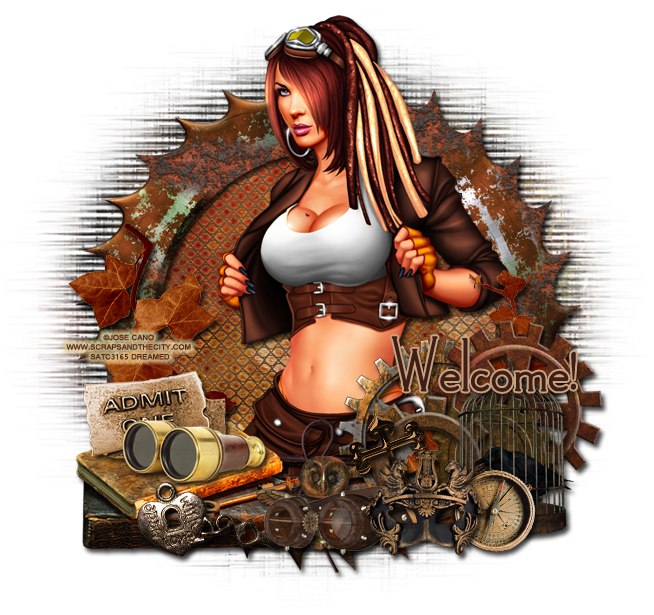
Name
Font is Landsdowne.
Main Color is #3d1f17.
The stroke, size 2, is color #c8a17f.
Add a drop shadow.
Add your tagger mark and copyright information.
Crop off any excess canvas.
Save as a .psd & .png.
Here are free snags for you!

Thanks for coming by!
