
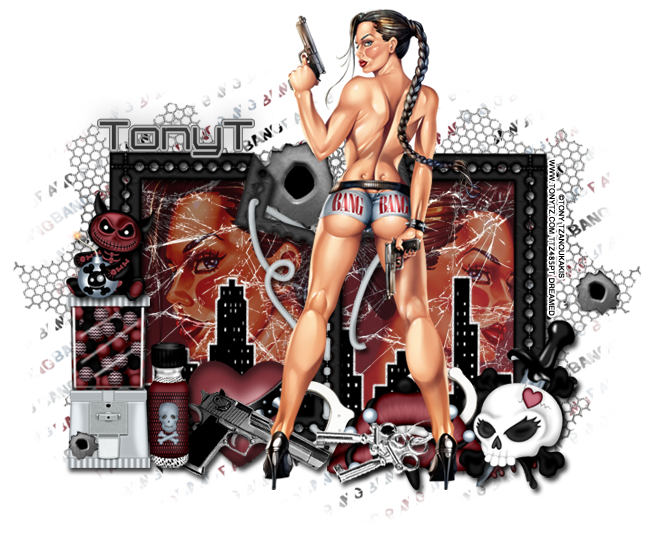
*Coming Soon!* Bang Bang by Tony T PTU tutorial!
With the matching kit by Wicked Creationz.
**This tutorial was written by me and any resemblance is purely coincidental. It is written for those with a working knowledge of Photoshop.**
Supplies
Font
from FontSpace
Mask
from Scrap It Studio
Scrap Kit
by Wicked Creationz
Tube
*You must obtain a license to use this tube.*
Elements
1
2
5
8
12
14
16
17
19
20
21
23
24
25
29
Papers
8
11
Let's begin :)
Open a new canvas, size 650x650.
Move ele29 on to the canvas. Resize & add a drop shadow.
Move pp11 behind the frame and erase anything sticking out including the dots around the frame.
Place the tube, full size, behind the frame on the left and create a clipping mask to the paper. Change the tube to Hard Light and drop the fill to 50%. Duplicate the tube close up and flip horizontally. Move to the right side of the frame and create a clipping mask.
Now take the full size of the tube and move her in front of the frame. Resize her so her chest is taller than the frame. Add a drop shadow.
Place ele20 between the frame and the tubes. Resize and flip horizontally. Add a drop shadow.
Behind ele20 and on top of the tubes, place ele25. Resize a little. Have one copy on each frame.
In front of the frame, place ele8 on the left. Resize & add a drop shadow.
On top of ele8, place ele12. Resize & add a drop shadow.
Next to ele8, place 5. Resize & add a drop shadow.
Behind ele5, place ele16. Resize & add a drop shadow.
On top of ele16, place ele23. Resize & add a drop shadow. Move it behind ele5 just a little and also behind the tube.
On the right side of the frame, place ele1. Resize & add a drop shadow.
Behind ele1, place ele2. Flip horizontally and resize. Add a drop shadow.
To the left and behind the skull, place ele14. Resize & add a drop shadow.
Behind the lips and heart, place ele24. Flip vertically then resize & add a drop shadow.
On top of the lips place ele17. Have them slightly horizontally and point to the left. Resize & add a drop shadow. Make sure the tube is the top layer.
Behind the frame, place ele19. Resize a little and move it to the left side. Duplicate it and move it to the other side.
Move ele21 behind the frame where it opens in the middle. Resize a little.
Take a copy of ele21 and resize smaller. Move on to ele8.
Move another copy of ele21 and make it smaller than the first copy, but bigger than the second. Move it over to the right of the mask on the wire.
Name
Font is Schutzgitterhaus-Grotesk-NBP.
Main color is black.
Add a drop shadow.
Change the contour to Gaussian and change the range to 23%.
Change the color overlay to #b7b7b7 and the opacity to 53%.
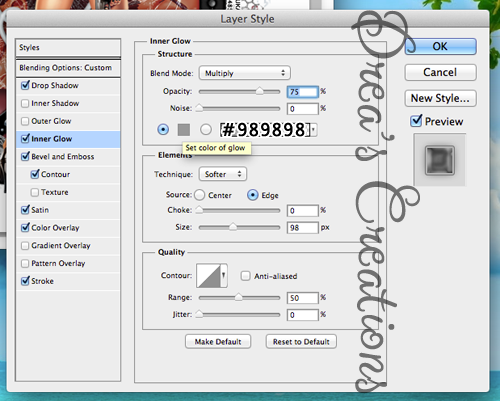
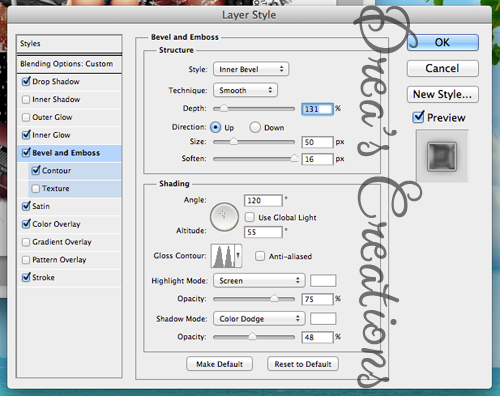
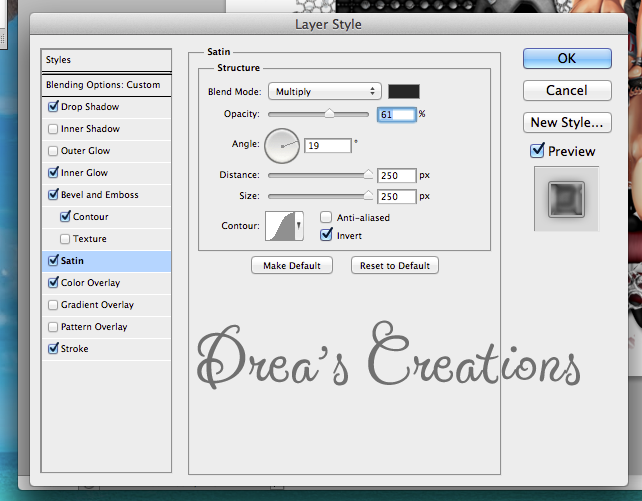
Follow the images below to add the rest of the settings.

Mask
Open a new canvas, size 600x600.
Open P8 and resize to 600x600. Place on top of the canvas.
Open SIS_MASK17 and move on top of the paper.
Remove the white background and place the mask behind the tag.
Add your tagger mark and copyright information.
Crop off any extra canvas.
Save as a .psd & .png.
Free Snags!

Thanks for coming by!
