Showing posts with label Toes In The Sand. Show all posts

Monday, April 29, 2013

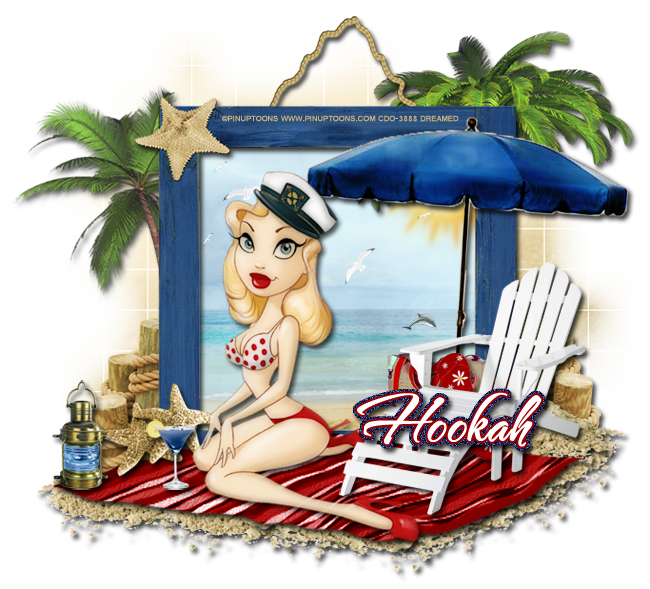
PTU "Toes In The Sand 2" Tutorial

My second PTU Tutorial using Jackie's Jewels Toes In The Sand kit and I used artwork by PinUp Toons, which you can find at CDO.

**This tutorial was written by me and any resemblance is purely coincidental. It is written for those with a working knowledge of Photoshop.**

Tools

Tube
PinUp Toon 69-2 
You can find it here.
*You must obtain a license to use it.*

Mask
WSL_Mask84
You can find it here.

Font
TheNautiGal
You can find it here.

Elements
BeachBag
Chair1
Cocktail2
Dolphin
FlipFlops
FlyingGulls
Frame4
Lantern2
PalmTree1
PalmTree2
Sandpile
Starfish2
Sun
Towel2
Umbrella
WoodElement

Papers
Paper9
Paper14

Ready? Let's get started!

Open a new canvas, 650x650.

Move Frame4 on to the canvas. Resize and add a drop shadow. 

Move Paper9 behind the frame. Resize to the size of the open part of the frame. There should not be any extra paper hanging outside the frame.

Now put the FlyingGulls on top of Paper9. Make the gulls smaller for a sense of depth.
Do the same thing with the Dolphin. You can erase tiny parts of the Dolphin so it looks like it's coming out of the water.

Move the Sun to the upper right hand corner of the frame. Rotate it so the lighter side of the Sun is showing through. Erase extras hanging outside the frame.

Move the WoodElement to the left side of the frame. Resize so it is no taller than the middle of the frame. Add a drop shadow. Duplicate the WoodElement, flip horizontally, and move to the right side of the frame.

Place Towel2 in front of the frame. Resize and add a drop shadow. 

Place Chair1 on top of the towel on the right hand side. The back of the chair can stick outside the back of the towel. 

Place a SandPile behind the chair and in front of the WoodElement. Make it so it just meets the top of the rope on the smaller pole. Add a drop shadow. 

Place the BeachBag behind the chair so it peeks through the arm of the chair. Add a drop shadow.
Move the FlipFlops in fron the BeachBag as well. Add a drop shadow.

Move Starfish2 in front of the lower left hand corner of the frame and WoodElement. Resize and add a drop shadow.

Move Lantern2 to the front left corner of the towel. Add a drop shadow.

Let's place the tube on the towel. If using the same one, move her in front of everything but the chair. Add a drop shadow. 

Place Cocktail2 in front of the tube, resize, and add a drop shadow.

Move the Umbrella behind the chair. Have it stick out over the chair. Add a drop shadow.

Move PalmTree2 behind the frame on the right. I can stick out above the frame. Add a drop shadow.
Move PalmTree1 behind the frame on the left. Make it smaller the than the other one and so it sticks over the WoodElement.

Now take the SandPile again and place it under the towel. It will take a few duplicates of the SandPile to make it sandy under the towel. Add a drop shadow to each pile.

Open the mask, a new canvas 600x600, and Paper14. Move the paper on to the canvas and the mask on top. Remove the white background and place the mask at the lowest layer. I erased parts of the mask that stuck out at the bottom.

Let's do the name now.
The name can be white with a red, #990000, stroke 2.
Now expand the pixels of the name by 4 and make it blue. You can choose the shade of blue that works for you. Add noise to the blue layer and then a drop shadow. Place it over the chair.

Crop off any extras and make sure not to cut off any parts of the tag!

Add your copyright information and tagger mark.
Save as .psd and .png.

I hope you enjoyed this one as well! I love this kit, as you can tell :)

Monday, April 22, 2013

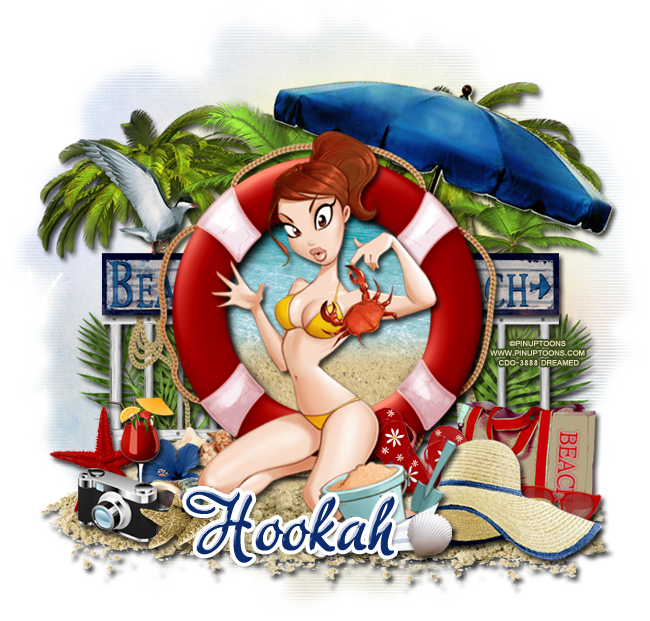
PTU "Toes In The Sand" Tutorial

PTU tutorial using Jackie's Jewels Toes In The Sand kit and I used the cute artwork of Pinup Toons, which you can find at CDO.


**This tutorial was written by me and any resemblance is purely coincidental. It is written for those with a working knowledge of Photoshop.**

Tools

Tube
PinUp Toon 41-3
You can find it here.
*You must obtain a license to use it.*

Mask
K'Lani's Designs Mask, which you can find here.

Font
akaDora 
You can find it on FontSpace.

Elements
AsstShells2
BeachBag
Camera
Cocktail1
Fence
FlipFlops
Flower4
Gull
Lifesaver
Ocean
Palms
PalmTree1
PalmTree2
PaperBoat
Sand
Sandpile
Shell1
Shell2
Shell3
Sign2
Starfish1
Starfish2
Sunglasses2
SunHat
Umbrella

Paper
Paper1

Alright, let's get started!
Open a new canvas, size 650x650.

Move the lifesaver to the blank canvas. Put in the middle. I made it a little smaller than it originally is.
Add a drop shadow.

Move the ocean behind the lifesaver and make the top of the ocean meet the bottom of the open circle. Erase parts of the ocean that stick outside the lifesaver.

Take the sand and move it behind the lifesaver and ocean. Erase any parts of the sand outside the lifesaver.

Move the fence behind the lifesaver so the part that sticks out shows the rope on the left side. Resize it so it the top of the fence meets the middle of the lifesaver. Add a drop shadow and then duplicate the fence. 
Move the fence duplicate to the right side of the lifesaver.

Now move your tube in front of the lifesaver. Have her head/hair just stick above the lifesaver and add a drop shadow.

Move the sand behind the fence and under the tube so she is sitting on it. The bottom of the sand should meet the very bottom of the tube. 

Move the palm behind the fence on the left hand side. Make it smaller and have two copies on each side to cover the back of the fence. Move a third copy on the left side only. Move it in the middle of the two palms and move it down a little to cover the empty space. Add a drop shadow to each palm.

Move PalmTree2 behind the palms on the right side. Have it stick out above the lifesaver just a little. Add a drop shadow. Duplicate the PalmTree and move it to the other side and flip horizontally. Make it shorter than the other group.

Now open PalmTree1. Move it on the right side and in front of PalmTree2. Make it smaller and below the PalmTree2. Add a drop shadow. Duplicate PalmTree1 and move it to the right of the PalmTree2 and behind the lifesaver. 

Now move Sign2 so it sits on the fence to the left of the lifesaver. It should stop at the 'A'. Add a drop shadow. Duplicate the sign and move it to the other side. Now it should show the 'CH'.

Move the Gull and have it sit on top of the sign on the left hand side. The wing tips should meet the palm tree branch. Add a drop shadow.

Move the Umbrella behind the lifesaver. Flip horizontally and add a drop shadow. Erase the pole if it sticks out. 

Now take the sandpile and move it on the left hand side. Move it behind the tube. Have the tip of the sandpile meet the bottom bar of the fence. It can stick outside the fence a little. Add a drop shadow. Duplicate the sandpile, flip horizontally, and move it to the right side of the tube. 
You should have a little space left in the middle so duplicate one of the sandpiles, make it smaller and move it to the middle under the tube. 

Move the BeachBag on top of the sandpile on the right side. The bag should stick out just about the bottom bar of the fence. Add a drop shadow.

Move the flipflops behind the tube and in front of the beachbag. Make it smaller and add a drop shadow.

Move the sandhat in front of the flipflops and beachbag. Add a drops shadow.

Move the sunglasses2 behind the sandhat and in front of the bag. Add a drop shadow.

Move the paperboat in front of the sand bucket (if you used the same tube as me). Add a drop shadow.

Move shell1 to the left side of the boat. Flip vertically and add a drop shadow.
Move shell2 to the right side of the paperboat. Add a drop shadow.

Move the camera to the left hand corner toward the edge. Add a drop shadow.

Move cocktail1 behind the camera and add a drop shadow.

Move starfish1 behind the camera and cocktail. Add a drop shadow. 

Move shell3 behind the camera and the tube. Resize and add a drop shadow.

Move flower4 behind the cocktail. Add a drop shadow.

Move asstshells behind flower4 and the tube. Add a drop shadow.

Move starfish2 in front of the camera and tube. Resize and add a drop shadow.

Save as a .psd if you haven't already.

Let's add the mask.

Open a blank canvas, size 600x600.
Open KLD_Maskvac from K'Lani's Designs.
Open Paper1 and resize to 600x600.
Move the paper on to the blank canvas and then move the mask on top of the paper.
Remove the white background.

Move the mask behind the tag and resize so it shows a little outside the tag. Make sure it doesn't stick outside the canvas.

Crop off any blank space. Don't cut off any parts of the tag!

For the font:
The font is akaDora.
The color is dark blue - #0a2c6e

Add a white stroke, size 4 and add a drop shadow.
Add a white bevel as well.

Add your copyright information and tagger mark.

Save as a .psd and .png.

We're done!

I hope you liked the outcome. I loved working with this kit and it's perfect for your arsenal of summer kits :)

New Name, New Blog!

Hello friends! I have decided to change my designer name to reflect that I make kits more than I do CT work. I made a new blog so the old links for this blog will remain active for future visits. Please visit me at Drea's Designs ! I'll see you there!
Related Posts Plugin for WordPress, Blogger...