
PTU Tutorial with Goddess2 from Scrappin Krazy Designs.

You can find this beautiful kit here!
*This tutorial was written for those with a working knowledge of Photoshop*
Tools
Font used:Sail
Grab it here.
Mask used:
Mask 20 from Moonbeams and Spiderwebs.
Grab it here.
Tube used:
Anita by Alex Prihodko from PicsforDesign
Grab it here.
*You must purchase this tube and obtain a license from PicsforDesign to use it.*
Elements used:
Bow1
Frame2
Glitter2
Heartstring
Ribbon1
Sparkle2
Sparkle3
Scrunchedribbon
Spiralgem
String2
Twistedclip
Wire1
Papers used:
P11
P15
Filters used:
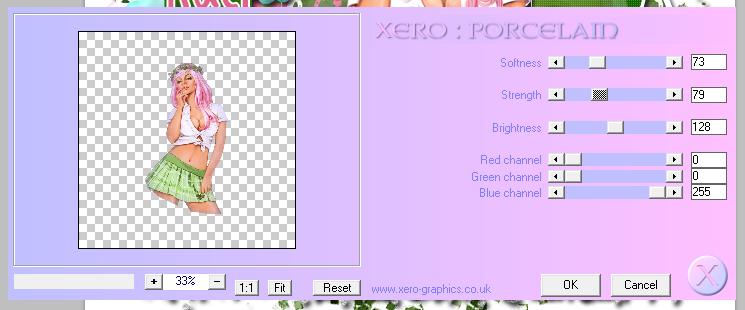
Xero Porcelain
Xero Radiance
Ready? Let's Go!
Open a new canvas size 650x650
Move frame2 over to the canvas
Resize the frame & add a drop shadow
Move Paper15 behind the frame
Resize and erase any extras sticking outside of the frame
Move Sparkle3 between the frame and paper15
I duplicated Sparkle3 a few times and rotated the new ones to fill in the background behind the tube
Merge the Sparkle3 layers and erase any extras that stick outside the frame (Adding a 50% gray layer will make the extra Sparkle3 show up so it can easily be erased)
Drag tube between the frame and the Sparkle3 layers
Add a drop shadow and erase any parts of the tube that stick outside the frame
Here are the numbers I used for the filters
Porcelain

Radiance
Move Spiralgem to the bottom right hand corner of the frame
Rotate and add a drop shadow
Move Ribbon1 and place it along the bottom of the frame
Resize and add a drop shadow
Move Wire1 and place it behind the Spiralgem and Ribbon1
Resize and add a drop shadow
Move Twistedclip and put it over the bottom left hand corner of the frame
Move it below Wire1, resize, and add a drop shadow
Move String2 and place it on top of the Twistedclip
Resize and add a drop shadow
Move Scrunchedribbon and place it on top of String2
Resize and add a drop shadow
Move Bow1 and place it on top of Scrunchedribbon
Resize and add a drop shadow
Open Heartstring and place it in the top left hand corner of the frame
Resize and add a drop shadow
Move Sparkle2 over Spiralgem
Resize it so it gives that certain gem sparkle
Move Glitter2 and place it below the frame on both bottom corners and resize
Open a new canvas, size 600x600
Open Mask 20 and resize to 600x600, if necessary
Open Paper11 and resize to 600x600
Move Paper11 onto new canvas and then move Mask 20 on top of Paper11 on the new canvas
Remove the background so you are just left with the mask
*If you do not know how to remove the background then please check out this easy to follow video here*
Now move the mask behind paper15 and resize to fit
Make sure no parts of the mask hang off the canvas
For the font:
I used Sail in a black style with a gold outline, expanded to size 4
Add a drop shadow to the gold layer
Add your copyright information and tagger mark
Crop to remove any extra canvas and save your template as .psd and your new tag in .png
I hope you enjoyed my Goddess2 PTU Tutorial!

No comments:
Post a Comment