*Coming Soon!*
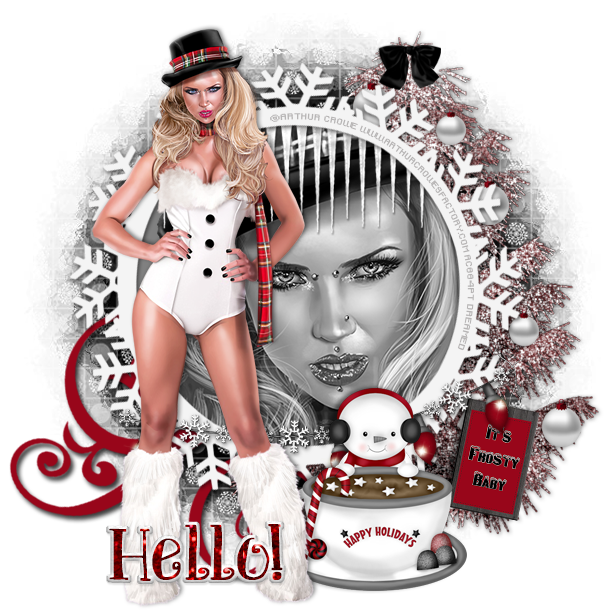
PTU tutorial using Frosty Baby by Arthur Crowe!
Matching kit made by Rissa's Designs!
You can purchase them both here!
**This tutorial was written by me and any resemblance is purely coincidental. It is written for those with a working knowledge of Photoshop.**
Supplies
Font
Mask
Scrap Kit
Tube
*You must obtain a license to use this tube.*
Elements
7
14
15
18
20
23
26
27
30
Papers
11
Let's start!
Open a new canvas, size 650x650.
Move ele 14 on the canvas. Resize and add a drop shadow.
Add a new layer below the frame and fill it with #808080.
Erase anything of the gray layer that sticks outside the frame.
Place the close up of the tube over the gray layer and create a clipping mask.
Change the close up tube to luminosity.
Behind the frame, place ele7 at the top of the frame. Resize and add a drop shadow.
Place the full size tube in front of the frame on the left. Resize and add a drop shadow.
Move the close up layer around so most of her face is visible.
Place ele15 behind the frame on the right. Resize and add a drop shadow.
Use ele26 to decorate the tree. Use varying sizes. Add a drop shadow to each ornament.
Use ele30 as the tree topper. Resize and add a drop shadow.
In front of the frame at the bottom, place ele27 behind the tube and to the right. Resize and add a drop shadow.
On top of the frame, place ele18. Resize and add a drop shadow. Lay it at an angle so it covers the lower part of the frame and on to the tree a little. Make sure it doesn't cover the face of the close up.
On top of the tree but below the lights, place ele20. Resize and add a drop shadow.
Behind the frame in the lower left hand corner, place ele23. Rotate, resize, and add a drop shadow.
Name
Main color is red with glitter added.
Select the pixels of the name and expand by 3.
Add a new layer below the name. Fill with white.
Add a bevel and a drop shadow.
Mask
Open a new canvas, size 600x600.
Open paper 11 and resize to 600x600. Place on top of the canvas.
Open the mask and move on top of the paper.
Remove the white background and place the mask behind the tag.
Make it evenly stretched on all sides.
Add your tagger mark and copyright information.
Crop off any extra canvas.
Save as a .psd & .png.
Free snags!
Thank you for coming by!


