
**Coming Soon!**
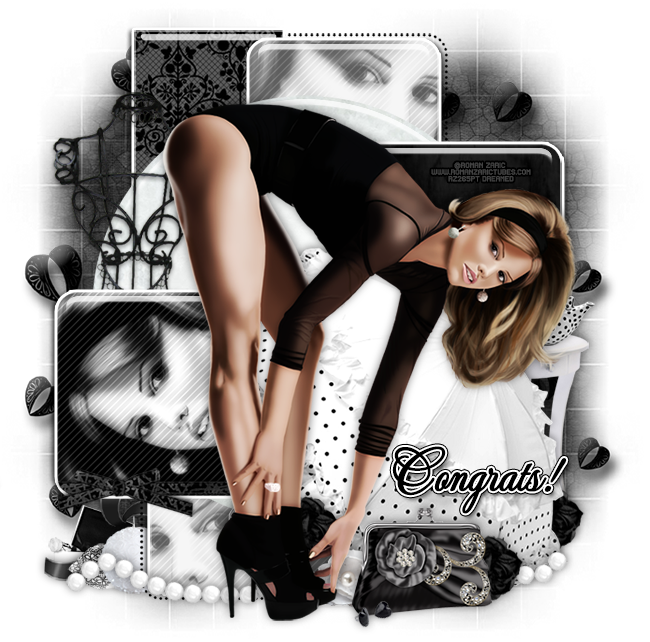
PTU tutorial using Sasha by Roman Zaric with the matching kit by Kizzed by Kelz!

**This tutorial was written by me and any resemblance is purely coincidental. It is written for those with a working knowledge of Photoshop.**
Scrap Kit
Template
Tube
*You must obtain a license to use this tube.*
Elements
3
7
14
15
16
17
18
19
20
23
24
28
29
30
34
Papers
5
8
9
10
Let's start!
Open a new canvas, size 700x700.
Open the template. Unclick layers 10-13 and Raster1. Move the visible layers onto the canvas. Resize if necessary.
To each layer of the template besides 1 & 2, add a bevel, drop shadow, and white stroke.
Place paper 5 over layers 3 & 4 and create a clipping mask to each layer.
Place paper 9 over layer 7 and create a clipping mask. Resize so you can see the outer dark border around the circle.
Place paper 8 over layer 8 and resize then create a clipping mask.
Place the tube in front of the template. Resize and add a drop shadow.
Take a close up of the tube and place it over layer 5 and 6 so the face opposite directions. Change both to luminosity and drop the opacity to 60%.
Take another close up and place it over layer 9. Have her facing the opposite direction of the tube and change it to luminosity.
Behind and around the template place a few copies of 34. Make sure none hang too far away from template.
Behind layer 9 place 14. Resize and add a drop shadow.
At the bottom of the tag and to the left of layer 6 place 23. Resize and add a drop shadow.
Behind and to the left of 23 place 29. Lay it horizontally, resize, and add a drop shadow.
Behind 29 place 16. Resize and add a drop shadow.
Behind the ribbon place 3. Resize and add a drop shadow.
Behind the tube on the right place 17. Resize and add a drop shadow.
Behind the umbrella on the right place 15 and flip horizontally. Resize and add a drop shadow.
On top of the table place 18. Resize and add a drop shadow.
In front of the umbrella and to the right of the tube place 7. Resize and add a drop shadow.
Behind the purse and to the right place 28. Resize and add a drop shadow.
Duplicate 28 and place it behind the umbrella on the right. Resize and add a drop shadow.
Behind the tube's feet and purse place 30. Resize and add a drop shadow.
Behind 30 and the tube, place another copy of 28. Resize and add a drop shadow.
Between the umbrella and the elements in front of it place 19. Lay it horizontally, resize, and add a drop shadow.
In front of the purse on the left place 20. Resize and add a drop shadow.
On the bottom of layer 9 place 24. Resize and erase parts so it appears that the ribbon is tied to the layer. Add a drop shadow.
Add your tagger mark and copyright information.
Crop off any extra canvas.
Save as a .psd & .png.
Free snags!
Thank you for coming by!
