
**This tutorial was written for those with a working knowledge of Photoshop.**
Tools
I made a mask for this tutorial so please click on the image of the mask below, right click, and save!
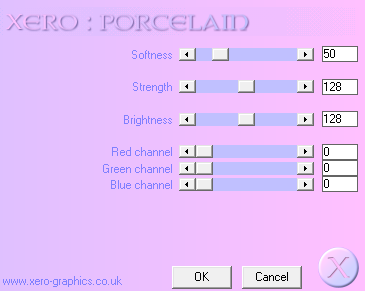
Filter
Xero Porcelain
Font
New Garden
You can find it on dafont
Tube
60-1-PinupToons
You can find it here.
*You must purchase this tube and obtain a license to use it.*
Elements
Basket
Bunny2
Butterflies
Fence
Flowers1
Flower3
Flower5
Flower7
Flower8
FlowerPot1
Flowers
GardenPails
Grass
Grass2
LeafBundle
Rock&Grass
Rope
Snail
Sun
Paper
P1
Let's go!
Open a new canvas, size 650x650.
Move the fence on the canvas and resize it.
Add a drop shadow.
Move Flower1 behind the fence. Add a drop shadow.
Move Grass behind the flowers. Resize it and place two copies on the left and right side. Then add another copy of the grass, make a little smaller and fill in the empty space in the middle. Add a drop shadow to each grass layer.
Move Butterflies just above the fence layer. Resize and do not add a drop shadow unless you prefer it.
Move Grass2 on top of the fence and resize. I added a few copies and resized. Add a drop shadow to each layer.
Move Basket to the left side of the fence and resize. Add a drop shadow.
Move Flowers on top of Basket. I erased a little of the flowers so parts of the Basket stood out. Add a drop shadow.
To make the flower pot, open FlowerPot1, Flower3, 5, & 7, and leaf bundle. I kept everything the original size to make it easier to see what you're doing. Move the leaf bundle on top of the pot and erase parts hanging out to give the illusion it's inside the pot. Repeat the process with the flowers, flipping and resizing to give it that potted look. Add drop shadows to everything but the leaf bundle. Place it just right of the middle of the fence above the Grass.
Move GardenPails above the flower pot you just made but behind the basket of flowers. Resize and add a drop shadow.
Place your tube so we can place the other elements around her. Add a drop shadow.
Add these settings to the tube.
Move Bunny2 above the tube and add a drop shadow.
You can add the same settings for Xero Porcelain to the bunny, if you like.
Move Rope behind the tube but in front of the grass and add a drop shadow.
Move Rock&Grass behind the tube on the right side of the fence. Add a drop shadow.
Move Flower 5 and Flower 8 behind the Rock&Grass, resize, and add a drop shadow.
Move Snail in front of the GardenPails, resize, and add a drop shadow.
Open a new canvas, size 600x600.
Open P1 and resize the width to 600 and that will make the height 587. Move it onto the canvas.
Move DCMask_21 onto the canvas.

Crop out the extra mask and then remove the white background. Place it as the lowest layer. Resize so it is only sticking out of the top as your sky.
Move Sun on top of the mask, resize, and place behind the tube.
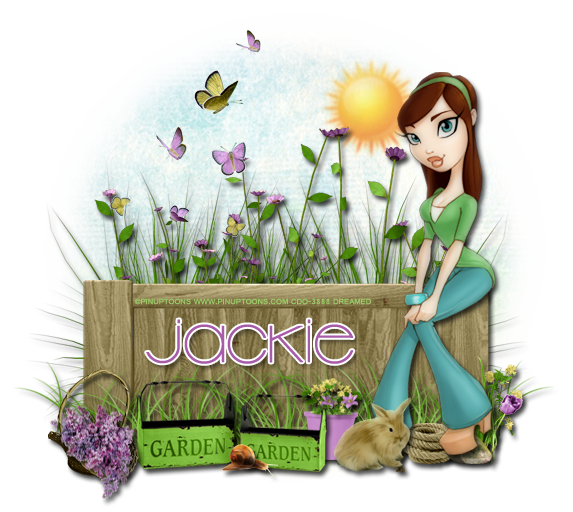
For the name add a drop shadow, and white stroke, size 2. I used #a65ca9 for the color of the name.
Add your tagger mark and copyright information.
Crop off any extras.
Save as .psd and .png.
This kit is so much fun! I know you will like it :)
No comments:
Post a Comment