Showing posts with label Scrappin Krazy Designs. Show all posts

Wednesday, August 28, 2013

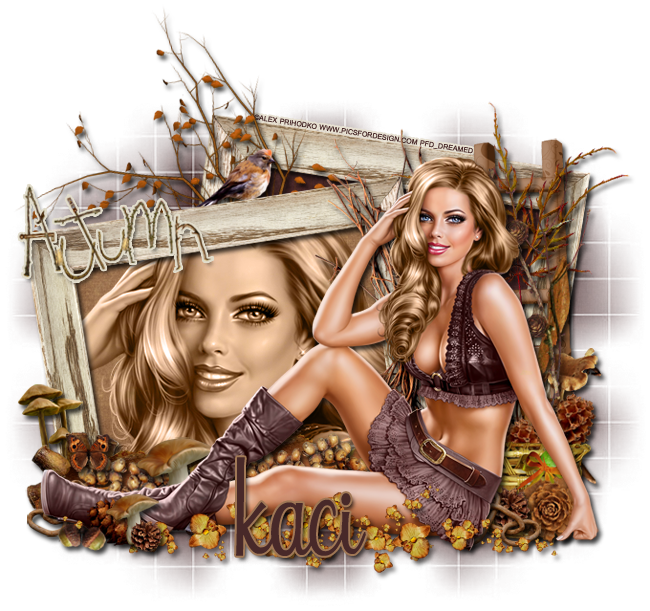
PTU Tutorial - Falling For Autumn

PTU tutorial using Falling For Autumn by Scrappin Krazy Designs!
Check out her blog HERE to see where it's on sale.
**This tutorial was written by me and any resemblance is purely coincidental. It is written for those with a working knowledge of Photoshop.**

Supplies

Font

Scrap Kit

Tube
*You must obtain a license to use this tube.*

Elements
4
5
6
7
8
9
10
11
13
28
30
35
40
45
51
54
58
62
63
64
65
67
69
75
77
Papers
6
8

Let's start!
Open a new canvas, size 650x650.
Place 58 on the canvas and resize. Rotate a little to the left. Duplicate the frame and place it behind the first one. Rotate it the opposite way. Add a drop shadow to both.
Place paper 6 behind the one in the back and paper8 behind the frame in the front. Erase anything that sticks out.
Place the tube in front of the frames. Resize and add a drop shadow.
Take a close up of the tube and place it between the paper and frame in front. Resize and change her to Luminosity.
Place 63 over the frame in the front and resize. Add a stroke, size 2, in #e1dccb.
Move 40 between the frames on the left side. Resize and add a drop shadow.
Place 77 on top of the front frame in front of the tree. Resize and add a drop shadow.
Take 11 and flip it so it's vertical and place it along the length of the frame in front behind the tube. Resize and add a drop shadow.
Now place 30 behind the tube and to the right. Resize and add a drop shadow.
Behind the basket, place 75 and flip horizontally.
Take 10, 16, and 62 and flip them vertically along the ladder . Arrange them like I did. Resize and add a drop shadow.
Place 7 and 64 between the elements just placed and the basket. Duplicate 7 and flip it the opposite way. Resize and add a drop shadow.
 Take elements 5, 13, and 54 and place one of each in front of the basket, but behind the tube. Place the chain links in front of the pine cone then the pine cone and then the flower behind the pinecone. Resize each and add a drop shadow.
Between the tube and the front frame, place 35. Resize and add a drop shadow. Duplicate so it covers the length behind the tube.
Place 45 on top of the wood. Resize and add a drop shadow. Duplicate and move along the frame the same way as the wood.
In front of the tube's foot place these elements in a cluster. Take 4, 5, 65, & 69. Place the mushroom between the two pine cones and place the acorns to the left of the cluster. Resize and add a drop shadow.
Duplicate the chain links from before and move then behind the tube's foot so they stick out a little.
Take 8 & 67 and place them between the wood and frame on the left side. Resize and add a drop shadow. Move the mushrooms behind 8.
Take 69 again and move it behind the tube's boots in front of 45. Resize and add a drop shadow.
Place 51 on top of 8. Resize and add a drop shadow.
Now take 28 and place it in front of the tube across the front of her. You made need to use a couple of copies to cover empty spaces. Resize and add a light drop shadow.
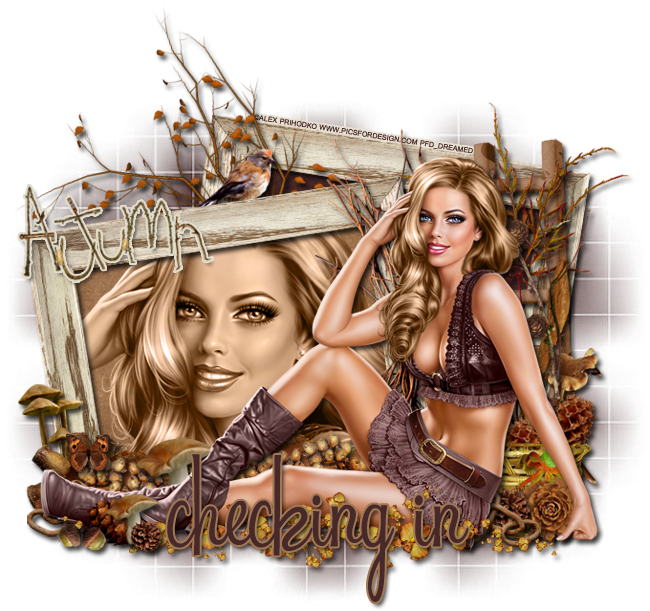

 Name
Main color is #482929.
Add a stroke, size 2, in #a07856.
Add a drop shadow.

Mask
Open a new canvas, size 600x600.
Open p7 and resize to 600x600. Place on top of the canvas.
Open the mask and move on top of the paper.
Remove the white background and place the mask behind the tag. 
Make it evenly stretched on all sides.

Add your tagger mark and copyright information.
Crop off any extra canvas.
Save as a .psd & .png.

Here are free snags!

Sunday, August 25, 2013

PTU Tutorial - Autumn's Song

PTU tutorial using Autumn's Song by Scrappin Krazy Designs!
You can check it out on her blog HERE!
**This tutorial was written by me and any resemblance is purely coincidental. It is written for those with a working knowledge of Photoshop.**

Supplies

Font

Mask

Scrap Kit

Tube
*You must obtain a license to use this tube.*

Elements
11
12
16
18
19
20
21
22
24
25
27
28
30
43
45
47
48

Papers
 4
11

Let's start!
Open a new canvas, size 650x650.
Place ele21 on to the canvas and resize. Add a drop shadow.
Place paper 11 behind the frame and erase anything outside of it.
Place the tube in front of the frame on the left and resize. Add a drop shadow.
Place the close up of the tube behind the window on the right. Resize a little and create a clipping mask to the paper.
Duplicate the paper and place it on top of the tube. Create a clipping mask so the two papers and close up are not sticking outside the frame.
Change the close up to Luminosity and drop the fill to 79%.
Change the top paper to Soft Light and the bottom paper to Luminosity.
Place ele22 behind the tube and on top of the frame. Place it over the left side of the frame.
Place ele11 on the right corner of the frame. Resize and add a drop shadow.
Place ele16 in front of the pumpkin. Resize and add a drop shadow.
Move ele43 behind the pumpkin. Resize and add a drop shadow.
Place ele18 behind the shrooms. Resize and add a drop shadow.
Place ele27 in front of the pumpkin, but behind the leaves. Resize and add a drop shadow.
To the left of the pumpkin, place ele47. Resize and add a drop shadow.
Behind the log, place ele16 again. Resize and add a drop shadow. Duplicate two more times and cover the back of the log along the length of the frame.
At the edge of the log and behind it, next to the pumpkin, place ele45. Resize and add a drop shadow. Duplicate the pinecone and move it to the right a little and rotate to the right.
On the left side of the frame, place ele19. Resize and add a drop shadow.
In front of the basket of shrooms, place a couple of copies of ele16. Resize and add a drop shadow.
On the left hand corner of the basket, place ele20. Resize and add a drop shadow.
Behind the basket on the left, place ele43. Resize and add a drop shadow.
Between the shrooms and pinecones, place ele28. Flip horizontally and resize a little. Erase anything that sticks out and add a drop shadow.
Between the basket and log, place ele30. Resize and add a drop shadow.
In front of the log and wood, place ele48. Resize and add a drop shadow.
In front of the shroom, place ele20 and flip horizontally. Resize and add a drop shadow.
Place ele12 in front of the shroom and a little to the left. Resize and add a drop shadow.
Between the animal and pinecones, place ele24. Resize and add a drop shadow.
To the right and behind the animal, place ele25. Make it sit behind the leaves in front of the pumpkin. Resize and add a drop shadow.

 Name
Main color is #4e2417.
Add a stroke, size 2, in #dad09d.
Add a bevel, change the gloss contour to Cone-Inverted, and change the shadow to #61321e.
Select the pixels of the name and expand by 3.
Create a new layer under the name and fill with #340f0c.
Add a drop shadow to the lower layer.

Mask
Open a new canvas, size 600x600.
Open p4 and resize to 600x600. Place on top of the canvas.
Open the mask and move on top of the paper.
Remove the white background and place the mask behind the tag. 
Make it evenly stretched on all sides.

Add your tagger mark and copyright information.
Crop off any extra canvas.
Save as a .psd & .png.

Thank you for coming by!

Friday, July 19, 2013

FTU Tutorial with EMOlution 19

FTU tutorial using Scrappin Krazy Designs part in the "Inspired by Verymany Blog Train".
She based her kit on EMOlution 19.
**This tutorial was written by me and any resemblance is purely coincidental. It is written for those with a working knowledge of Photoshop.**

Supplies

Font

Mask

Scrap Kit
Blog Train: Inspired by Verymany
EMOlution 19
by Scrappin Krazy Designs

Tube
*You must obtain a license to use this tube.*

Elements
07
14
15
25
30
34
36
37
40
41
43
45
51
52
53
60

Papers
06
10

Let's start!

Open a new canvas, size 650x650.
Move ele52 on to the canvas. Resize & add a drop shadow.

Move the tube in front of the frame. Resize & add a drop shadow.
Behind the frame, place p06. Resize then erase parts hanging outside the frame.

Behind the tube and in front of the frame, place ele45. Rotate and resize a little. Add a drop shadow in #a1447b.

Place ele43 behind the frame. Resize & add a light drop shadow.
On top of ele43 add ele60. Use a few copies of the diamond scatter so they are scattered around the frame. Resize & add a drop shadow.

In front of the tube place ele14. Move it to the left corner of the frame. Resize & add a drop shadow.

Behind ele14, place ele30. Resize & add a drop shadow.
Move a small copy of ele41 in front of the crown where it meets the little bottle. Add a drop shadow. Duplicate the small heart and move it to where the crown and cupcake meet.

In front of the crown and to the right a little, move ele07. Resize & add a drop shadow.
Place ele53 behind the cupcake and to the right. Flip horizontally then resize & add a drop shadow.

Between the cupcake and the heart charm, place ele25. Resize & add a drop shadow. Move it around so the lips are hidden behind the cupcake but the wings are at least showing on top of ele53.

Next to ele53, move ele40. Flip horizontally and rotate so it lays almost flat. Move it in the right corner.
Behind the hat, place ele34. Resize & add a drop shadow.
Between the hat and the boot, place ele37. Rotate so the openings face to the right vertically. Resize & add a drop shadow.

In front of everything, move ele36. Resize so the edges hang off the sides by just a little. Add a drop shadow.

Move ele15 in front of the tube and behind the elements. Erase parts of the bow that hang over her hair. Resize & add a drop shadow.

Use ele51 to add a few sparkles around the frame and elements. Use varying sizes.

 Name
Font is Rock It.
Main color is #9c3673.
Add a stroke, size 3, in black and a drop shadow.
Bevel: change the gloss contour to Cove-Deep.

Mask
Open a new canvas, size 650x650.
Open p10 and resize to 650x650. Place on top of the canvas.
Open Vix_Mask404 and move on top of the paper.
Remove the white background and place the mask behind the tag. Make it evenly stretched on all sides.

Add your tagger mark and copyright information.
Crop off any extra canvas.
Save as a .psd & .png.

Thank you for coming by!

Tuesday, July 9, 2013

PTU Tutorial - Rawkin Goth

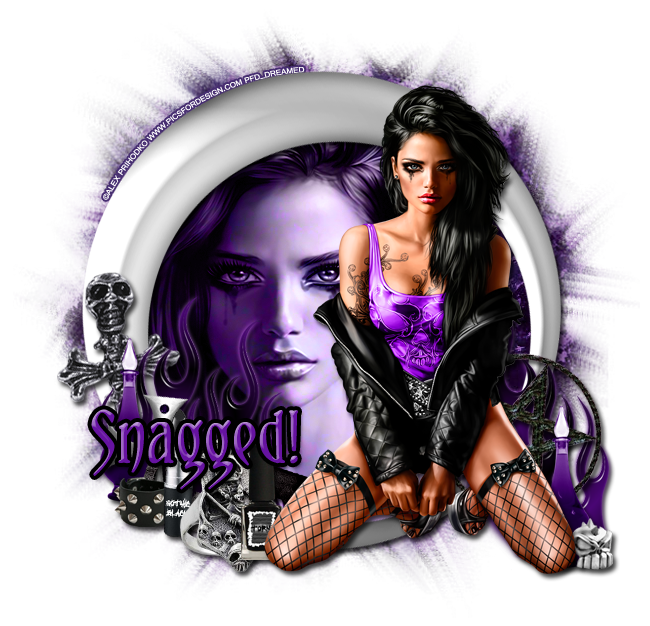
I have a new PTU tutorial using Rawkin Goth by Scrappin Krazy Designs! 
I matched it with the artwork of Alex Prihodko.

**This tutorial was written by me and any resemblance is purely coincidental. It is written for those with a working knowledge of Photoshop.**

Supplies

Font

Mask

Scrap Kit

Tube
by Alex Prihodko

Elements
blade
cuff
flames
frame2
lipstick
metalornament2
metalornament5
metalornament8
polish
symbol
vase
zipper

Papers
p11

Let's start!

Open a new canvas, size 650x650.

Place frame2 on the canvas. Resize and add a drop shadow.
Move p11 behind the frame and erase parts outside the frame.

Place the tube in front of the frame on the right side. Resize and add a drop shadow.
Take another copy of the tube and place it behind the frame and on top of the paper. Keep it a larger size and flip horizontally. Change the tube to Luminosity.

Behind the tube on right, place the symbol. Resize and add a drop shadow.

In front of the symbol, place the vase. Resize and add a drop shadow.

Move metalornament5 in front of the vase and flip it horizontally. Resize and add a drop shadow.

Behind the symbol, place the flames. Resize and add a drop shadow. Erase any parts that show on the other side of the tube. Add a glow, just change the color to #703e8d.

 Starting next to the tube on the far left side, place the polish. Resize and add a drop shadow.

Behind the polish, place the metalornament2 and flip horizontally. Resize and add a drop shadow.

Move the lipstick behind the metalornament2 and make it stand straight up. Resize and add a drop shadow.

Place the cuff behind the lipstick. Resize and add a drop shadow.

Behind these four items, move the blade. Resize and add a drop shadow.

At the left end of the blade place metalornament8. Make it smaller and rotate to the right then add a drop shadow.

Place the vase behind the metalornament8. Resize and add a drop shadow.

Now behind all of these elements, move the flames and resize. Add the drop shadow and glow from the first layer of flames.

Move metalornament3 behind the flames and against the frame. Resize and add a drop shadow.

Mask
Open a new canvas, size 600x600.
Open p11 and resize to 600x600 then place on top of the canvas.
Open the mask and place on top of the paper.
Remove the white background and place behind the tag.
Stretch out the mask so it seen evenly around the frame.

Name
Font is Yataghan.
Main color is #6613a1.
Stroke is size 4, black.
Bevel:
Change the gloss contour to Rounded Steps and the shadow to white.

Add your tagger mark and copyright information.
Crop off any extras.
Save as a .psd & .png.

Here are a few free snags for you!


Thanks for stopping by!

Thursday, June 20, 2013

CT Tag Show Off & Freebie Snags

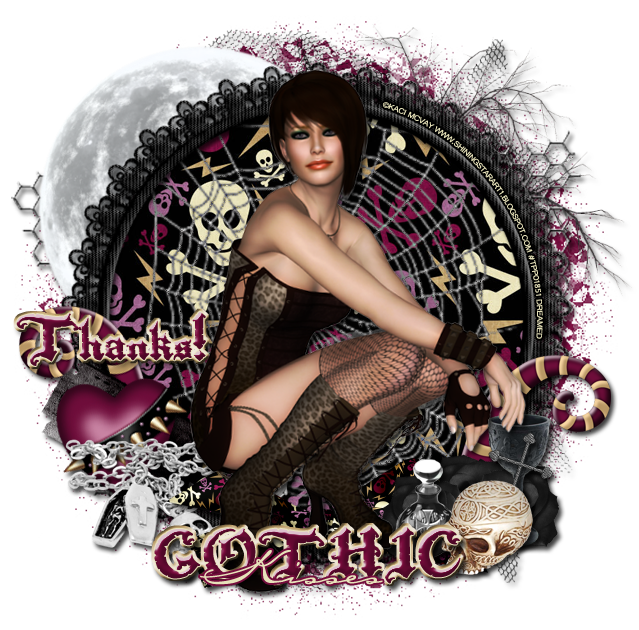
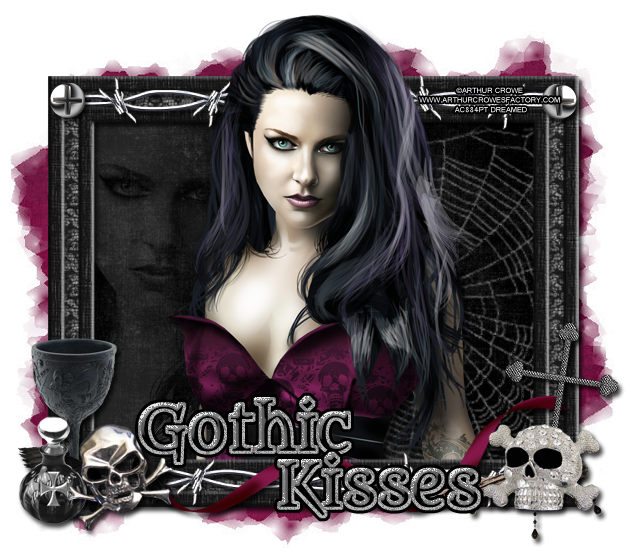
I have two tags for you. The first one is using a great poser by Kaci McVay from Shining Star Art and the other is using the artwork of Arthur Crowe! 
I used Scrappin Krazy Designs' part of the FTU Gothic Kisses Blog Train.
You can find it on her blog, and other stops, here!


Here are two freebie snags too!


Thanks for stopping by :)

Friday, June 14, 2013

New PTU Tutorial "Beach Party"

I have a new PTU tutorial using a new kit, Beach Party, by Scrappin Krazy Designs! I matched it with a new tube by Ismael Rac.


**This tutorial was written by me and any resemblance is purely coincidental. It is written for those with a working knowledge of Photoshop.**

What you will need:

Font
Grand Hotel 
You can download it on FontSpace.

Mask
I used an exclusive mask. Any mask with a starburst look will work :)

Tube
Ready 4 Summer Tube by Ismael Rac.
You can purchase it here.
*You must obtain a license in order to use it.*

Elements
4
5
7
8
14
16
29
33
35
36
39
41
42
44
47
48
51
58
59
60

Papers
2
11

Let's start!

Open a new canvas, size 650x650.

Move ele16 on to the canvas and resize. Add a drop shadow and a bevel in Cove Deep with a white shadow.

Place p02 behind the frame. Resize it so the sun glare is in the upper left hand box. Erase any parts of the paper outside the frame and in between.

Move your tube in front of the frame and add a drop shadow.

Place ele07 behind the frame on the lower left side. Hide some of it behind the frame and add a drop shadow. Duplicate, flip horizontally, and move to the other side. Move it higher than the other side.

Move ele33 behind the frame. Resize and rotate so just a little is sticking out the left side. Add a drop shadow. Duplicate and flip horizontally and have it stick out the top right side.

Move ele44 behind and below the frame. Resize the sand.

Place ele22 on the lower left hand corner of the frame. Resize and add a drop shadow.

Place ele51 on the lower right hand corner at an angle. Resize and add a drop shadow.

Move ele08 below the frame between the ball and flowers and resize, add a drop shadow.
Place ele60 on top of the word art and erase the bow and parts of it so it looks like the ribbon is a part of it. Add a light drop shadow to ele60.

Place ele04 behind the beach ball on the left. Have it cover part of ele07. Add a drop shadow. Duplicate and flip horizontally and move behind the flowers on the right side. Have this one cover the waves too.

Move ele29 in front of the flowers, but behind the word art and add a drop shadow.

Place ele14 and ele59 behind the summer word art and above it. Place 59 then 14 and then 59 and 14 again. Add a drop shadow to each and overlap them.

Move ele05 in front of the S in summer and the beach ball, resize and add a drop shadow.
Move ele58 between the E & R in summer, resize and add a drop shadow.

Take ele35, 36, 39, 41, 42, 47, 48 and place behind the tube and below the word art  Place one right after the other horizontally. Resize each one, overlap, and add a drop shadow.

Take ele04 and rotate horizontally and place behind the word art and shells. Resize and add a drop shadow.

For the name:
Grand Hotel
Main color: #f66291
Stroke: size 2, #fbe2bb
Bevel: White shadow, Gaussian
Drop Shadow

For the mask:
Open a blank canvas, size 600x600
Open the mask you choose, make sure it is 600x600
Open p11 and resize to 600x600
Move the paper on to the canvas and then the paper on top.
Remove the background and place behind everything on the tag.
Stretch out the mask so it sticks out the top and a little on the sides. No need for it to stick out below.
Make sure nothing hangs off the edge of the original canvas.

Crop off any extras, if there is any.
Add tagger mark and copyright information.

Save as a .psd and .png.

Thanks for stopping by! I hope you enjoyed the tut :)

Freebie Clusters Using Nautical Retreat

These got lost somewhere in Bloggerland so I wanted to repost them because they're perfect for summer!

FTU Clusters - Nautical Retreat

Nautical Retreat is a realistic, beautiful kit from Scrappin Krazy Designs. 
You can find it here.


Click the preview to download or download the clusters here.

Here is a tag I made with one of the clusters.


Please leave some love when you download :)

Saturday, June 1, 2013

PTU Tutorial "Tropical Peach"

I have a new PTU Tutorial using Tropical Peach by Scrappin Krazy Designs. You can find out more about it on her blog here!


**This tutorial was written by me and any resemblance is purely coincidental  It was written for those with a working knowledge of Photoshop.**

What you will need:

Font
Blessed Day by Billy Argel
You can download it from FontSpace.

Mask
I used an exclusive mask, but a floral/tropical mask will be perfect!

Tube
24-1 by Jessica Dougherty
You can purchase the tube from CDO.
*You must obtain a license in order to use this tube*

Elements
8
11
13
14
21
28
29
32
33
34
35
55

Papers
1
14

Let's begin :)

Open a new canvas size 650x650.

Move element 11 onto the canvas. Resize and add a drop shadow.

Place your tube over the frame. I made her sit so her head is just barely under the top of the frame. Erase any parts that hang over the bottom of the frame.

Move p14 behind the frame and tube. Resize it smaller and erase any little parts that hang outside the frame.

Place ele55 on the left hand side of the tube on top of the frame. Resize it so it meets the same height as her chin. Add a drop shadow in the color code #ffd170.

Move ele35 behind the drink. Resize so it's relative to the size of the drink and add a drop shadow.

Place ele32 in front of the lemon slice but behind the drink. So it looks like the coconut is sitting on the bottom of the glass you will need to erase the little part of the glass that sits over the coconut. Not any part of the stem, just the base. Add a drop shadow.

Move ele08 behind the lemon and resize/rotate. Add a drop shadow.

Place ele34 on the middle of the frame. Resize a little and add a drop shadow. Have it above the coconut so it just covers little parts.
Move ele33 behind ele34 and make it a little larger than the solid pink bow. Move it behind the coconut and add a drop shadow.

Place ele29 behind both bows and the wide part of the shell stick out facing right. Resize and add a drop shadow. Move ele28 behind ele29 and have it cover any parts of the tube still showing where it meets the frame. Add a drop shadow.

Duplicate the layer you have ele08 on and flip it horizontally. Move it to the other side and place it behind the shells.

Move ele14 on top of the frame and behind everything else. Flip it vertically and resize a little. Add a drop shadow.

Take ele13 and place it behind ele14. Flip horizontally and vertically. Resize and add a drop shadow.

Place ele23 behind everything. Flip horizontally and vertically and resize a little. Add a drop shadow.

For the mask I used p01. Just open a new canvas, size 600x600, move your mask, size 600x600, on top of the blank canvas, and then move the paper, resized to 600x600, below the mask. Remove the background and place it behind the frame. Don't have too much stick outside the frame and nothing sticking outside the canvas.

For the name:
The font is Blessed Day
The main color is #bf4044
Add a bevel in linear with a white shadow
Add a stroke, size 2, in the color #ffb5ae
Add a drop shadow in the color #ffd170

Add your copyright information and tagger mark.
Crop off any extra parts of the canvas, but don't cut off any parts of the tag or mask.

Save as a .psd & .png.

We're done! Thanks for stopping by and trying out my tutorial!

Monday, May 20, 2013

PTU Tutorial "With Love"

I have a new PTU tutorial using a Scrappin Krazy Designs kit, With Love, that is part of a charity collab. You can find out more about it on her blog. I used a FTU tube by Zindy, which you can find here.

**This tutorial was written by me and any resemblance is purely coincidental. It is written for those with a working knowledge of Photoshop.**

What you will need:

Font
Lovers Quarrel by TypeSETit
You can download it from FontSpace.

Tube
Temporary Peace
FTU tube by Zindy
You can download it from her site here.
*You still need a Zindy Zone license number to use this FTU tube.*

Elements
11
20
21
28
32
37
48
55
60

Paper
08

Alright, let's get started!

Open a new canvas, size 650x650.

Move ele21 on the canvas and rotate so it is vertical. Resize just a little and add a drop shadow.

Move p08 behind the frame and resize so just a little sticks outside the frame. Erase the extras.

Place the tube behind the frame and on top of the paper. Resize so it sits nicely inside the frame. Erase any little parts that stick out. No drop shadow necessary.

Take ele28 and place it on the right side of the frame. You will need to make it smaller so it can sit on the frame and have it stick out evenly on both sides. Place it lower than the middle of the frame. Add a drop shadow and duplicate then flip horizontally. Move the duplicate across the frame to the other side. Duplicate the copy two more times and and move those two to cover the frame.

Now take ele55 and place it behind the flowers on the right side so it goes up the frame and sticks off a little. You will need to resize and erase parts that stick out below or off to the sides. Add a drop shadow, duplicate, and move to the other side.

Place ele48 behind the white flowers. Add a drop shadow so it is easier to see. Flip it vertically and have it round out the bottom of the flowers. Duplicate it and flip it horizontally on the other side. Duplicate it again and resize so it's smaller than the original two and fill the empty space under the flowers in the middle.

Move ele37 and place it over the ribbon where it dips, resize it and add a drop shadow.

Place ele32 on the other side and place it over the ribbon. Resize it and add a drop shadow.

Move ele20 on to the white flowers in the middle, resize, and and add a drop shadow.

Place ele11 on top of ele20. Resize so it's not larger than the heart and add a drop shadow.

Now use ele60 as the mask. Place it behind the frame and resize so there is room to fit it on there twice. Have one copy stick out the right side and one stick outside the left side. In the blending options select color overlay and use color code #9272b1. No drop shadow necessary.

Let's start the name. Again, the font is Lovers Quarrel. Use the color code #7c5ba2 for the fill. Add a white stroke, size 3, add a drop shadow, and a white bevel using Linear.  Place it over the flowers on the left.

Add your tagger mark and copyright information.

Crop off any extra background. Be careful not to cut off any parts of the tag or mask.

Save as a .psd and .png.

I hope you enjoy the tutorial and thanks for helping with the charity collab!

Saturday, January 12, 2013

CT Tag Wisteria

CT Tag Show Off using Wisteria by Scrappin Krazy Designs.
You can get the kit here.
I added a few snags for you!


Thanks for coming by!


New Name, New Blog!

Hello friends! I have decided to change my designer name to reflect that I make kits more than I do CT work. I made a new blog so the old links for this blog will remain active for future visits. Please visit me at Drea's Designs ! I'll see you there!
Related Posts Plugin for WordPress, Blogger...