PTU tutorial using Autumn's Song by Scrappin Krazy Designs!
You can check it out on her blog HERE!
**This tutorial was written by me and any resemblance is purely coincidental. It is written for those with a working knowledge of Photoshop.**
Supplies
Font
Mask
Scrap Kit
Tube
*You must obtain a license to use this tube.*
Elements
11
12
16
18
19
20
21
22
24
25
27
28
30
43
45
47
48
Papers
4
11
Let's start!
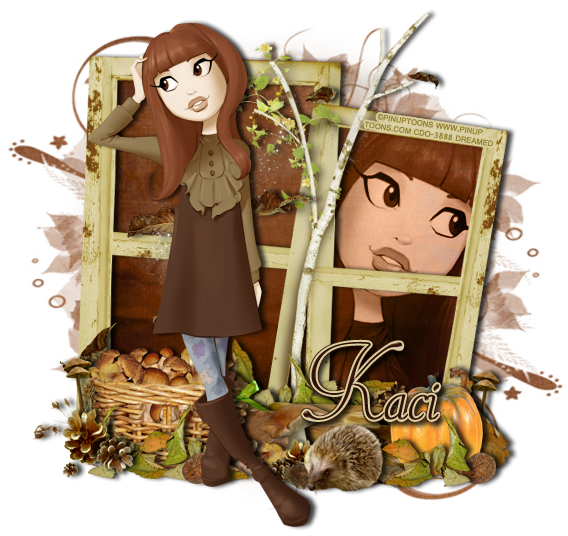
Open a new canvas, size 650x650.
Place ele21 on to the canvas and resize. Add a drop shadow.
Place paper 11 behind the frame and erase anything outside of it.
Place the tube in front of the frame on the left and resize. Add a drop shadow.
Place the close up of the tube behind the window on the right. Resize a little and create a clipping mask to the paper.
Duplicate the paper and place it on top of the tube. Create a clipping mask so the two papers and close up are not sticking outside the frame.
Change the close up to Luminosity and drop the fill to 79%.
Change the top paper to Soft Light and the bottom paper to Luminosity.
Place ele22 behind the tube and on top of the frame. Place it over the left side of the frame.
Place ele11 on the right corner of the frame. Resize and add a drop shadow.
Place ele16 in front of the pumpkin. Resize and add a drop shadow.
Move ele43 behind the pumpkin. Resize and add a drop shadow.
Place ele18 behind the shrooms. Resize and add a drop shadow.
Place ele27 in front of the pumpkin, but behind the leaves. Resize and add a drop shadow.
To the left of the pumpkin, place ele47. Resize and add a drop shadow.
Behind the log, place ele16 again. Resize and add a drop shadow. Duplicate two more times and cover the back of the log along the length of the frame.
At the edge of the log and behind it, next to the pumpkin, place ele45. Resize and add a drop shadow. Duplicate the pinecone and move it to the right a little and rotate to the right.
On the left side of the frame, place ele19. Resize and add a drop shadow.
In front of the basket of shrooms, place a couple of copies of ele16. Resize and add a drop shadow.
On the left hand corner of the basket, place ele20. Resize and add a drop shadow.
Behind the basket on the left, place ele43. Resize and add a drop shadow.
Between the shrooms and pinecones, place ele28. Flip horizontally and resize a little. Erase anything that sticks out and add a drop shadow.
Between the basket and log, place ele30. Resize and add a drop shadow.
In front of the log and wood, place ele48. Resize and add a drop shadow.
In front of the shroom, place ele20 and flip horizontally. Resize and add a drop shadow.
Place ele12 in front of the shroom and a little to the left. Resize and add a drop shadow.
Between the animal and pinecones, place ele24. Resize and add a drop shadow.
To the right and behind the animal, place ele25. Make it sit behind the leaves in front of the pumpkin. Resize and add a drop shadow.
Name
Main color is #4e2417.
Add a stroke, size 2, in #dad09d.
Add a bevel, change the gloss contour to Cone-Inverted, and change the shadow to #61321e.
Select the pixels of the name and expand by 3.
Create a new layer under the name and fill with #340f0c.
Add a drop shadow to the lower layer.
Mask
Open a new canvas, size 600x600.
Open p4 and resize to 600x600. Place on top of the canvas.
Open the mask and move on top of the paper.
Remove the white background and place the mask behind the tag.
Make it evenly stretched on all sides.
Add your tagger mark and copyright information.
Crop off any extra canvas.
Save as a .psd & .png.
Thank you for coming by!


