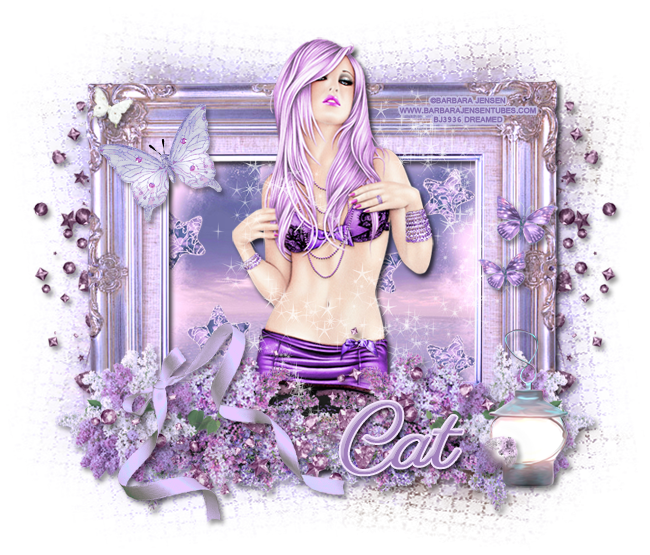
PTU tutorial using Amethyst by Kissing Kate!
You can purchase the kit at the Pimpin' PSPers Warehouse!
**This tutorial was written by me and any resemblance is purely coincidental. It is written for those with a working knowledge of Photoshop.**
Supplies
Font
Mask
Scrap Kit
Tube
Dreamweaver - Bonus Tube
*You must obtain a license to use this tube.*
Elements
4
9
10
11
16
25
26
37
40
41
49
Frame3
Papers
2
5
Let's start!
Open a new canvas, size 650x650.
Move Frame 3 on to the canvas, resize, and add a drop shadow.
Place paper 2 behind the frame and resize it so there's not much left to erase. Erase anything outside the frame.
Place the tube on top of the frame and resize. Erase her legs that hang off the frame and add a drop shadow.
Place 25 on the right and left sides of the frame. Resize a little and add a drop shadow.
Now place 26 in between the two 25s. Fill in the space in front of the tube. Resize a little and add a drop shadow.
Place 9 in front of the flowers on the right side. Resize and add a drop shadow.
Place 16 in front of 9. Rotate it so it faces north east. Resize and add a drop shadow.
Place 37 on top of the flowers. Rotate/flip it so it lays horizontally along the flowers. Resize and add a drop shadow.
On top of the gems, place 41. Resize and add a drop shadow. Place it over the corner of the frame.
Take another copy of 37 and place it behind the frame on the right side. Erase the little extras that stick out too far. Resize and add a drop shadow.
Duplicate 37 and move it on the left side behind the frame.
Take 11 and place it behind the frame and on top of the paper. Resize and then duplicate it a couple more times so there are a few times around the tube.
Take the smaller butterfly from 4 and place it in the upper left hand corner of the frame. Add a drop shadow.
Move 40 below and to the right of small white butterfly. Resize and add a drop shadow.
Place 10 and place on the middle right side of the frame. Resize a little, add a drop shadow, then rotate a little to the right.
Duplicate the butterfly and move it lower than the first butterfly. Make it smaller and rotate it to the left a little.
Place 49 over the tube and resize a little. Make sure it doesn't cover her face.
Mask
Open a new canvas, size 600x600.
Move paper 5 on to the blank canvas.
Open the mask and move on top of the paper.
Remove the white background and place the mask behind the tag.
Make it evenly stretched on all sides, but not hang off the canvas.
Name
Main color is #a07ebb.
Add a stroke, size 2, in#f3e4fc.
Add a drop shadow.
Add a bevel to the name. Change the gloss contour to Rounded Steps.
Change the shadow mode to white.
Add your tagger mark and copyright information.
Crop off any extra canvas.
Save as a .psd & .png.
We're done :)
Here are a few snags for you!
Thank you for coming by!


