
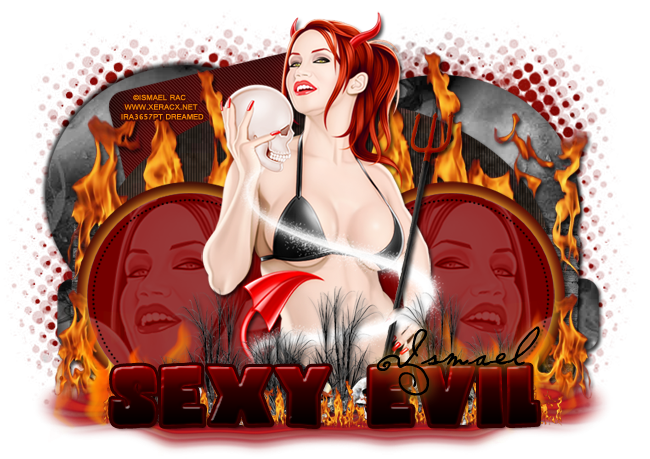
*Coming Soon!*
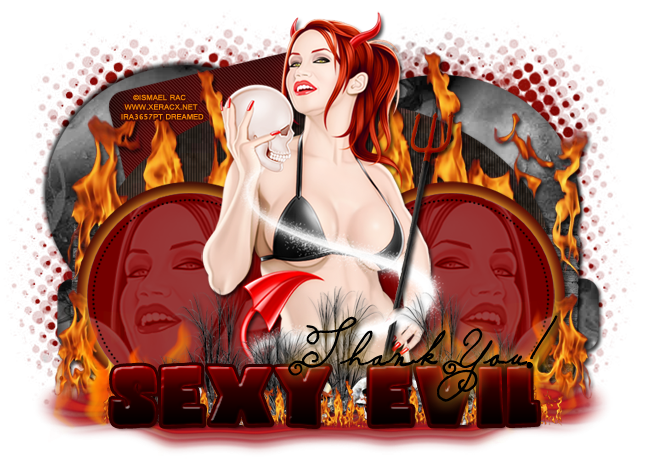
PTU tutorial using 2013 BB Sexy Evil by Ismael Rac!
You can purchase the tube and the matching kit HERE soon!
**This tutorial was written by me and any resemblance is purely coincidental. It is written for those with a working knowledge of Photoshop.**
Supplies
Font
Mask
Scrap Kit
Template
Tube
*You must obtain a license to use this tube.*
Elements
flames 2
flames
glow swirl
grass
lava
pitchfork
Papers
1
3
4
6
Let's start!
Open a new canvas, size 700x650 (You can resize later.).
Open the template and select all layers. Move it on to the canvas.
Resize the template as needed.
Delete the background and raster 1 as well as 12, 13, 16, 17, and 18.
Layer 1 will be mostly hidden, but we will add paper 1 over it and create a clipping mask. Resize, but make sure it fill the entire shape. Add a drop shadow to the shape.
With layer 2 and 3, place paper 1 over both and create a clipping mask. You can resize and duplicate as you like. Add a drop shadow to both circles.
Place paper 6 over layer 4 and resize. Create a clipping mask and then blur the paper using Gaussian Blur. Add a drop shadow to the paper.
If you have it, use the Penta filter - Jeans on the paper.
Over layer 5, place paper 4. Resize as you like and create a clipping mask.
Use Xero - Soft Vignette and make vertical lines on the paper.
Add a drop shadow to the shape.
Place paper 3 over layer 6. Most of it will be hidden, but some will still peek out. Create a clipping mask and resize the paper so you can see the bricks. You will need to duplicate the paper to cover both ends. Add a drop shadow to the shape.
Layer 7 will be almost completely hidden so just copy paper 4 from earlier and clip it to the layer. Add a drop shadow to the shape.
For layers 8 and 9 take paper 6 from earlier and clip it to layers 8 and 9. Add a drop shadow to both shapes.
Fill layers 9 & 10 with #740000. Add a drop shadow to both.
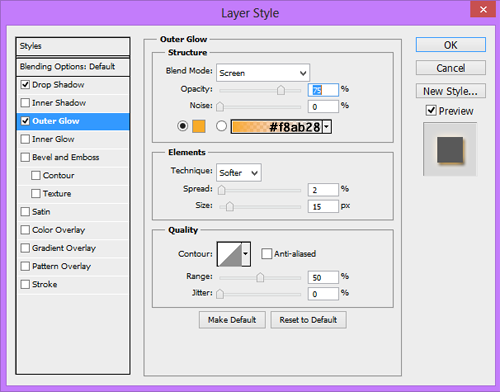
Add the outer glow settings below:
 The dotted circles should be black.
Now place the tube in between the two circles in front. Resize and add a drop shadow.
In front of the tube, place the grass. Resize the grass so it's not too tall. I used three copies across the front of the tag. Add a drop shadow to all.
Now erase any parts of the tube that show below the grass.
In front of the grass you can put your word art (Directions are below).
Below the tag and in the front, place the lava. Resize it a little and flip it horizontally. Move the first copy on the left and the move the copy on the right below the first copy.
Now take a close up of the tube and place it on the front circle on the left. Resize so it's mostly her face. Change it to Luminosity and drop the opacity to 25%. Duplicate the tube and flip it horizontally. Move it to the circle on the right and arrange like before.
Take a copy of flames 2 and place it on the left between layer 5 and layers 8 & 9. Resize so it's not too tall. Make the bottom of flames 2 meet the middle of front circles. Add a drop shadow. Duplicate the flames and move to the right side.
Between layers 8 &9 and 10 & 11, place another copy of flames 2 on the right. It should be considerably smaller than the first flames, but it can almost reach the bottom of the first flames. Add a drop shadow. Resize the flames and add to the left side in the same way.
Now take the flames and place them between the grass and front circle on the left. Resize and smudge the sharp edges. Don't make it too big or covering the tube's face. Duplicate it and place a copy on the right side.
Take a copy of flames 2 and make it quite small. Use it to fill open spaces between the word art and grass. You may need quite a few copies.
Place the pitchfork over the tube on the right. Place it so it looks like she's holding it. Erase the part the sticks over her forefinger. Resize and add a drop shadow.
Now place the glow swirl over the tube and resize. Erase the top part that may cover the tube's face.
Use the "blood" style and add a stroke, size 3, in #2f0000 and add a drop shadow.
Resize as you like.

Open the template and select all layers. Move it on to the canvas.
Resize the template as needed.
Delete the background and raster 1 as well as 12, 13, 16, 17, and 18.
Layer 1 will be mostly hidden, but we will add paper 1 over it and create a clipping mask. Resize, but make sure it fill the entire shape. Add a drop shadow to the shape.
With layer 2 and 3, place paper 1 over both and create a clipping mask. You can resize and duplicate as you like. Add a drop shadow to both circles.
Place paper 6 over layer 4 and resize. Create a clipping mask and then blur the paper using Gaussian Blur. Add a drop shadow to the paper.
If you have it, use the Penta filter - Jeans on the paper.
Over layer 5, place paper 4. Resize as you like and create a clipping mask.
Use Xero - Soft Vignette and make vertical lines on the paper.
Add a drop shadow to the shape.
Place paper 3 over layer 6. Most of it will be hidden, but some will still peek out. Create a clipping mask and resize the paper so you can see the bricks. You will need to duplicate the paper to cover both ends. Add a drop shadow to the shape.
Layer 7 will be almost completely hidden so just copy paper 4 from earlier and clip it to the layer. Add a drop shadow to the shape.
For layers 8 and 9 take paper 6 from earlier and clip it to layers 8 and 9. Add a drop shadow to both shapes.
Fill layers 9 & 10 with #740000. Add a drop shadow to both.
Add the outer glow settings below:
Now place the tube in between the two circles in front. Resize and add a drop shadow.
In front of the tube, place the grass. Resize the grass so it's not too tall. I used three copies across the front of the tag. Add a drop shadow to all.
Now erase any parts of the tube that show below the grass.
In front of the grass you can put your word art (Directions are below).
Below the tag and in the front, place the lava. Resize it a little and flip it horizontally. Move the first copy on the left and the move the copy on the right below the first copy.
Now take a close up of the tube and place it on the front circle on the left. Resize so it's mostly her face. Change it to Luminosity and drop the opacity to 25%. Duplicate the tube and flip it horizontally. Move it to the circle on the right and arrange like before.
Take a copy of flames 2 and place it on the left between layer 5 and layers 8 & 9. Resize so it's not too tall. Make the bottom of flames 2 meet the middle of front circles. Add a drop shadow. Duplicate the flames and move to the right side.
Between layers 8 &9 and 10 & 11, place another copy of flames 2 on the right. It should be considerably smaller than the first flames, but it can almost reach the bottom of the first flames. Add a drop shadow. Resize the flames and add to the left side in the same way.
Now take the flames and place them between the grass and front circle on the left. Resize and smudge the sharp edges. Don't make it too big or covering the tube's face. Duplicate it and place a copy on the right side.
Take a copy of flames 2 and make it quite small. Use it to fill open spaces between the word art and grass. You may need quite a few copies.
Place the pitchfork over the tube on the right. Place it so it looks like she's holding it. Erase the part the sticks over her forefinger. Resize and add a drop shadow.
Now place the glow swirl over the tube and resize. Erase the top part that may cover the tube's face.
Name
Main color is black.
Add the same glow from layers 10 & 11 and a drop shadow.
Place it over the word art on the left.
Word Art
Font is DK Codswallop.
I downloaded a free set of Halloween styles for this.You can find them here.Use the "blood" style and add a stroke, size 3, in #2f0000 and add a drop shadow.
Resize as you like.
Mask
Open a new canvas, size 600x600.
Open paper 6 and resize to 600x600. Place on top of the canvas.
Open the mask and move on top of the paper.
Remove the white background and place the mask behind the tag.
Make it evenly stretched on all sides.
Add your tagger mark and copyright information.
Crop off any extra canvas.
Save as a .psd & .png.
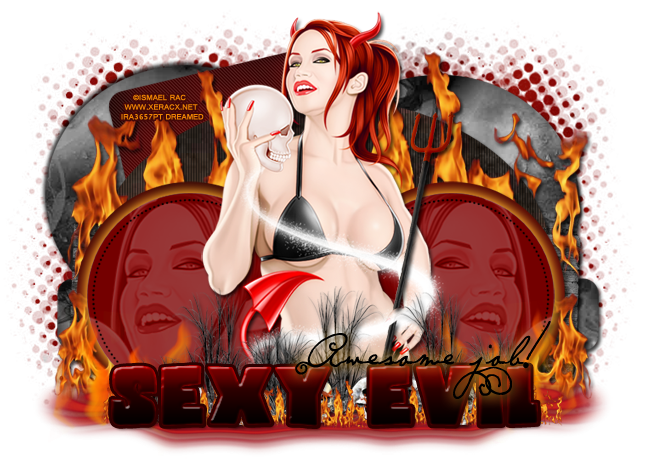
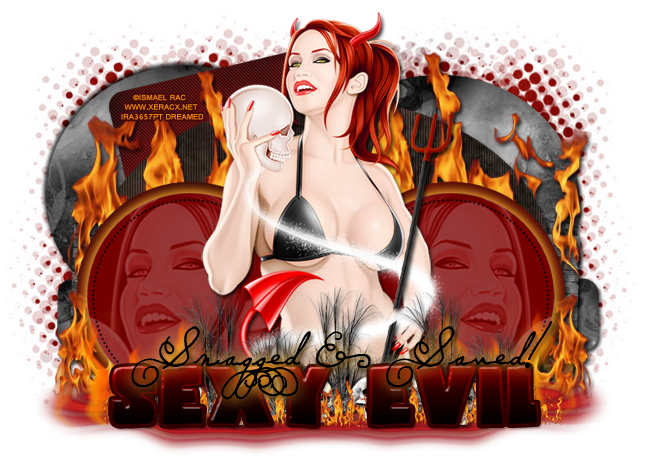
Here are free snags!
Thank you for coming by!