*Coming Soon!*
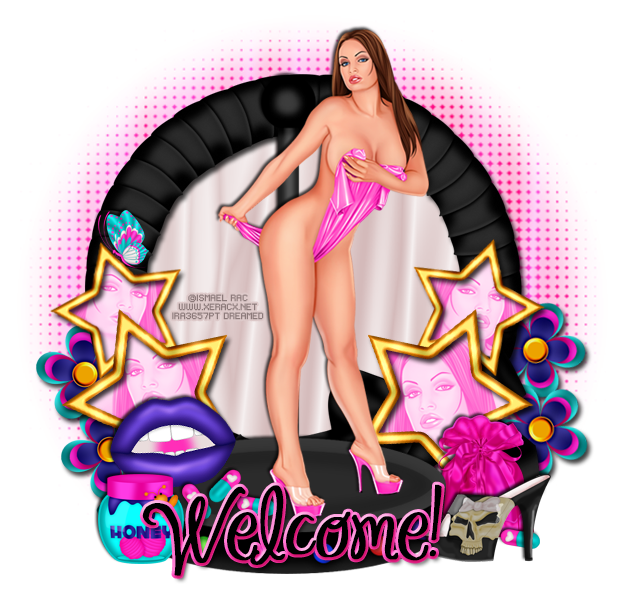
PTU tutorial using 2013 Undress Me by Ismael Rac!
Matching kit made by Wicked Creationz!
You can purchase them both here!
**This tutorial was written by me and any resemblance is purely coincidental. It is written for those with a working knowledge of Photoshop.**
Supplies
Font
Mask
(Masks made by me.)
Scrap Kit
Tube
*You must obtain a license to use this tube.*
Elements
6
12
14
18
20
22
25
27
28
29
Papers
4
5
Let's start!
Open a new canvas, size 650x650.
Place ele 29 on the canvas. Resize and add a drop shadow.
Place paper 5 behind the frame. Resize and erase anything sticking outside the frame.
Place ele 28 in front of the frame. Resize and add a drop shadow.
Place the tube on top of ele 28. Resize and add a drop shadow.
To the right of ele 28, place ele 12. Resize and add a drop shadow.
In front of the pink bag, place ele 6 and flip horizontally. Resize and add a drop shadow.
Place ele 25 in front of ele 28 on the left side. Resize and add a drop shadow.
On top of ele 28 and behind the honey jar, place ele 18. Resize and add a drop shadow.
Place ele 22 on top on ele 28 and in front of the lips. Resize and add a drop shadow.
Take another copy of the pills and place one between the high heel and pink bag.
Take ele 20 and place two on each side of the frame. Erase the stick if it hangs out too far. Resize and add a drop shadow to each one.
Behind the stars, add a layer and fill with black. Erase anything outside the stars.
Take a close up of the tube and place one in each star, flipping horizontally. Create a clipping mask for each one and change to luminosity. Duplicate the black layer behind the stars and move on top of the tubes close up. Create a clipping mask.
Select the pixels of the top black layer and fill with #ff57c8. Change to Screen.
Set ele 14 on top of the star on the left. Resize and add a drop shadow.
Take ele 27 and place it behind the stars on the left. Duplicate and place on below the first. Resize and add a drop shadow.
Duplicate the two flowers and place them on the right side in the same way.
Name
Main color is black.
Add a stroke, size 3, in #ff55c6.
Add a Stroke Emboss bevel.
Change the Shadow Mode to #c90170.
Mask
Open a new canvas, size 600x600.
Open paper 4 and resize to 600x600. Place on top of the canvas.
Open the mask and move on top of the paper.
Remove the white background and place the mask behind the tag.
Make it evenly stretched on all sides.
Add your tagger mark and copyright information.
Crop off any extra canvas.
Save as a .psd & .png.
Free snags!