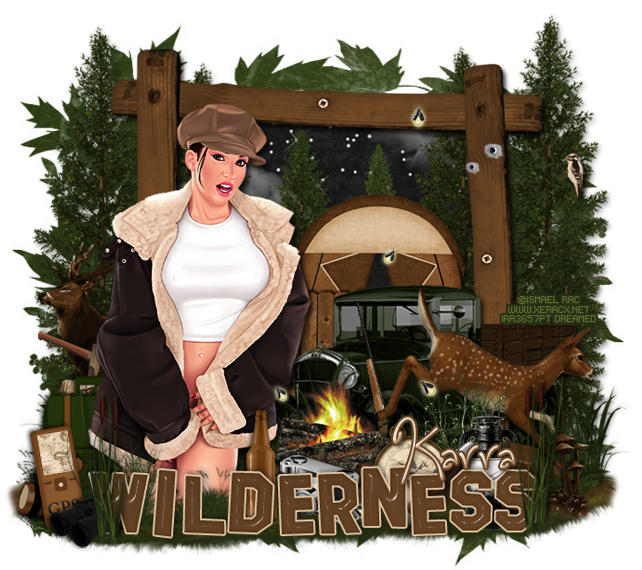
PTU tutorial using Outdoor Odyssey by Karra's Kreative Korner!
You can purchase the kit HERE!
**This tutorial was written by me and any resemblance is purely coincidental. It is written for those with a working knowledge of Photoshop.**
Supplies
Font
Mask
Scrap Kit
Tube
*You must obtain a license to use this tube.*
Elements
backpack
beer bottle
binoculars
bird
bug repellant
bullet holes
camera
cattails
compass
deer
fawn2
fence
fire
fireflies
flask
frame1
gps
grass
ground
lantern
mushroom
pinecone
pocket knife
rifle
tall grass
tent
tree1
truck
woodpile
word art1
Papers
6
15
Let's start!
Open a new canvas, size 650x650.
Move the frame on to the canvas. Resize and add a drop shadow.
Place the tube in front of the frame and a little to the left. Resize and add a drop shadow.
Place to of the trees on both sides of the frame. Resize both so they are taller than the frame. Make one tree a little taller than the other and add a drop shadow to both.
Place paper 6 behind the frame. Resize and erase anything outside the frame.
Place the fence on top of the paper and behind the frame. Erase anything outside the frame. Resize and add a drop shadow.
Behind the fence, place the tent. Resize and add a drop shadow.
Place four trees between the tent and the paper. Make them different sizes and add a drop shadow to both.
Place the bird on the right outside the frame on the right. Resize and add a drop shadow.
Below everything inside the frame and the tube, place the ground. Duplicate and flip the ground until you cover the "ground" in front and around the tube. Make sure it doesn't hang off the canvas.
Place the grass on top of the ground and around the tube.
On top of the grass and to the right of the tube, place the truck in front of the frame. Resize, flip horizontally, and add a drop shadow.
In front of the truck, place fawn2. Resize and add a drop shadow.
Behind the tube on the left, place the back pack. Resize and add a drop shadow.
Behind the backpack, place the wood pile between the frame and the back pack. Resize, flip horizontally, and add a drop shadow.
Behind the wood pile, place the deer. Resize, flip horizontally, and add a drop shadow.
In front of the tube, place the Wilderness word art. Resize and add a drop shadow.
On the left and right end of the word art, place the cattails. Resize and add a drop shadow.
Behind the word art on the left, place the binoculars, then the gps, and then the flashlight. Resize each one and add a drop shadow.
To the right of the tube behind the word art, place the beer bottle. Resize and add a drop shadow.
Next to the beer bottle, place the camera. Resize and add a drop shadow.
Next to the camera, place the compass. Resize and add a drop shadow.
Behind the compass, place the pocket knife. Resize and add a drop shadow.
Behind the tube, camera, and beer bottle, place the fire. Resize and add a drop shadow.
Lean the rifle against the truck in the back ground. Resize and add a drop shadow.
Use the tall grass to fill in empty space on the right side of the tag. Duplicate as needed. Resize and add a drop shadow.
To the right of the word art and in front of the fawn, place the mushrooms. Resize and add a drop shadow.
In front of the mushrooms, place two pinecones. Resize and add a drop shadow.
Place the fireflies over the tag. Resize and erase a couple here and there so it's not too crowded. Add a default glow instead of the drop shadow.
Name
Main color is #dcc2a1.
Add a stroke, size 2, in #644327 and add a drop shadow.
Add the bevel, change to Gaussian and change the shadow mode to #644327.
Mask
Open a new canvas, size 600x600.
Open paper 15 and resize to 600x600. Place on top of the canvas.
Open the mask and move on top of the paper.
Remove the white background and place the mask behind the tag.
Make it evenly stretched on all sides.
Add your tagger mark and copyright information.
Crop off any extra canvas.
Save as a .psd & .png.
Free snags!
Thank you for coming by!


