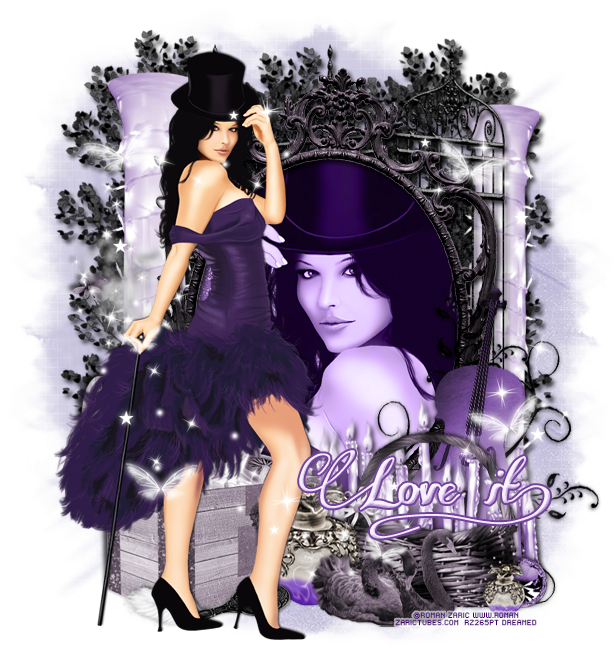
PTU tutorial using Antoaneta by Roman Zaric!
Matching kit made by Irish Princess Designs!
You can purchase them both here!
**This tutorial was written by me and any resemblance is purely coincidental. It is written for those with a working knowledge of Photoshop.**
Supplies
Font
Mask
Scrap Kit
Tube
*You must obtain a license to use this tube.*
Elements
Basket
Candles
Chest
Column
Feather
Frame1
Gem
Mirror
Perfume
Screen
Sparkles
Swan
Tree
Violin
Papers
3
11
Let's start!
Open a new canvas, size 650x650.
Place the frame on the canvas. Resize and add a drop shadow.
Place the tube in front of the frame and to the left, flip her horizontally. Resize and add a drop shadow.
Place paper 3 behind the frame and erase anything outside the frame.
Place a close up of the tube over the paper. Change it to Luminosity and create a clipping mask to the paper.
Behind the tube on the left, place the chest and flip horizontally. Resize and add a drop shadow.
Behind the frame, place the screen and flip horizontally. Resize and add a drop shadow.
Behind the chest and tube on the left place the column. Resize and add a drop shadow.
Duplicate the column and flip horizontally. Move to the right side of the screen.
Behind the screen and columns, place a few copies of the tree to fill the empty space in back.
In front of the frame on the right, place the violin and rotate so it's vertical with a lean to the right. Resize and add a drop shadow.
In front of the violin, place the candles. Resize and add a drop shadow.
In front of the candles, place the basket. Resize and add a drop shadow.
To the left of the basket and in front of it, place the perfume. Resize and add a drop shadow.
Duplicate the perfume and move it over to the right of the basket. Make it smaller than the first.
Behind the basket on the right, place the gem. Flip horizontally, resize, and add a drop shadow.
In front of the basket and perfume, place the swans. Resize and add a drop shadow.
Behind the tube and in front of the chest, place the mirror and the feather. Resize and add a drop shadow.
Name
Main color is #f5eaff.
Add a stroke, size 2, in #73429d.
Add a drop shadow & bevel.
Mask
Open a new canvas, size 600x600.
Place paper 11 on top of the canvas.
Open the mask and move on top of the paper layer.
Remove the white background and place the mask behind the tag.
Make it evenly stretched on all sides.
Add your tagger mark and copyright information.
Crop off any extra canvas.
Save as a .psd & .png.
Free snags!
Thank you for coming by!


