Sunday, June 30, 2013

PTU Tutorial - Just Beachy

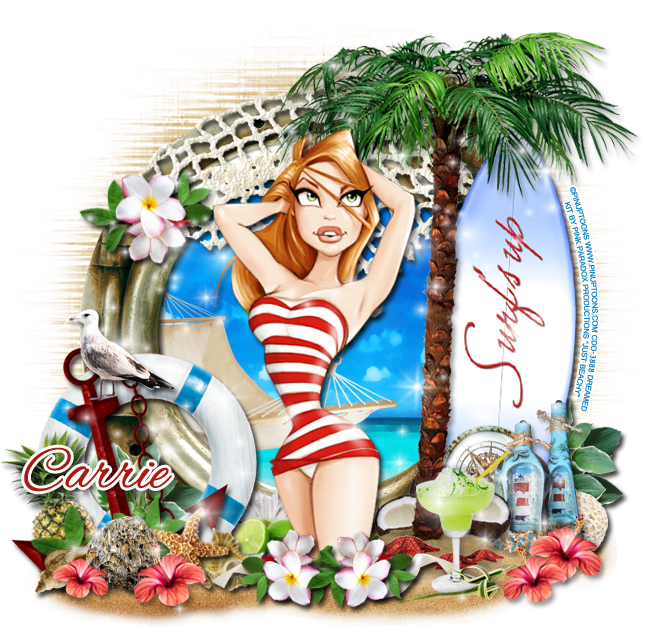
I have a new PTU Tutorial using a packed kit by Pink Paradox Productions called Just Beachy!
I matched it with the artwork of Pin Up Toons.


**This tutorial was written by me and any resemblance is purely coincidental. It is written for those with a working knowledge of Photoshop.**

Supplies

Font
Alex Brush by TypeSETit

Mask
WSL_Mask216 by Weescotslass Creations

Scrap Kit
Just Beachy by Pink Paradox Productions
You can buy it at PicsForDesign!
PPP kits are on sale for the month of July. Buy 3 get 1 FREE!

Tube
Tube 32-1 by Pin Up Toons
*You must obtain a license to use this tube.*

Elements
1
2
3
6
7
12
13
16
20
23
25
39
40
42
47
48
60
76
83
87
95
100
101
103
109
117
118
133
F3

Papers
2
3

Let's get started :)

Open a new canvas, size 650x650.
Move F3 (frame) on to the canvas. Resize and add a drop shadow.
Place P3 (paper) behind the frame. Resize and erase parts outside the frame.

Place the tube in front of the frame. Resize and add a drop shadow.

Move E100 to the right of the tube. Resize and add a drop shadow.
Place E40 next to the tree and a little behind it. Make it smaller than the tree. Add a drop shadow.

Place E118 underneath everything so it sits in front of the frame too. 
Place E117 on top of the frame. Resize and rotate so it follows the curve of the frame. Add a drop shadow.

Move E60 behind the frame and on top of the paper and resize.

Place E23 on top of the frame on the left. Resize and add a drop shadow.
Place E39 on top of E23 and rotate. Resize and add a drop shadow.
Place E20 on top of E39. Resize and add a drop shadow.

Take E76 & E95 and lets place them on the netting on the frame. Place E76 on the end of it, rotate and resize. Move E96 behind the flowers and resize and rotate so the leaves stick out. Add a drop shadow to both.
Now link these two together and duplicate. Place two copies in front of the tube on the sand and resize.

Move E101 behind the surfboard on the right and behind the lifesaver. Resize and add a drop shadow.

In front of the lifesaver:
Place e47 on the left. Resize and add a drop shadow.
In front of the pineapple, place E13. Rotate, resize, and add a drop shadow.
Next to E13, place E17Resize and add a drop shadow.
Move E12 next to E13. Rotate a little to the left. Resize and add a drop shadow.
Behind E12, place E16 then resize and add a drop shadow.
 In front of the pineapple and behind the shells and starfish, place E95. Rotate, resize, and add a drop shadow.
Place E87 in front of E7 & E12. Flip horizontally then resize, and add a drop shadow.
Duplicate the flower and flip back. Move in front of E13 & E7. Make it smaller. 

Behind the tube and between her and the lifesaver place E52. Resize and add a drop shadow.
Behind the lime, place E83 then rotate, resize, and add a drop shadow.

On the sand of the palm tree place E3. Flip horizontally then resize.
Place E42 in front of the palm tree and the cluster of starfish. Resize and add a drop shadow.
In front of the drink, place E103. Resize and add a drop shadow.

Behind the palm tree and the tube place two E48s. The one behind the tube and the tree make smaller. Make the second coconut smaller and flip horizontally, but larger than the other one. Add a drop shadow to both.

Take E1 & E2 and move them in front of the surf board, but behind the tree and coconuts. Move E1 next to the coconut. Resize and add a drop shadow. Move E2 next to and behind E1. Resize and add a drop shadow.

Behind the coconuts and bottles, place E25. Rotate, resize, and add a drop shadow.
Behind the bottles on the right, place E6. Rotate, resize, and add a drop shadow.

Take E87 again and place in front of the bottles and palm tree. Resize and add a drop shadow.
Duplicate, make smaller and flip horizontally. Add a drop shadow.

Behind the cluster of flowers in front of the tube, use E109 to have a little stick out both sides. Resize and erase parts of the bow that aren't necessary. Duplicate so it's on both sides. Add a drop shadow to both.

Now place E133 on top of the elements on the left side. Erase any parts that hang off the tag. Place another copy on the opposite side, flip horizontally. Erase any parts that hang off the tag.

Mask:
Open a new canvas, size 600x600.
Open WSL_Mask216.
Open P2 and resize to 600x600.
Place the mask on top of the canvas and then the paper. 
Remove the white background. 
Move behind the tag. 
Stretch so it is even on both sides of the frame and be sure not to stretch it off the canvas.

Name:
Font is Alex Brush.
Main color: #ab1911.
Stroke, size 3, in white.

Now crop off any extra parts. Make sure not to cut any parts of the tag off. 
Save as a .psd & .png.

Thanks for stopping by!

Saturday, June 29, 2013

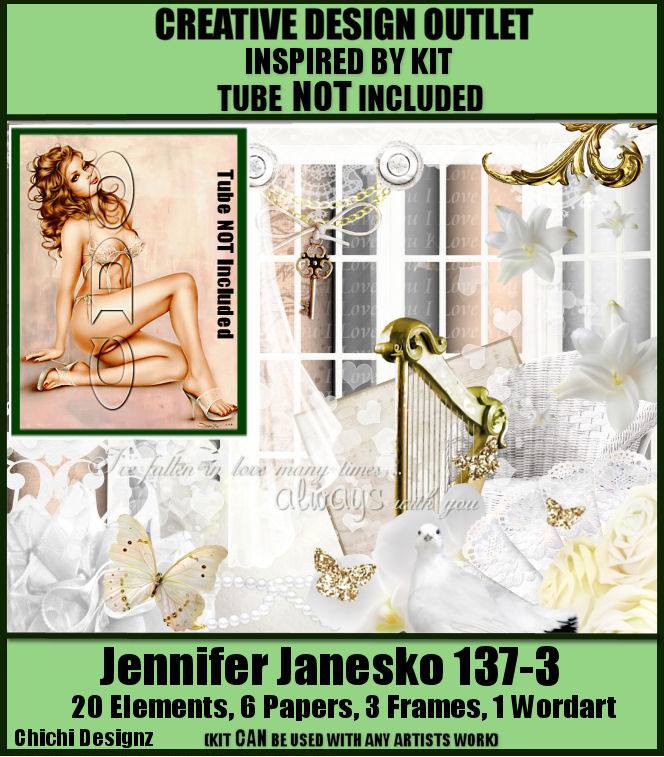
CT Tag Show Off using Jennifer Janesko 137-3 by ChiChi Designz!

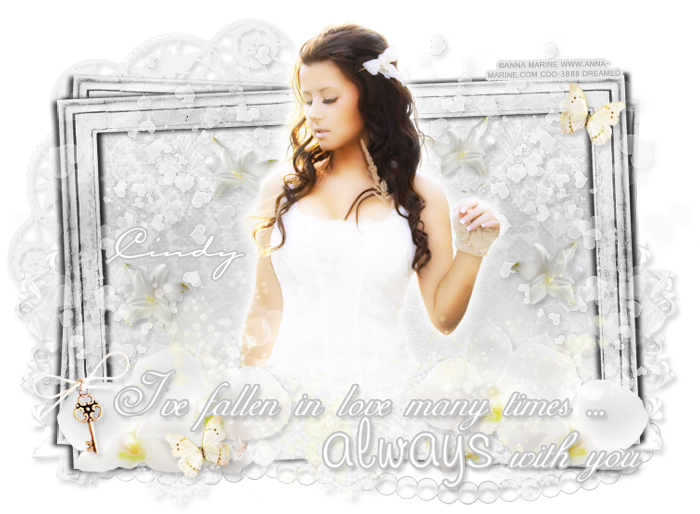
I made two tags with this beautiful kit by ChiChi Designz!

Check out the kit here!

Jennifer Janesko 137-3 

First tag is made with the artwork of Anna Marine.
You can find her artwork here.


The second tag is made a tube by Amy Matthews.
You can find her artwork here.


I made two freebie snags for you! Enjoy :)


Please leave some love and thanks for stopping by :)

Friday, June 28, 2013

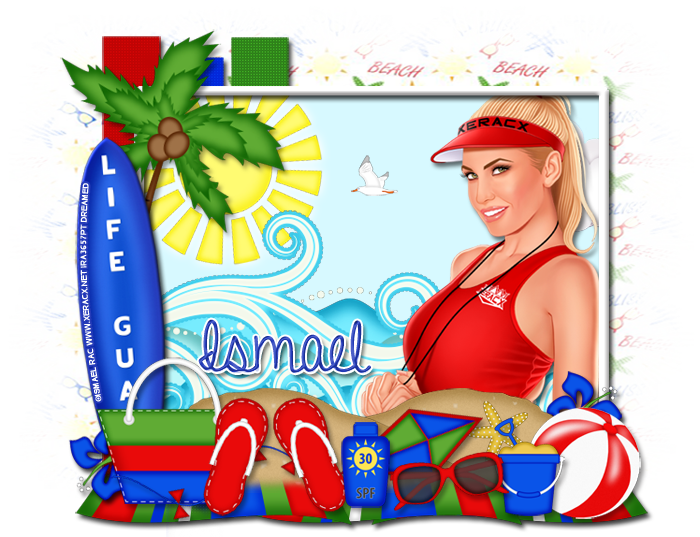
PTU Tutorial 2013 LifeGuard by Ismael Rac!

I have a new PTU tutorial using 2013 LifeGuard by Ismael Rac and the matching kit! 
Both are coming to his store very soon!! :)


**This tutorial was written by me and any resemblance is purely coincidental. It is written for those with a working knowledge of Photoshop.**

What you will need:

Font
by ByTheButterfly

Mask
Hana - Mask1
You can find it on Creative Misfits' Blog.

Scrap Kit
2013 Lifeguard by Ditzy Designs

Tube
2013 LifeGuard by Ismael Rac

Template
Halloween Template 1 Misfit by Jackie
You can find it on Creative Misfits' Blog.

Elements
Beachbag
Beachball 1
Flipflops 2
Flower 1
Kite
Pail 2
Palmtree 1
Rainbow
Sand 2
Seagull
Starfish
Sun 2
Sunglasses
Sunscreen 1
Surfboard 2
Towel
Waves 1

Papers
Paper 3

Alright, let's begin! 
Open a new canvas, size 800x650.
Open your template. Select all layers, unclick the raster and word art, link together and move on to the blank canvas.

The three vertical bars in the back will be red, blue, and green from left to right in that order:
#c00404, #0328db, #2f821a
Make sure you change the color to the lower layer of each vertical bar and leave the overlay alone.
Add a drop shadow to each lower layer.

Frame around the main square:
Fill white
Add a drop shadow
Bevel: Leave everything as default, but change the shadow to #848282.

Main Square fill to this color #d7f8ff.

Place the tube behind the frame and create a clipping mask to the main square. Resize and move so she's not cut off too close to the face and her arm is just hiding behind the frame. Add a drop shadow #3b3a3a.

Move the Sun 2 in the upper left corner and resize. Rotate a little and add a glow: change the size to 12 and leave everything else the same.
Place the Waves 1 behind the frame at the bottom. Erase any parts outside the frame.
Move the Seagull to the right of the Sun. Resize so it's tiny.

Now take the Towel and place it under the frame to the right. Duplicate two more times so it covers below the frame. Add a drop shadow.

Place Sand 2 on top of the towels in front of the main square. Move one copy to the left side and resize. Duplicate and move to underneath the first copy so they are even. Merge the two layers together.
Use the small round eraser around 20px and soften the bottom of the sand.

Move the Surfboard 2 on the left side of the square and behind the sand. Rotate a little to the left and add a dropshadow.

Move the Palmtree 1 behind the surfboard and add a drop shadow.

Place Flower 1 behind the sand at the bottom and in front of the surfboard. Resize and rotate so it's pointing down. Add a drop shadow.
Duplicate the Flower 1 and move to the right side behind the sand, but this time move it to the top of the sand hill. Point this one toward the top.

Place the Beachbag in front of the surfboard and sand on the left. Resize and add a drop shadow. Make sure not to cover up the flower.

Move the Beachball 1 on the right side of the sand layer and in front. Resize and add a drop shadow. Make sure not to cover up the flower.

Place Pail 2 to the left of the beach ball so they overlap. Resize and add a drop shadow. 

Place the Flipflops 2 to the right of the beachbag so they overlap very little. Resize and add a drop shadow.
Now place the Sunscreen 1 next to the flip flips so they overlap very little too. Resize and add a drop shadow.

Move the sunglasses between the sunscreen and pail. Resize so they touch just a little. Add a drop shadow.

Place the Starfish on to the sand hill behind the pail. Resize and rotate a little.

Move the Kite behind everything and on top of the sand. Resize and rotate so it's laying behind the elements on the sand. Add a drop shadow.

Let's make the mask:
Open a blank canvas, paper 3, and your mask and resize them all to 600x600.
Move the paper on to the canvas and then the paper. 
Remove the white background then move behind the tag. 
Resize so you can see it on all three sides (except the bottom, erase that part). 
Make sure you do not stretch it off the canvas. 
Crop off the extras around the tag and make sure not to cut off any parts of the tag.

For the name:
Font is A Gentle Touch.
Main color is #243cbc.
Stroke is white, size 3.
Bevel is Rolling Slope -Descending. 

Add your tagger mark and copyright information. 
Save as .psd & .png.

We're done! Thanks for coming by :)

Thursday, June 27, 2013

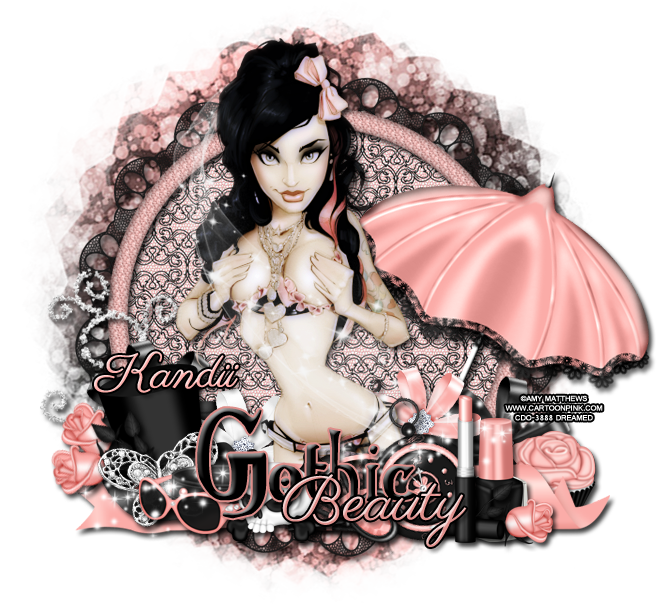
PTU Tutorial Gothic Beauty

I have a new PTU Tutorial with the gorgeous kit by Kandii Popz called Gothic Beauty. It matched perfectly with a tube by Amy Matthews. 


**This tutorial was written by me and any resemblance is purely coincidental. It is written for those with a working knowledge of Photoshop.**

What you will need:

Fonts

Mask
I used a circle mask. You can find a similar one here.

Scrap Kit
Gothic Beauty by Kandii Popz.
You can purchase it here!

Tube
17-1 by Amy Matthews
You can purchase it here.
*You must obtain a license to use this tube.*

Elements
Charm
Choker
Cuppy
Fan
Frame1
GlitterDoodle
Key
Lipstick
NailPolish
Parasol
PocketWatch
Ribbon1
RibbonFlower1
RibbonFlower2
RibbonFlower3
Rose
Skull2
Sparkles2
StreakofLight
Sunnies
TopHat

Papers
P1
P9

Have everything ready? Let's go!

Open a new canvas, size 650x650.

Move Frame1 on to the canvas and resize. Rotate if you like and add a drop shadow.
Place P1 behind the frame, resize, and erase extras.

Move the full sized tube in front of the frame. Resize so the hair sticks over the top of the frame a little and the bottom of her meets in the middle of the bottom of the frame. Add a drop shadow.

Place the Parasol on the right side of the tube and behind her. Resize and rotate it toward the right a little. Make sure nothing hangs off the edge of the canvas. Add a drop shadow.

Move the Tophat to the left of the tube. Resize and add a drop shadow.

Take Ribbon1 and place it in front of the tube on the bottom. Place it behind the top hat and in front of the parasol. Resize and add a drop shadow.

Move Ribbonflower1 behind the tophat. Resize and add a drop shadow.
Move Ribbonflower3 behind the tube and the tophat. Move it slightly lower than the black flower. Resize and add a drop shadow.
On the right side of the tube, move Ribbonflower2  behind the tube. Resize and add a drop shadow.
Duplicate the layer of Ribbonflower1 and move it behind the pink flower and in front of the parasol. Resize and add a drop shadow.

In front of the black flower on the right side and behind the pink ribbon, place the Cuppy. Resize and add a drop shadow.

Place the choker in front of the tophat. Resize and add a drop shadow.
In front of the tophat and choker, place the sunglasses. Resize and add a drop shadow. Erase parts of the sunglasses that appear over the choker on the left so it appears the sunglasses are in front and behind the choker.

Directly to the right of the tube place the pocket watch above everything. Resize and add a drop shadow.
Move the nail polish right next to the pocketwatch. Resize and add a drop shadow.
Place the lipstick in front of the pocketwatch and nail polish. Resize and add a drop shadow.

Now lay the key in front of the pocketwatch. Resize and rotate so the teeth of the key are laying flat pointing up. Add a drop shadow.

Behind the pocketwatch, place the fan. Resize and add a drop shadow. Have some of the fan hidden behind the pocketwatch.

Move Skull2 in front of the fan and the choker/sunglasses. Resize and add a drop shadow.

Between the tophat and the choker/sunglasses, place the Charm. Resize and add a drop shadow.

Between the lipstick and the nail polish, take a rose and rotate it so it lays horizontally facing away from the tube. Resize and add a drop shadow.
Duplicate the rose layer and add two pointing away from the tube on the left side behind the top hat.

Move Sparkles2 on to the elements in the front. You can move it around until it's covering what you want. Resize and erase any extras hanging off the elements.

Move Streakoflight on to the tube. Rotate so it goes along the height of the tube. Resize and erase any parts hanging off the tube and outside the tag.

Behind the tophat, move the Glitterdoodle. Resize and rotate so it's going along the curve of the frame toward the top. Add a drop shadow.

For the word art:
"Gothic Beauty"
Gothic is in the font Gothic Birthday.
Main color is black.
Stroke is size, 2, in color #dd8e8a.
Bevel is the default.

Beauty is in the font Parisienne.
Main color is #e0918d.
Stroke is size2, black.
Bevel is in Gaussian with a white shadow.

Add a drop shadow to both. Place Gothic on top of the elements and a little higher than the sunglasses.
Move Beauty on top of Gothic and a little toward the right. Have the B meet the "o" in gothic. Make sure the sizes are somewhat equal. 

For the name:
Use the same font as Beauty in the word art.
Copy the main color and the layer styles from Beauty too.

Let's make the mask:
Open a blank canvas, size 600x600.
Open P9 and resize to 600x600.
Open your choice of mask and make sure the size is 600x600.
Move the paper on to the blank canvas and then the mask on top.
Remove the white background and place behind the tag.
Resize so it is visible around the frame. Make sure no parts of the mask hang off the canvas.

Now add your copyright information and tagger mark.
Crop off any extras.
Save as .psd & .png.

We're done! Isn't it beautiful?
Thanks for stopping by:)

Wednesday, June 26, 2013

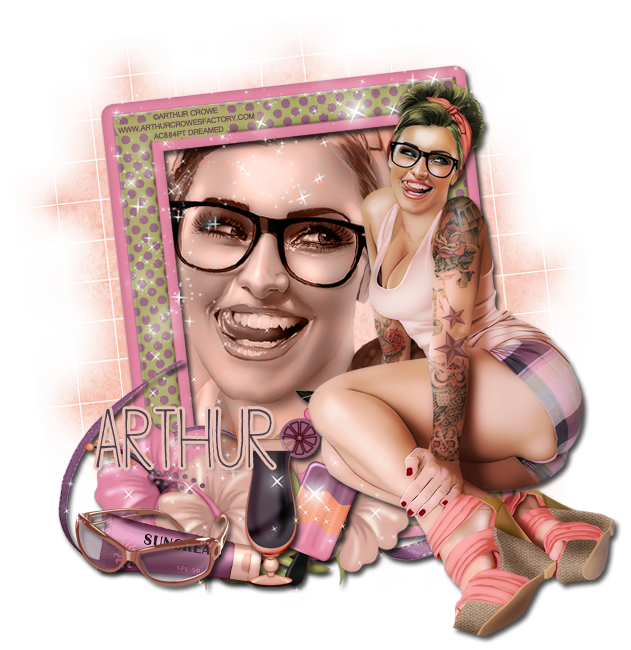
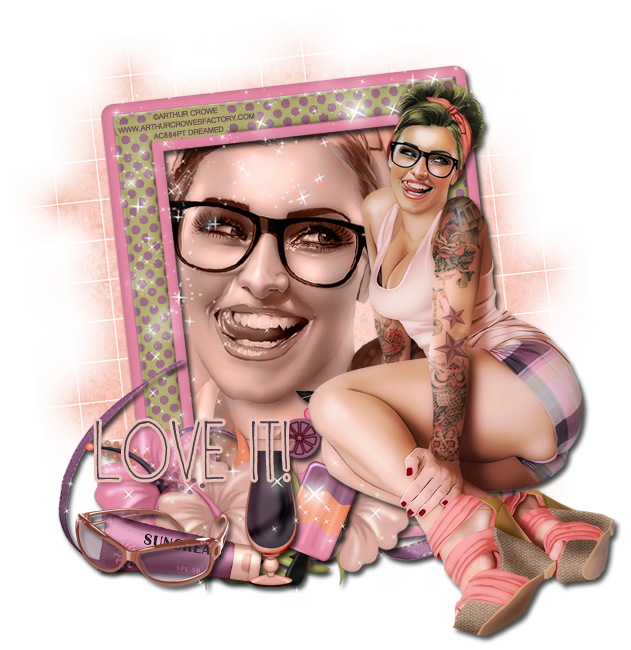
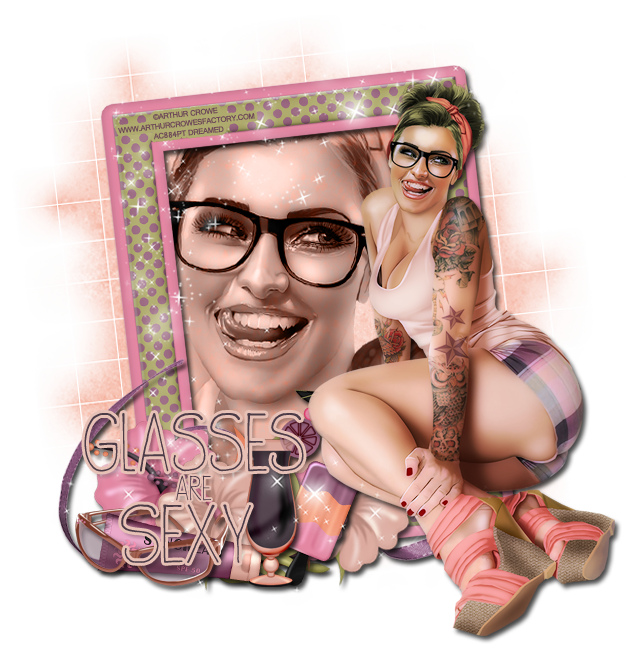
PTU Tutorial - Glasses Babe

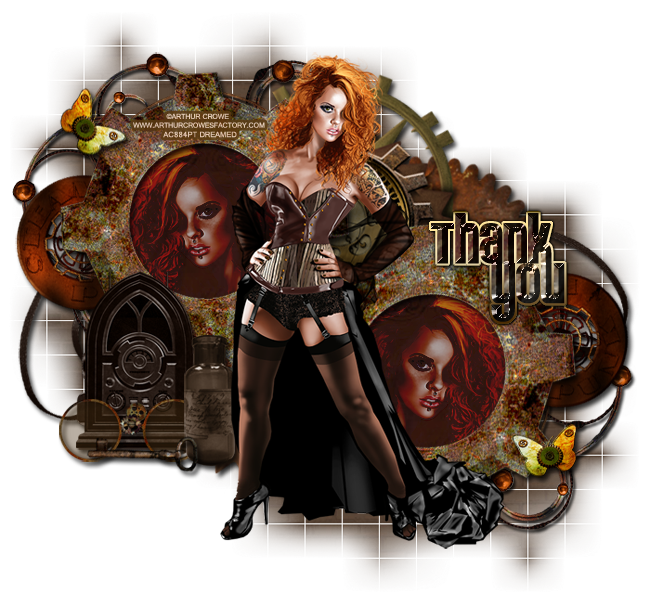
I have a new PTU tutorial using a hot new tube by Arthur Crowe called Glasses Babe!
I used the matching kit by Sandy's Designs.
Both are coming soon to Arthur Crowe's Factory!


**This tutorial was written by me and any resemblance is purely coincidental. It is written for those with a working knowledge of Photoshop.**

What you will need:
Filters
Xero Porcelain 
Xero Radiance

Font

Mask
by Weescotslass Creations

Scrap Kit
Glasses Babe

Tube
*Coming Soon*
Glasses Babe

Elements
Drink2
Flower1
Flower2
Frame2
Icelolli2
Ribbon2
Sparkle
Sun Cream2
Sunglasses

Papers
p11
p12

Let's go :)

Start with a new canvas, size 650x650.
Move Frame2 on to the canvas and resize. Rotate to the left a little and add a drop shadow.
Place p11 behind the frame. Resize as you like and erase any paper outside the frame.

Place the full size tube in front of the frame more toward the right side. Resize and add a drop shadow. 
Take the close up of the tube and place it behind the frame on top of the paper. Rotate to the left a little and erase any parts of the tube outside the frame. Change the tube to luminosity.

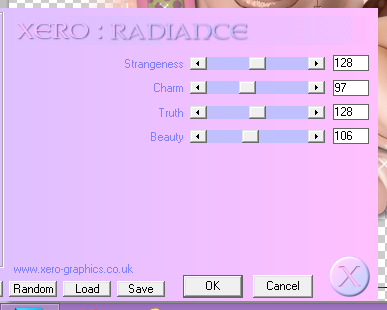
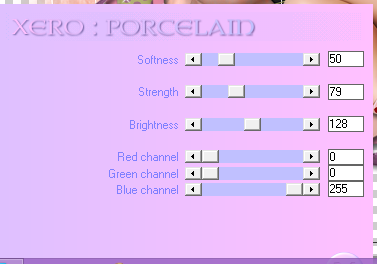
Apply these filter settings to both layers of the tube:

Xero Radiance


Xero Porcelain

Now move Flower2 over to the lower right hand corner of the frame. Resize and move it higher than the corner and add a drop shadow. 
Take Flower1 and move below and to the right of the first flower. Resize so it's smaller than the first flower. Add a drop shadow.
Duplicate Flower2 and move next to and behind Flower1. Resize so it's smaller and add a drop shadow.
Duplicate Flower1 and move next to and behind the smaller Flower2. Resize so it's smaller and add a drop shadow.

Move Ribbon2 behind the flowers and tube. Flip horizontally, resize and rotate, and add a drop shadow.

Place Drink2 in front of the flowers. Resize and a drop shadow.
Move the Icelolli2 behind the tube and the drink. Resize and a drop shadow.

Move the Sun Cream2 to the left of the drink. Resize and a drop shadow.
Place the sunglasses front of the sun cream. Erase a small part of the sunglasses that overlaps the sun cream in the top left corner of the cream tube. Add a drop shadow.

Move the Sparkles in front of everything. Resize so it mostly rests on the tag. Move around until it covers the the half opposite of the tube. Erase parts of the sparkle outside the tag and covering the tube.

Mask:
WSL_Mask 84
P12
Open a new canvas, size 600x600.
Open p12 and resize to 600x600. Place on to the new canvas.
Open mask and move on top of the paper on the canvas.
Remove the white background.
Move behind the tag. Rotate with the frame and stretch out a little evenly so it is visible on most sides. Make sure nothing hangs off the canvas.

Name:
Font is DK Wayang
Main color is #4b3c48.
Stroke, size 2, is in color #e8c1b6.
Add a drop shadow.

Add your copyright information and tagger mark.
Crop off extras being extra careful not to cut off anything on the tag.
Save as a .psd & .png.

Done!
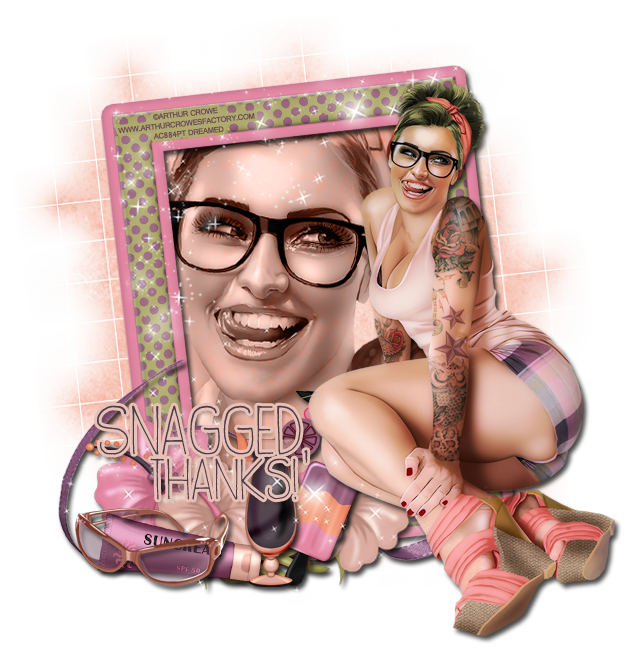
Now I have a few snags for you :)


Thanks for stopping by! :)

Tuesday, June 25, 2013

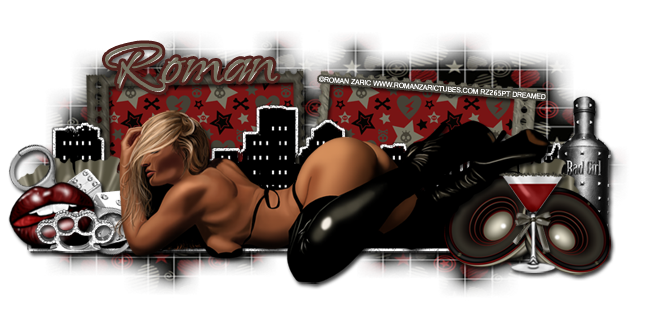
PTU Tutorial "Wishy" by Roman Zaric

I have a new PTU Tutorial with Roman Zaric's new tube "Wishy" and the matching kit by Rissa's Designs.


**This tutorial was written by me and any resemblance is purely coincidental. It is written for those with a working knowledge of Photoshop.**

What you will need:

Font

Mask
WSL_Mark84

Scrap Kit 
Wishy by Rissa's Designs

Tube
Wishy by Roman Zaric

Elements
Bottle
Bow
Brass Knuckle
CityScene
Dice
Frame3
Handcuffs
Lips2
Martini
Speakers

Papers
2
3

Let's start!
Open a larger canvas, 800x800.
Move the tube on to the canvas and resize. Leave enough room on both ends for elements and mask. Add a drop shadow.

Move the CityScene behind the tube and add a drop shadow.

Move Frame3 behind the CityScene and rotate so the flat part with the string is on the bottom. Erase any parts of the frame sticking out below the CityScene. Resize and add a drop shadow.

Move Paper3 behind the frame opening on the left. Resize rather small and erase any parts outside the frame. Duplicate this paper and move to the other opening. Erase extras and add a drop shadow.

Behind the tube on the right add the Speakers, Bottle, Bow, and Martini.
Resize the speakers so a little is hidden behind the tube and it meets the end of the CityScene. Add a drop shadow.
Move the Bottle behind the Speakers on the right side. Resize and add a drop shadow.
Place the Martini in front of the Speakers and the tube. Resize and add a drop shadow.
Move the Bow behind everything and on top of the CityScene. Flip it horizontally and resize. Add a drop shadow.

On the left side of the tube add the Handcuffs, Dice, Lips2, BrassKnuckles, and Bow.
Move the Lips2 to the edge of the CityScene and rotate so the left hand corner of the lips meets the lower left hand corner of the CityScene. Add a drop shadow.
Place the BrassKnuckles in front of the lips. Resize and add a drop shadow.
Move the Handcuffs behind the lips and the tube. Resize and add a drop shadow.
Move the Dice behind the handcuffs and the tube. Resize and add a drop shadow.
Move the Bow behind everything and on top of the CityScene. Flip it vertically and resize. Add a drop shadow. 

Let's make the mask:
Open a new canvas, size 600x600.
Open Paper2 and resize to 600x600.
Open the mask and make sure it's 600x600.
Place the paper on the blank canvas and then the mask on top.
Remove the white background and move it behind the frame on the right. Resize the mask so it just covers the right opening of the frame and has a little coverage in between the frames. Make sure no edges of the mask hang off the canvas.
Duplicate the mask and flip horizontally. Move the duplicate behind the frame opening on the left. 
Link the masks together so you can resize and move them as one. Make sure the mask sticks out evenly on all four sides and nothing hangs off the edge of the canvas.

For the name:
Font is Echinos Park Script.
The main color is #767463.
The stroke, size 3, is color #51211d.
Add a drop shadow.
Add a bevel, change the shadow color to white and change the Gloss Contour to Cone-Inverted.

Add your copyright information and tagger mark.
Crop off any extras.
Save as .psd & .png.

Thanks for coming by!

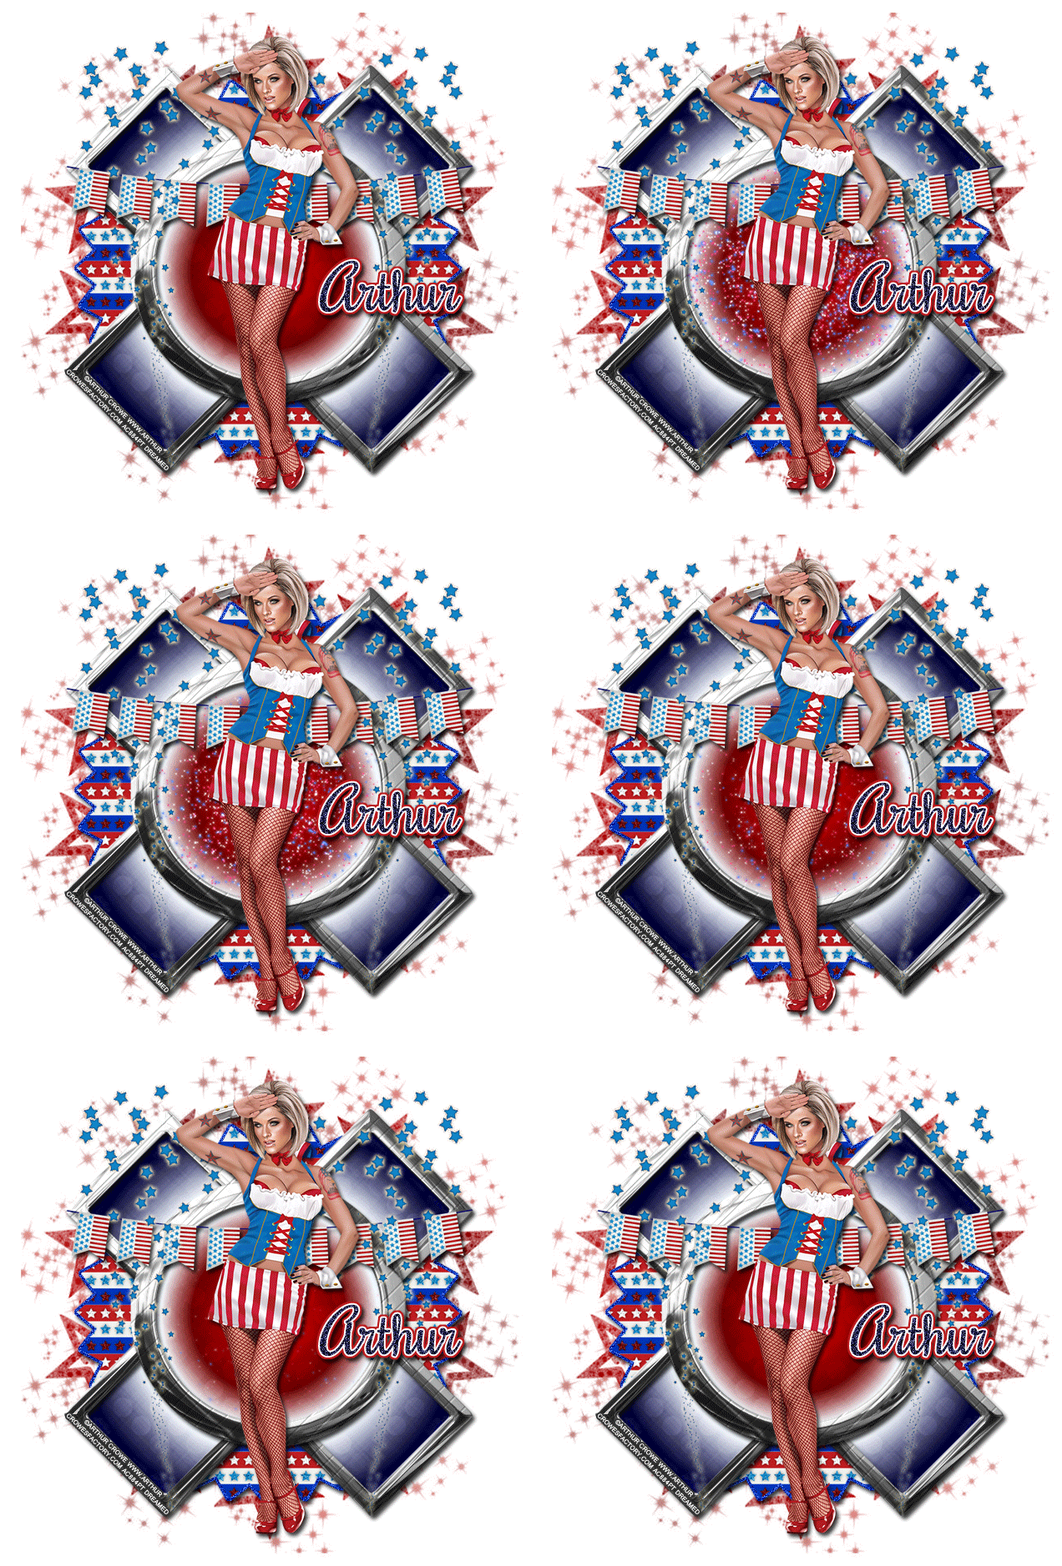
CT Tag Show Off "Miss USA" by Arthur Crowe

I made two tags with the gorgeous Miss USA tube by Arthur Crowe and the matching kit by Bookworm Dezines.
You can purchase both here!

Here is the first tag:
Animated


Non animated


Here is the second tag I made:


I made two freebie snags for you as well :)

Animated


Non animated


Thanks for stopping by :)

Monday, June 24, 2013

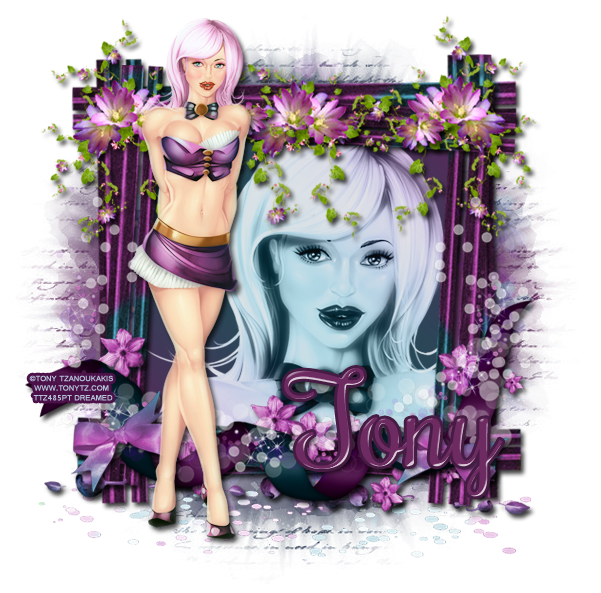
PTU Tutorial with Alleye by Tony Tzanoukakis

I have a new PTU tutorial with the beautiful artwork of Tony Tzanoukakis called "Alleye" and the matching kit by Desirena Designs. 

*Coming Soon!*
**This tutorial was written by me and any resemblance is purely coincidental. It is written for those with a working knowledge of Photoshop.**

What you will need:
Font

Mask
WSL_Mask 236

Scrap Kit
Alleye 

Tube
Alleye by Tony Tzanoukakis
You can purchase it here.
*You must obtain a license to use this tube.*

 Elements
3
4
5
9
10
22
26
29


Papers
P1
P12

Let's begin!
Open a new canvas, size 650x650.
Move element 22, frame, on to the canvas. You can rotate as I did or leave as is. Resize and add a drop shadow.

Place element 9 on the top left hand corner of the frame in front. Rotate so it follows the angle of the frame. Resize and add a drop shadow. Duplice and flip horizontally then move to the opposite corner.
Copy the layer again and place the large flower with the small flower on the right  in the middle of the other two element 9s. Erase the part sticking up. Resize and add a drop shadow.

 Move element 26 under the frame. Move and resize until it looks placed under the frame.
Place element 29 in front of the frame on the bottom. Resize and add a drop shadow.

Place element 3 along the lower part of the frame. Resize so there is room for a copy on the right side. Add a drop shadow.

Move element 5 over the joint in the lower left hand corner of the frame.  Resize and add a drop shadow. Duplicate and move to the opposite side.

Place element 4 behind the bows layer. Rotate and resize so only a little of the ribbons' ends hangs off the sides. Add a drop shadow.

Now place element 2 behind the bows layer too. Resize and rotate so it goes along the length of the frame and up the sides.

Move the tube, full size, on top of everything. Resize the tube so her head and feet are hanging over the top and bottom of the frame. Add a drop shadow.

For the background I used the colors from pp12 to make a gradient. Erase parts of the paper between the frames and outside the frame.

Take another copy of the tube and leave her full size. Move her head and a little of her upper body behind the frame. Erase parts hanging outside the frame. Change the tube to luminosity and fill to 85%.

For the mask:
Open a new canvas, size 600x600.
Open P1 and resize to 600x600.
Open the mask and make sure it's 600x600.
Place the paper on to the canvas and then the mask on top.
Remove the white background and move behind the frame. 
Resize the mask so it is outside the frame evenly on all sides.
Make sure it does not hang outside the canvas.

The name:
The font is Rochester.
The main color is #6e2b62.
The stroke, size 3, in color #471c44.
Add a drop shadow and bevel in these settings:
Gloss Contour: Cone-Inverted
Shadow: white

Add your copyright information and tagger mark.
Crop off any extras.
Save as .psd & .png.

We're done! 

Here are few freebie snags for you :)


Thanks for coming by!

Sunday, June 23, 2013

PTU Tutorial "Machine Girl" by Arthur Crowe


I have a new PTU Tutorial using Arthur Crowe's Bonus Tube, Machine Girl, with matching kit by Bookworm Dezines. This tube is gorgeous and the kit is a perfect match and great to work with!

You can get both for free when you spend $10 before July 12th.
Find out more here!

**This tutorial was written by me and any resemblance is purely coincidental  It is written for those with a working knowledge of Photoshop.

What you will need:
Font
Eight Track


Mask
WSL_Mask84

Scrap Kit
Machine Girl

Tube
Machine Girl *Bonus Tube*
*You must obtain a license to use this tube.*

Elements
1
8
9
10
11
12
13
14
16
17
22

Papers
1
10

 Let's begin!
Move Element1 on to the canvas. Move this one toward the top left of the canvas. Resize and add a drop shadow. 
Duplicate Element1 and move it down and to the right of the first one. These will be our frames.

Place Paper1 behind the first frame and resize. Erase any parts outside the frame.
Move the paper behind the other frame and resize. Erase any parts outside the frame.

Now take a copy of the tube and place it on top of the paper on the lower right hand side. Change it to Pin Light and lower the Fill to 59%.
Duplicate the tube and flip horizontally. Move it to the other frame and place it the same way.

Place the full tube in front of the frames between the two tube reflections. Resize and add a drop shadow.

Move Element10 behind the frames and papers. Rotate and move in the middle. Resize and add a drop shadow. Erase parts showing in the frame openings.

Place Element11 behind the frames and Element10. Rotate so it covers the top left side the of tage. Resize and add a drop shadow. Erase parts showing in the frame openings. Duplicate, flip horizontally, and move to the lower right hand side of the tag. Erase parts showing in the frame openings.

Move Element14, resize and add a drop shadow, and place over the part of Element11 that sticks outside the frame on the lower right hand corner. Rotate so it faces toward the tube.
Duplicate the butterfly and place on the upper left hand side on the parts of Element11 that hang outside the top frame. 

Now place Element13 directly behind the paper and frames and above the other elements. Make it smaller and rotate a little. Resize and add a drop shadow. 
Duplicate and move it to the opposite side.

Take Element21 and move it behind everything. Resize and add a drop shadow. Rotate one copy and move it behind Element13 on the right side. Duplicate it and flip horizontally. Move to the other side behind and below Element 13.

Place Element8 to the left side of the tube in front of the frame. Resize and add a drop shadow. 
Move Element22 in front of Element8, but behind the tube. Resize and add a drop shadow. 
Move Element16 in front of Element21 and behind Element22. Resize and add a drop shadow.
Place Element17 in front of the elements. Rotate so it lays vertically. Resize and add a drop shadow. 

Let's make the mask:
I used WSL_Mask84 by Weescotslass Creations.
Open a new canvas, size 600x600.
Open the mask and make sure it is 600x600 as well.
Open Paper10 and resize to 600x600.
Move the paper on to the blank canvas and then the mask on top.
Remove the white background and place behind the frame and move toward the higher left hand corner. 
Duplicate the mask and flip horizontally. Move the mask the other side and cover the rest of the background of the tag.
Make sure no parts of the mask hang off the edges of the mask.

For the name:
I used Eight Track by Fonts-a-licious.
For the main color you will need to download the styles here.
Use style 23 and remove the drop shadow.
Select the pixels of the name and expand by two.
On the layer below the name fill it with white.
Now use the Simple Gold layer style you find in this package here.
Add a drop shadow to the gold layer.
Move on the top right part of the tag.

Add your tagger mark and copyright information.
Save as .psd and .png.

Thanks for checking out my tutorial!
Here are three freebie snags for you :)


Please leave some love! 

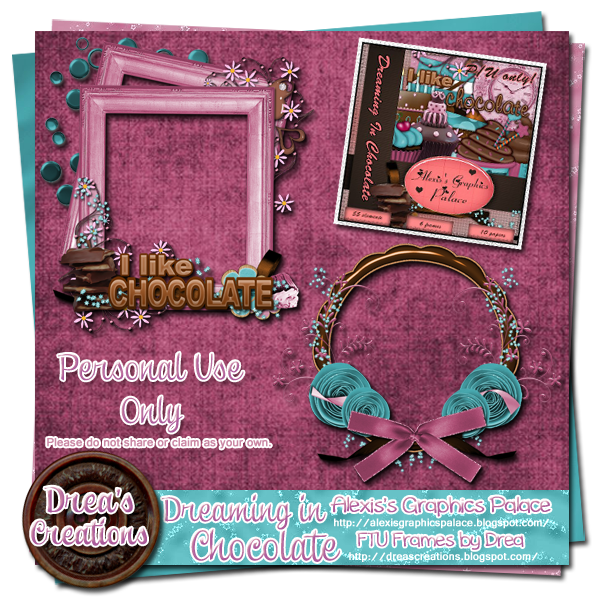
Cluster Frame Freebies using "Dreaming In Chocolate"

I used Dreaming in Chocolate by Alexis's Graphics Palace to make two cluster frame freebies for you!

Cluster Frame Preview
Click image to download.


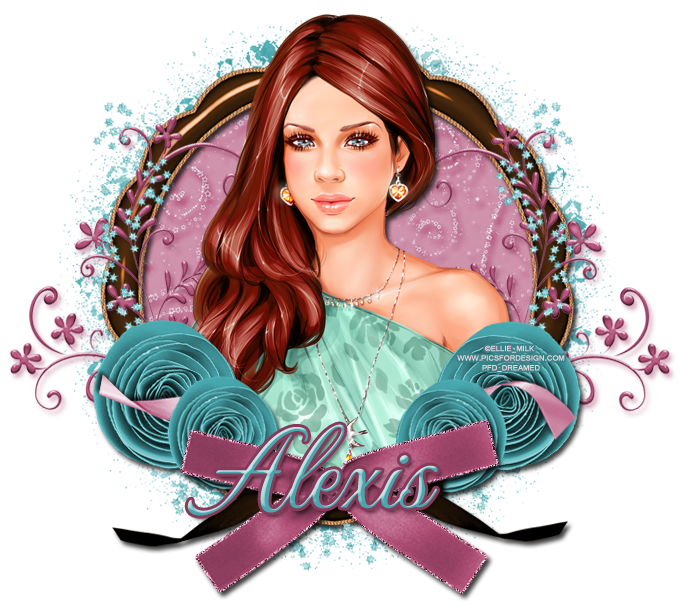
Here are tags I made using the cluster frames for Alexis :)


Please leave some love when you download. Thanks! 

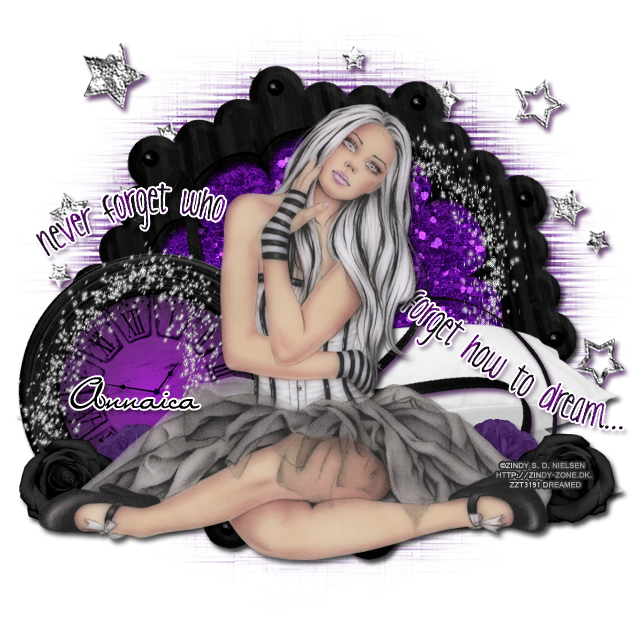
PTU Tutorial "Dark Dreamer"

I have a new PTU tutorial using Dark Dreamer by Annaica's Place. I matched it with a tube by Zindy S.D. Nielsen.


**This tutorial was written by me and any resemblance is purely coincidental  It is written for those with a working knowledge of Photoshop.**

What you will need:
Filter
Xero Porcelain

Font

Mask
WSL_Mask216

Scrap Kit
by Annaica's Place

Tube
Doll At Heart
*You must obtain a license to use this tube.*

Elements
2
10
22
23
35
37
45
52
55

Papers
9
14

Let's begin!
Open a blank canvas, size 650x650.

Move Element52 on the blank canvas. Rotate a little and add a drop shadow.

Place the tube in front of the frame. Resize and add a drop shadow.
Add these settings using Xero Porcelain to the tube.


Behind the tube, place Paper14 behind the frame. Erase extras outside the frame. Move Paper9 on top of Paper14, create a clipping mask, and then change it to overlay. 

Move Element10 behind the tube on the left. Resize and add a drop shadow.

Place Element2 behind the tube on the right side. Resize and add a drop shadow.

Move Element22 behind the tube on the left, but in front of the clock. Resize and add a drop shadow.
Move Element23 behind the black flower. Resize and add a drop shadow.
Duplicate the black and purple flower and move to the other side behind the tube and in front of the pillows.

Place Element45 behind the tube, but in front of the pillows and behind the clock. Resize and add a drop shadow in #3a0a47.

Now take Element37, place it on top of the frame and behind everything else above the frame. Rotate so you have the curve behind her head on the right. Resize. Duplicate and place it behind the tube and on top of the clock.  Resize and rotate so you the swirl at the top of the clock.

Move Element35 behind the papers and frame. Resize and add a drop shadow #3a0a47.
Duplicate a couple more times so you can have the stars around the top half of the frame. 

Now move element55 behind the tube and on top of the pillows and ribbon. Have it flow over the elements like I did. Add a white stroke, size 2 and add a drop shadow, color #3a0a47.

Let's make the mask:
Open a new canvas, size 600x600.
Open your mask and make sure it is also 600x600.
Open Paper14 again and resize it to 600x600.
Place the Paper on top of the blank canvas and then move the mask on top of the paper.
Remove the white background and place the behind the stars and frame.
Stretch the mask out so you can see it around the frame. 

For the name:
The font is Miss Brooks
The main color is black and add a white stroke, size 2.
Move it over the clock in a smaller size.

I have a few freebie snags for you!


Thanks for stopping by! Please leave some love :)
New Name, New Blog!

Hello friends! I have decided to change my designer name to reflect that I make kits more than I do CT work. I made a new blog so the old links for this blog will remain active for future visits. Please visit me at Drea's Designs ! I'll see you there!
Related Posts Plugin for WordPress, Blogger...