
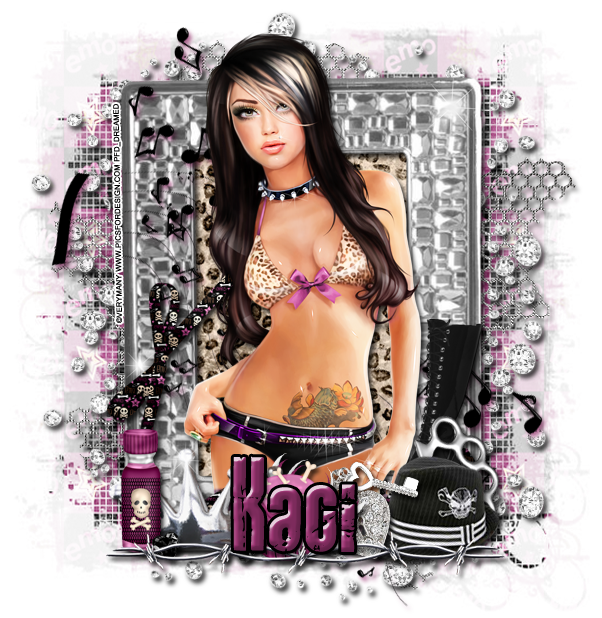
FTU tutorial using Scrappin Krazy Designs part in the "Inspired by Verymany Blog Train".
She based her kit on EMOlution 19.
**This tutorial was written by me and any resemblance is purely coincidental. It is written for those with a working knowledge of Photoshop.**
Supplies
Font
Mask
Scrap Kit
Blog Train: Inspired by Verymany
EMOlution 19
by Scrappin Krazy Designs
Tube
*You must obtain a license to use this tube.*
Elements
07
14
15
25
30
34
36
37
40
41
43
45
51
52
53
60
Papers
06
10
Let's start!
Open a new canvas, size 650x650.
Move ele52 on to the canvas. Resize & add a drop shadow.
Move the tube in front of the frame. Resize & add a drop shadow.
Behind the frame, place p06. Resize then erase parts hanging outside the frame.
Behind the tube and in front of the frame, place ele45. Rotate and resize a little. Add a drop shadow in #a1447b.
Place ele43 behind the frame. Resize & add a light drop shadow.
On top of ele43 add ele60. Use a few copies of the diamond scatter so they are scattered around the frame. Resize & add a drop shadow.
In front of the tube place ele14. Move it to the left corner of the frame. Resize & add a drop shadow.
Behind ele14, place ele30. Resize & add a drop shadow.
Move a small copy of ele41 in front of the crown where it meets the little bottle. Add a drop shadow. Duplicate the small heart and move it to where the crown and cupcake meet.
In front of the crown and to the right a little, move ele07. Resize & add a drop shadow.
Place ele53 behind the cupcake and to the right. Flip horizontally then resize & add a drop shadow.
Between the cupcake and the heart charm, place ele25. Resize & add a drop shadow. Move it around so the lips are hidden behind the cupcake but the wings are at least showing on top of ele53.
Next to ele53, move ele40. Flip horizontally and rotate so it lays almost flat. Move it in the right corner.
Behind the hat, place ele34. Resize & add a drop shadow.
Between the hat and the boot, place ele37. Rotate so the openings face to the right vertically. Resize & add a drop shadow.
In front of everything, move ele36. Resize so the edges hang off the sides by just a little. Add a drop shadow.
Move ele15 in front of the tube and behind the elements. Erase parts of the bow that hang over her hair. Resize & add a drop shadow.
Use ele51 to add a few sparkles around the frame and elements. Use varying sizes.
Name
Font is Rock It.
Main color is #9c3673.
Add a stroke, size 3, in black and a drop shadow.
Bevel: change the gloss contour to Cove-Deep.
Mask
Open a new canvas, size 650x650.
Open p10 and resize to 650x650. Place on top of the canvas.
Open Vix_Mask404 and move on top of the paper.
Remove the white background and place the mask behind the tag. Make it evenly stretched on all sides.
Add your tagger mark and copyright information.
Crop off any extra canvas.
Save as a .psd & .png.
Thank you for coming by!